
Trash to Treasure Office Wall Organizer
A quick and easy way to Repurpose thrift store items into an office wall organizer.
Hello, sweet friends!
I cannot tell you how HAPPY I am about to be writing this post!
So what’s got me grinning from ear to ear and making me want to do cartwheels (if only) around the kitchen?
Wait for it. Wait for it.
I AM TURNING TRASH INTO TREASURES AGAIN!!!!
WHEW! Sorry, I didn’t mean to scream! But gosh darn it- I’m just so over the moon excited to get back to doing what I LOVE so much! It’s been FAR too long!
And this project-well, it must have been meant to be, because not only was I able to find exactly what I was looking for at our local thrift store (that never happens) but I was able to complete the project in record time and the total cost was a whopping $3!
YIPPEE!!!
Okay, so let’s talk about the piece that inspired it all.
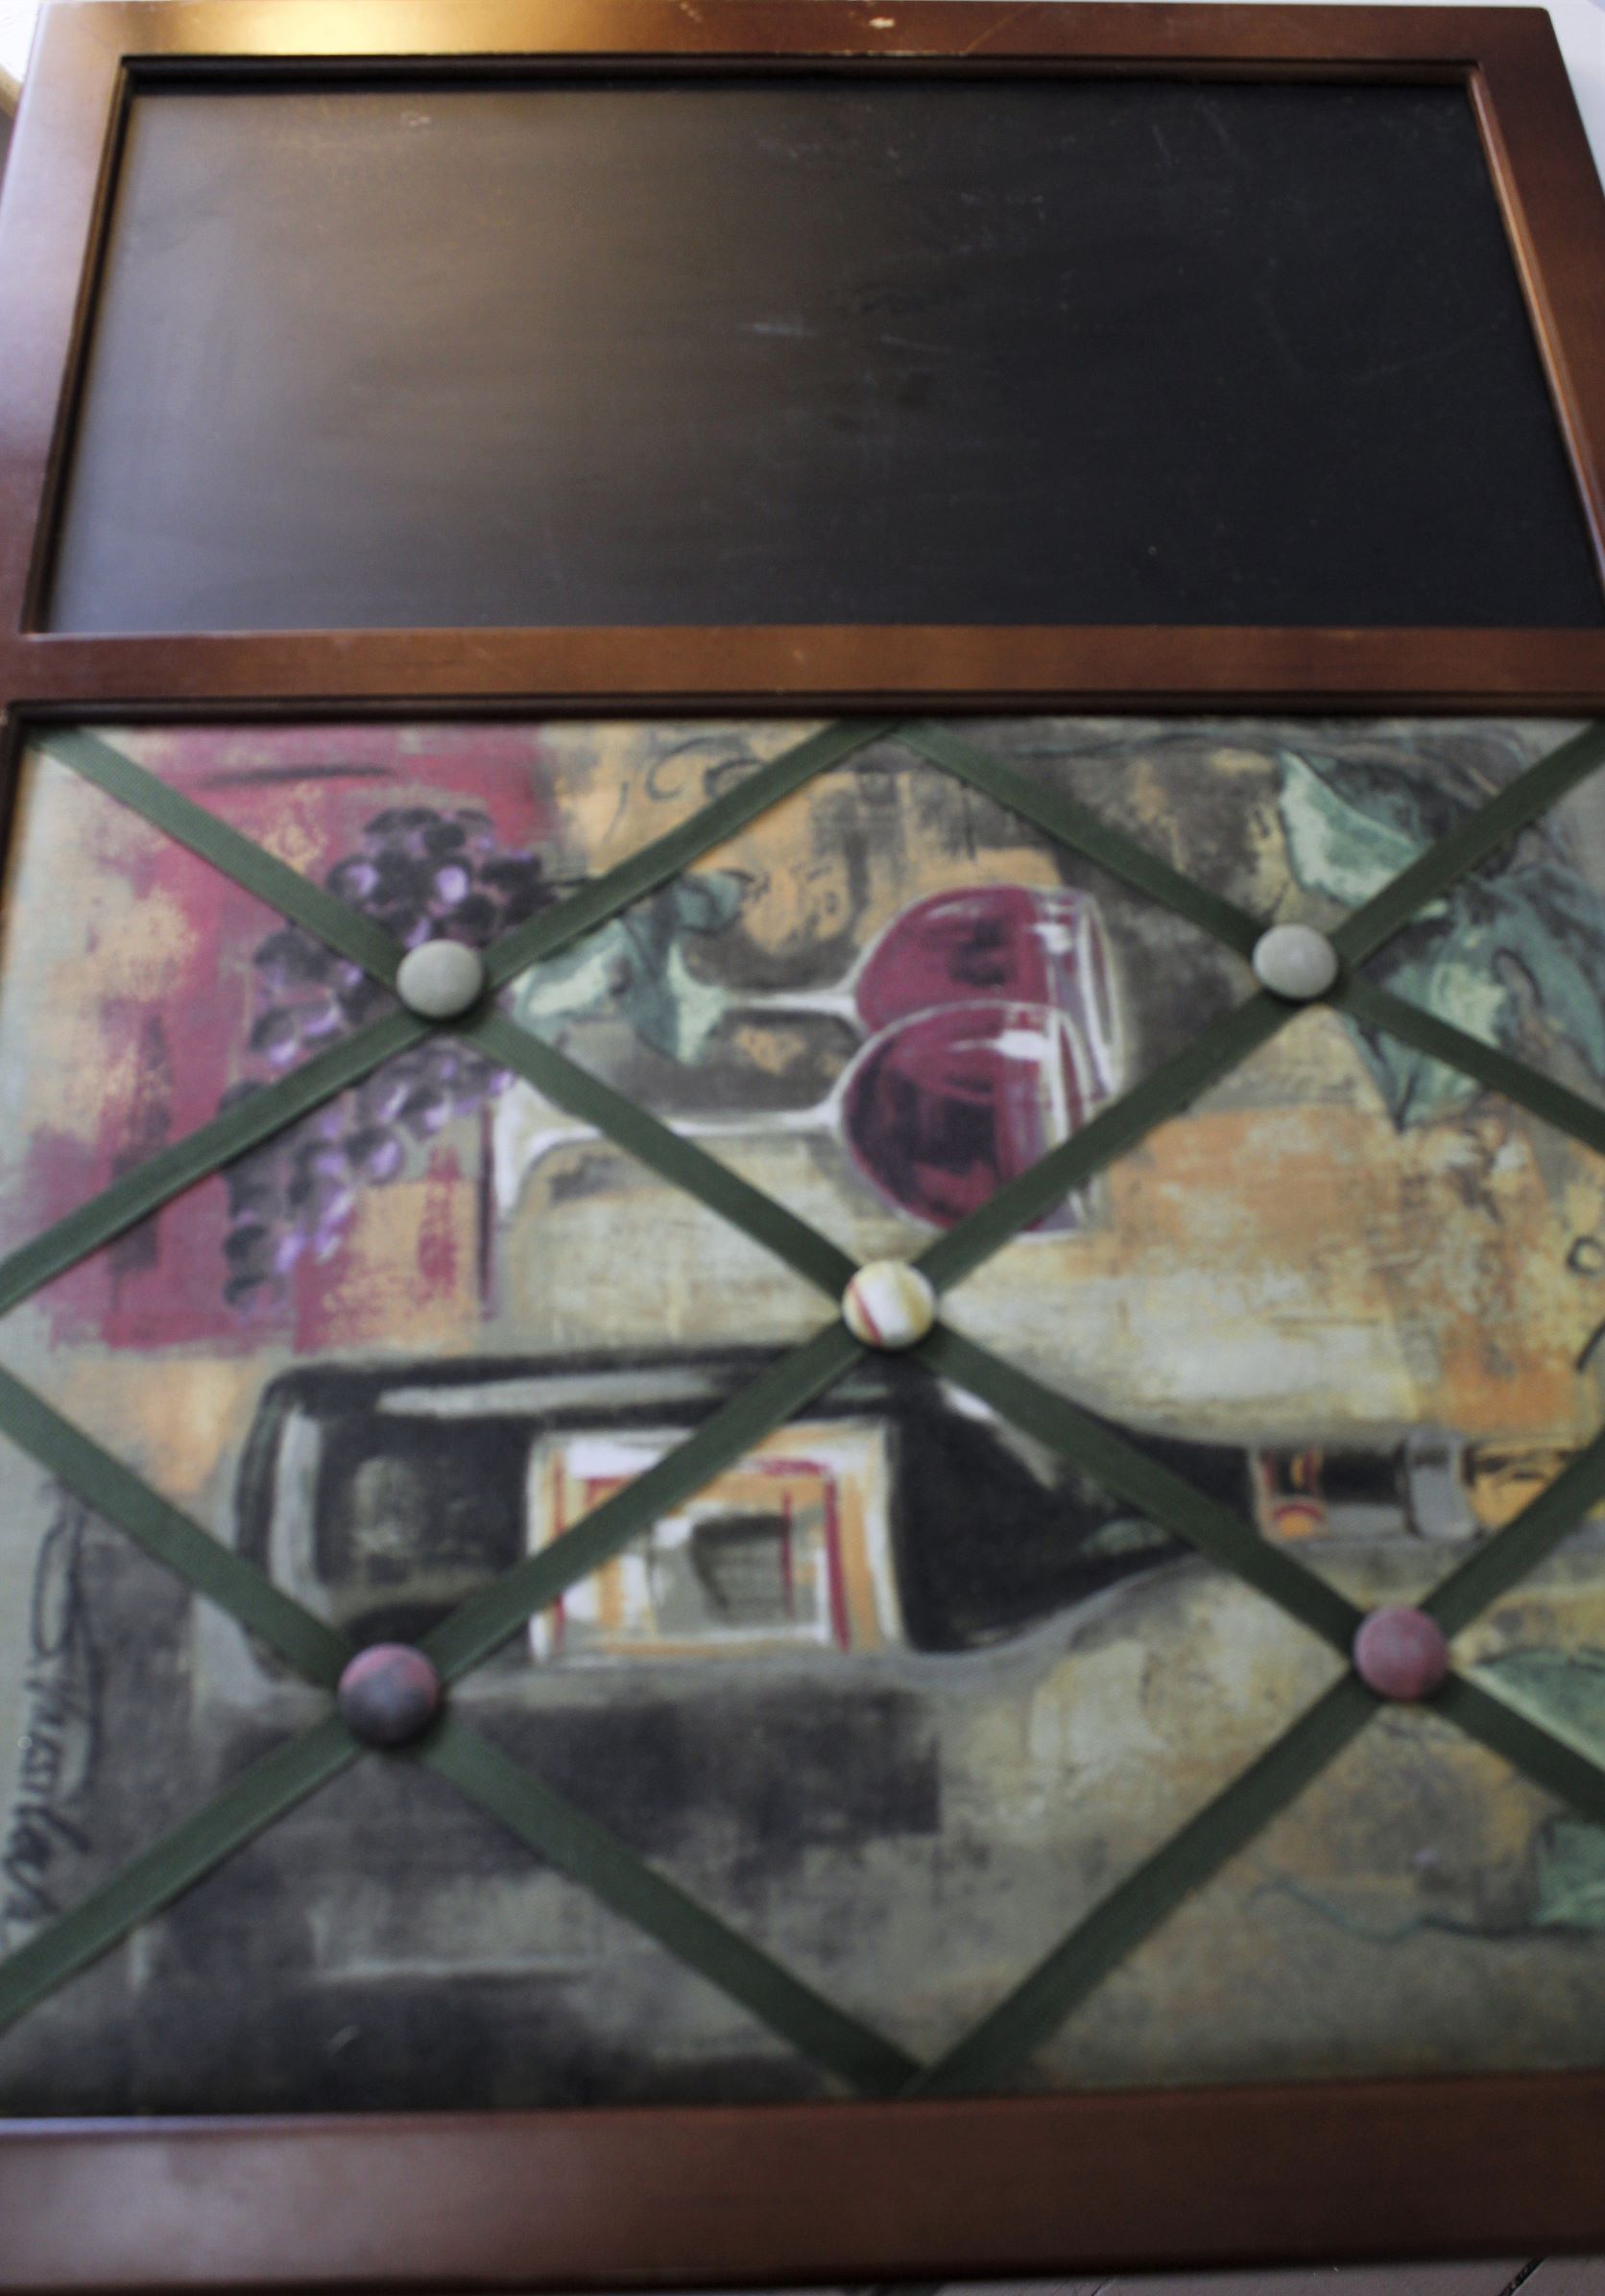
Not the prettiest wall art-but not ugly either. I found it at one of the last yard sales we went to last fall. It was so cold that day that the poor lady was packing up early because no one had stopped by for hours. I literally picked this piece out of the pile she was getting ready to throw in the trash! She didn’t want anything for it, but I couldn’t just take it so I gave her a $1. At the time I had no idea what I would do with it, I just knew that I couldn’t let anything that had a chalkboard get thrown away! (Yes, I’m a chalkboard fanatic! I can’t help it. I have one in almost every room(most DIY’s) in our house and I LOVE each and everyone.)
Anyway, I definitely didn’t care too much for the other side of the wall art, but I figured someday my creative juices would start flowing again, and I’d come up with something. Until then, the piece got shoved into my ‘storage’ room in the basement to never be seen again.
Until last weekend. I was looking for some decorating items to use for my new home office (for those not following on Instagram-it’s currently getting a makeover) when I came upon the not so pretty wall art again.
But this time when I looked at it I knew exactly what I do with it!
A Wall Organizing unit!
I found this cutie online at Walmart but it seemed a bit spendy and wasn’t exactly what I wanted. Other units that I found elsewhere and loved were even more $!!!
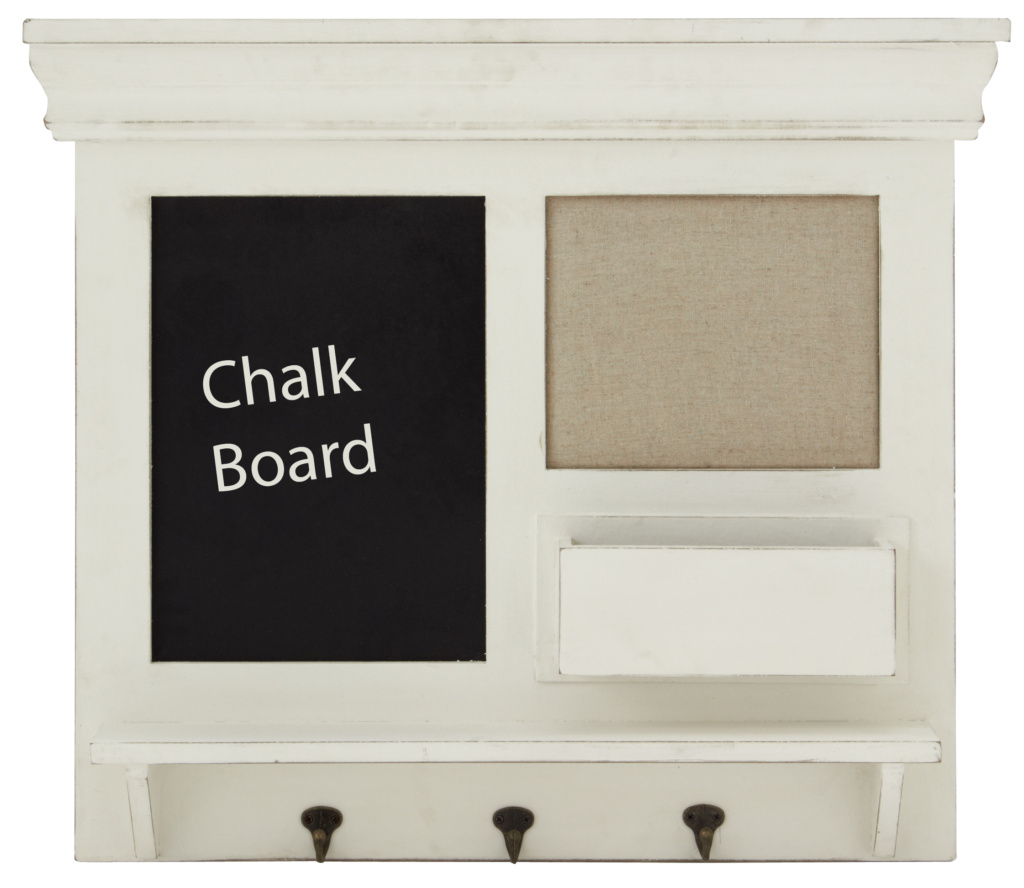
The wall art that I’d found had good bones and of course, it already had the chalkboard. All I needed now was a few more items and I could make my own wall organizing unit!

I really liked the piece of cork on the unit I’d found at Walmart. It would be the perfect spot for reminder notes (which I definitely need) so I started looking for some cork at our local craft store. Pricing for that was anywhere from $5-10 depending on the size I needed. Although that wasn’t bad for the price, I still thought I could do better, so I took a chance and stopped at a local thrift store. I found this small corkboard in the clearance aisle for $.99!!! SCORE! (AGAIN, I”M NEVER THIS LUCKY!!!)
That’s $2 so far if you’re counting. (LOL)
But I still needed items to complete the project.
Here’s the list:
Had already:
Tools:
Scissors, Tape Measure, Pencil, Wire Cutter, Needlenose Pliers, Screwdriver
Material:
Painters tape, glue, White paint, Garden Netting
Purchased:
A roll of Vinyl Drawer Liner (Dollar Store-$1) Corkboard (Thrift Store-$1) Wall Art-(Yard Sale-$1)
Here’s what I did to create my Office Wall Organizer
Step One: Remove the fabric insert. Thankfully this step was super easy. I just pulled back on some of the staples with my screwdriver and the insert popped right out.
Step Two: Remove the fabric from the insert board and sand off glue to create a smooth surface. This step took a little longer because there was a LOT of glue, but I needed the surface to be smooth so I could move onto the next step. Are you ready for it?
Step Three: Measure pretty paper (vinyl drawer liner) to cover the insert board. This was one of my favorite parts of the project! I found this vinyl liner at the Dollar Tree and fell in love with the pattern! The gray was the perfect complement to the wall color I chose for my office! The liner was almost the exact length and width I needed too! (can you say lucky!)
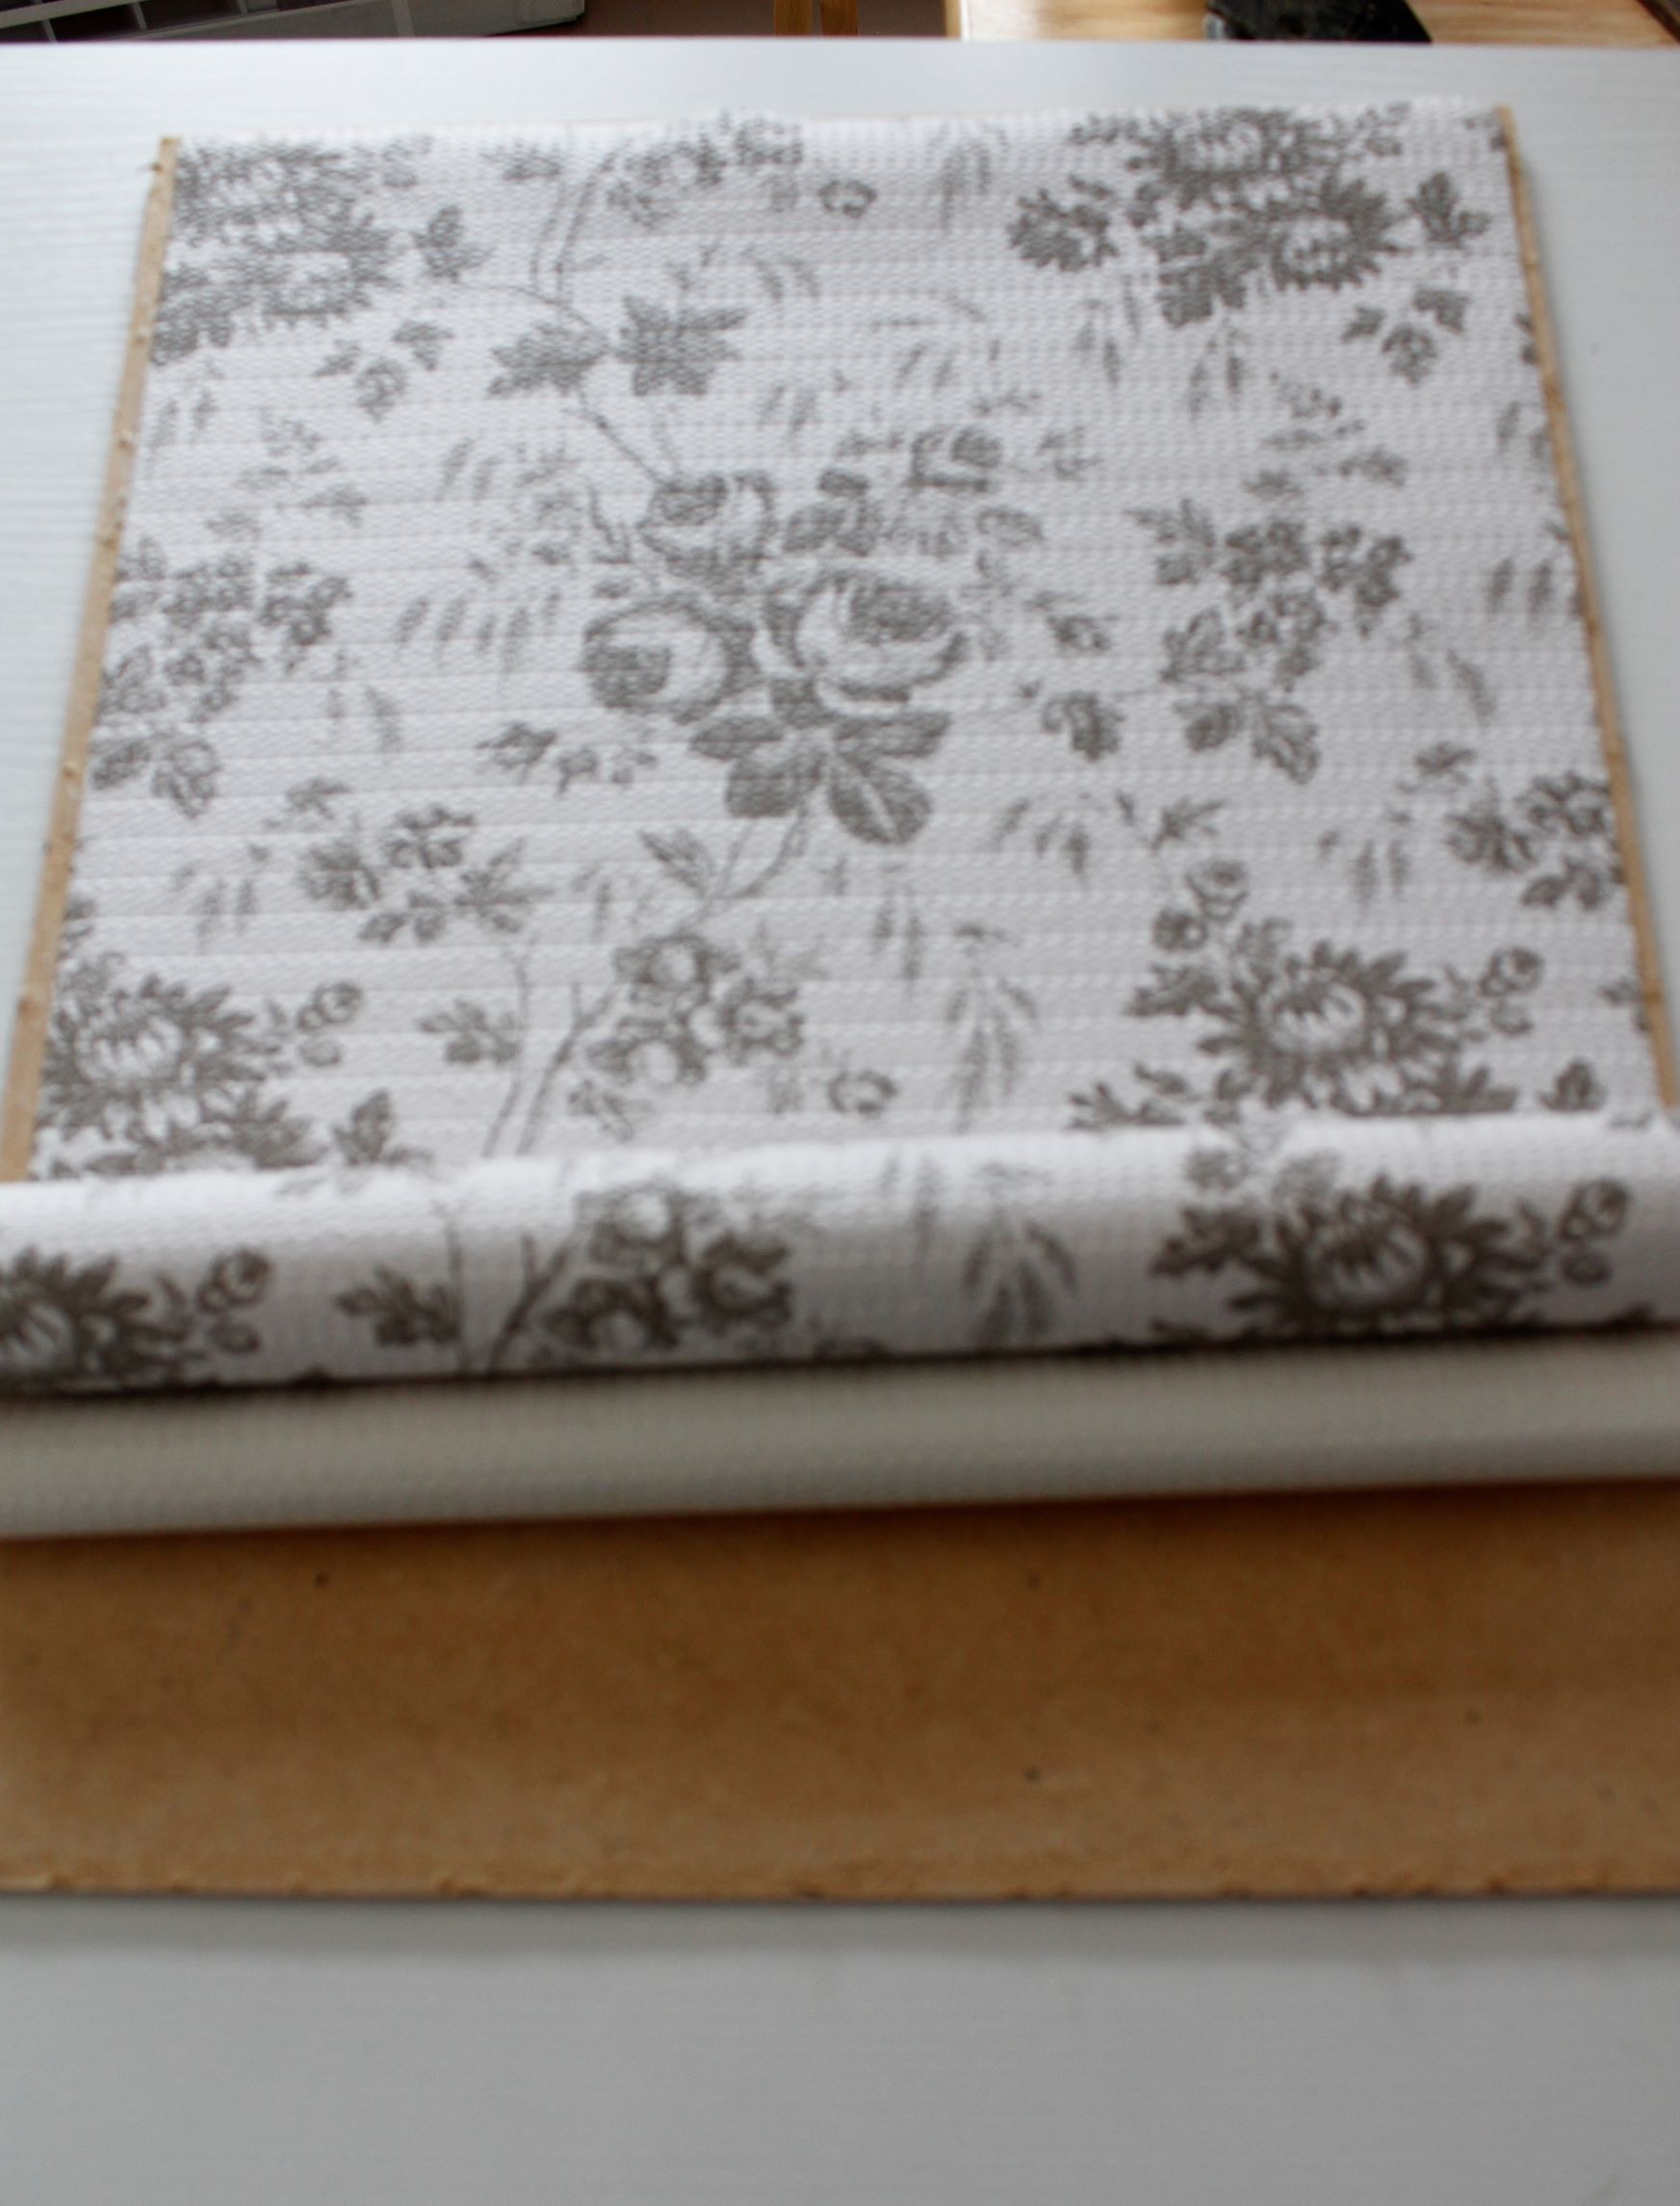
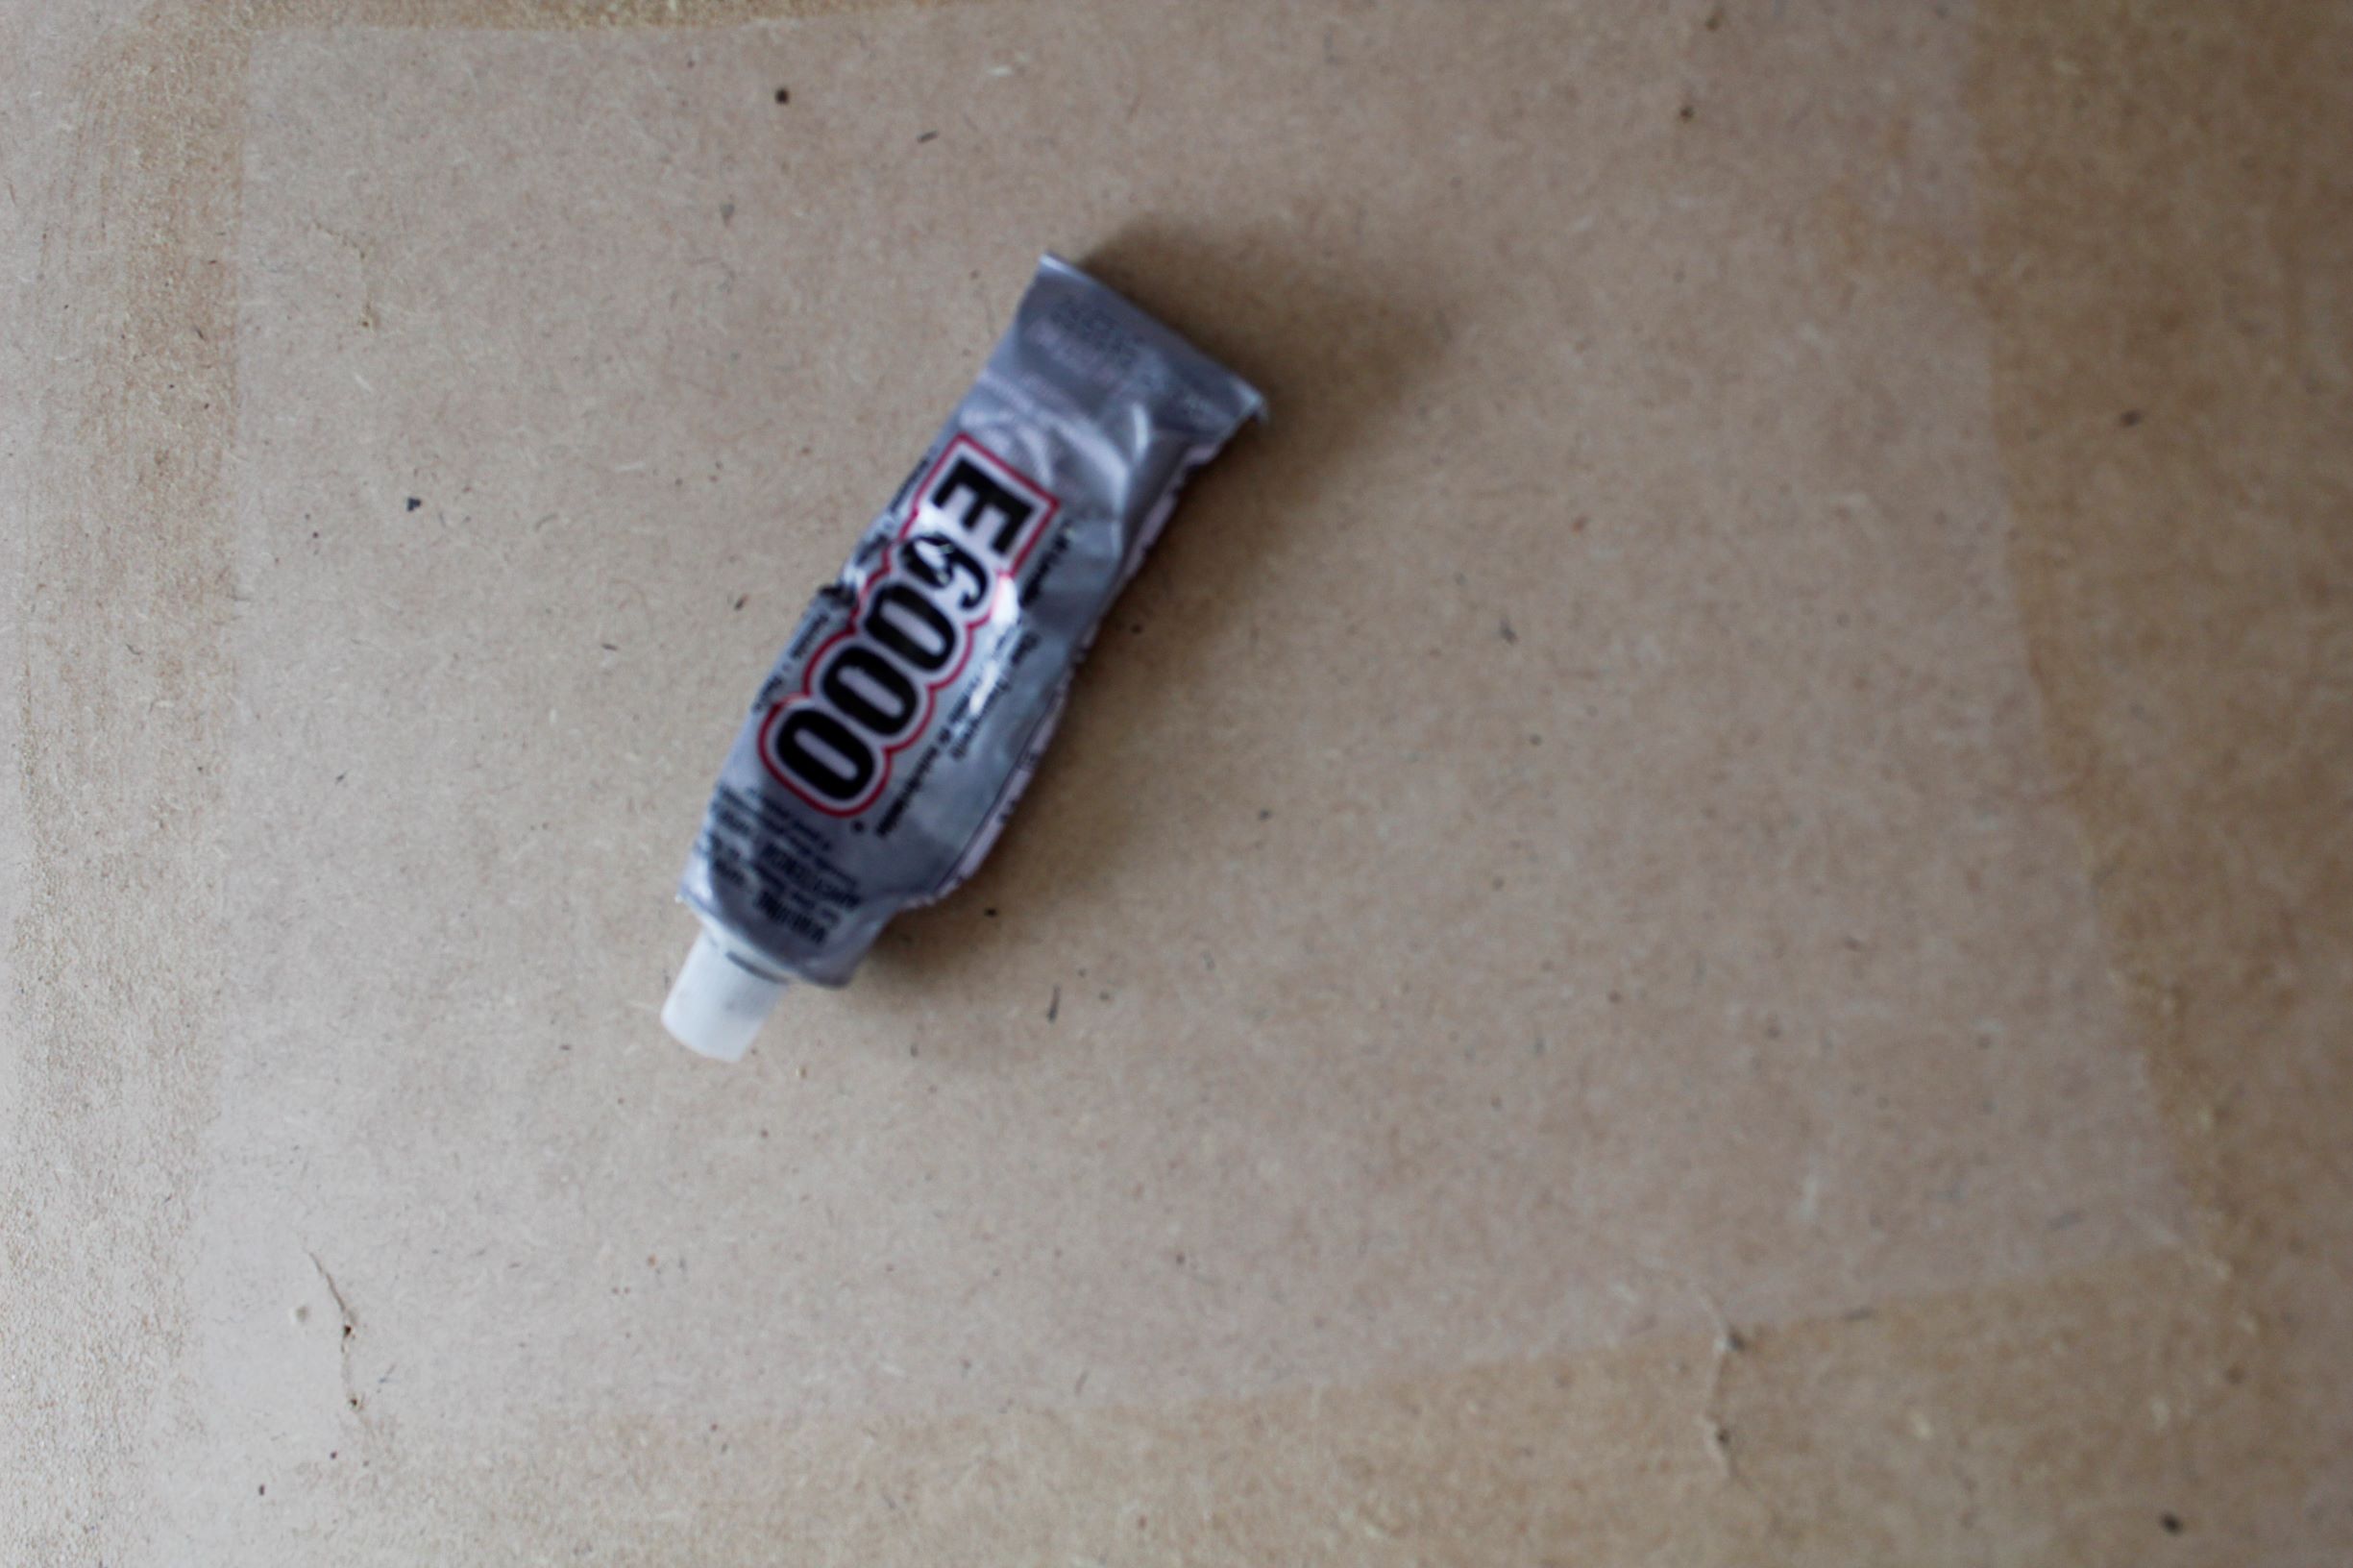
Step Four: Glue the vinyl liner onto the insert board. Can I just say I LOVE this glue!! Seriously, it’s like duck tape but better! I’ve used it on so many different projects and it never fails me! I spread a thin coat on the insert board and laid the liner down, pressing firmly in the top corners and then running my hand down the center making sure there were no creases or bumps. Once the liner was pressed into place I let it sit for about 30 minutes until the glue dried.
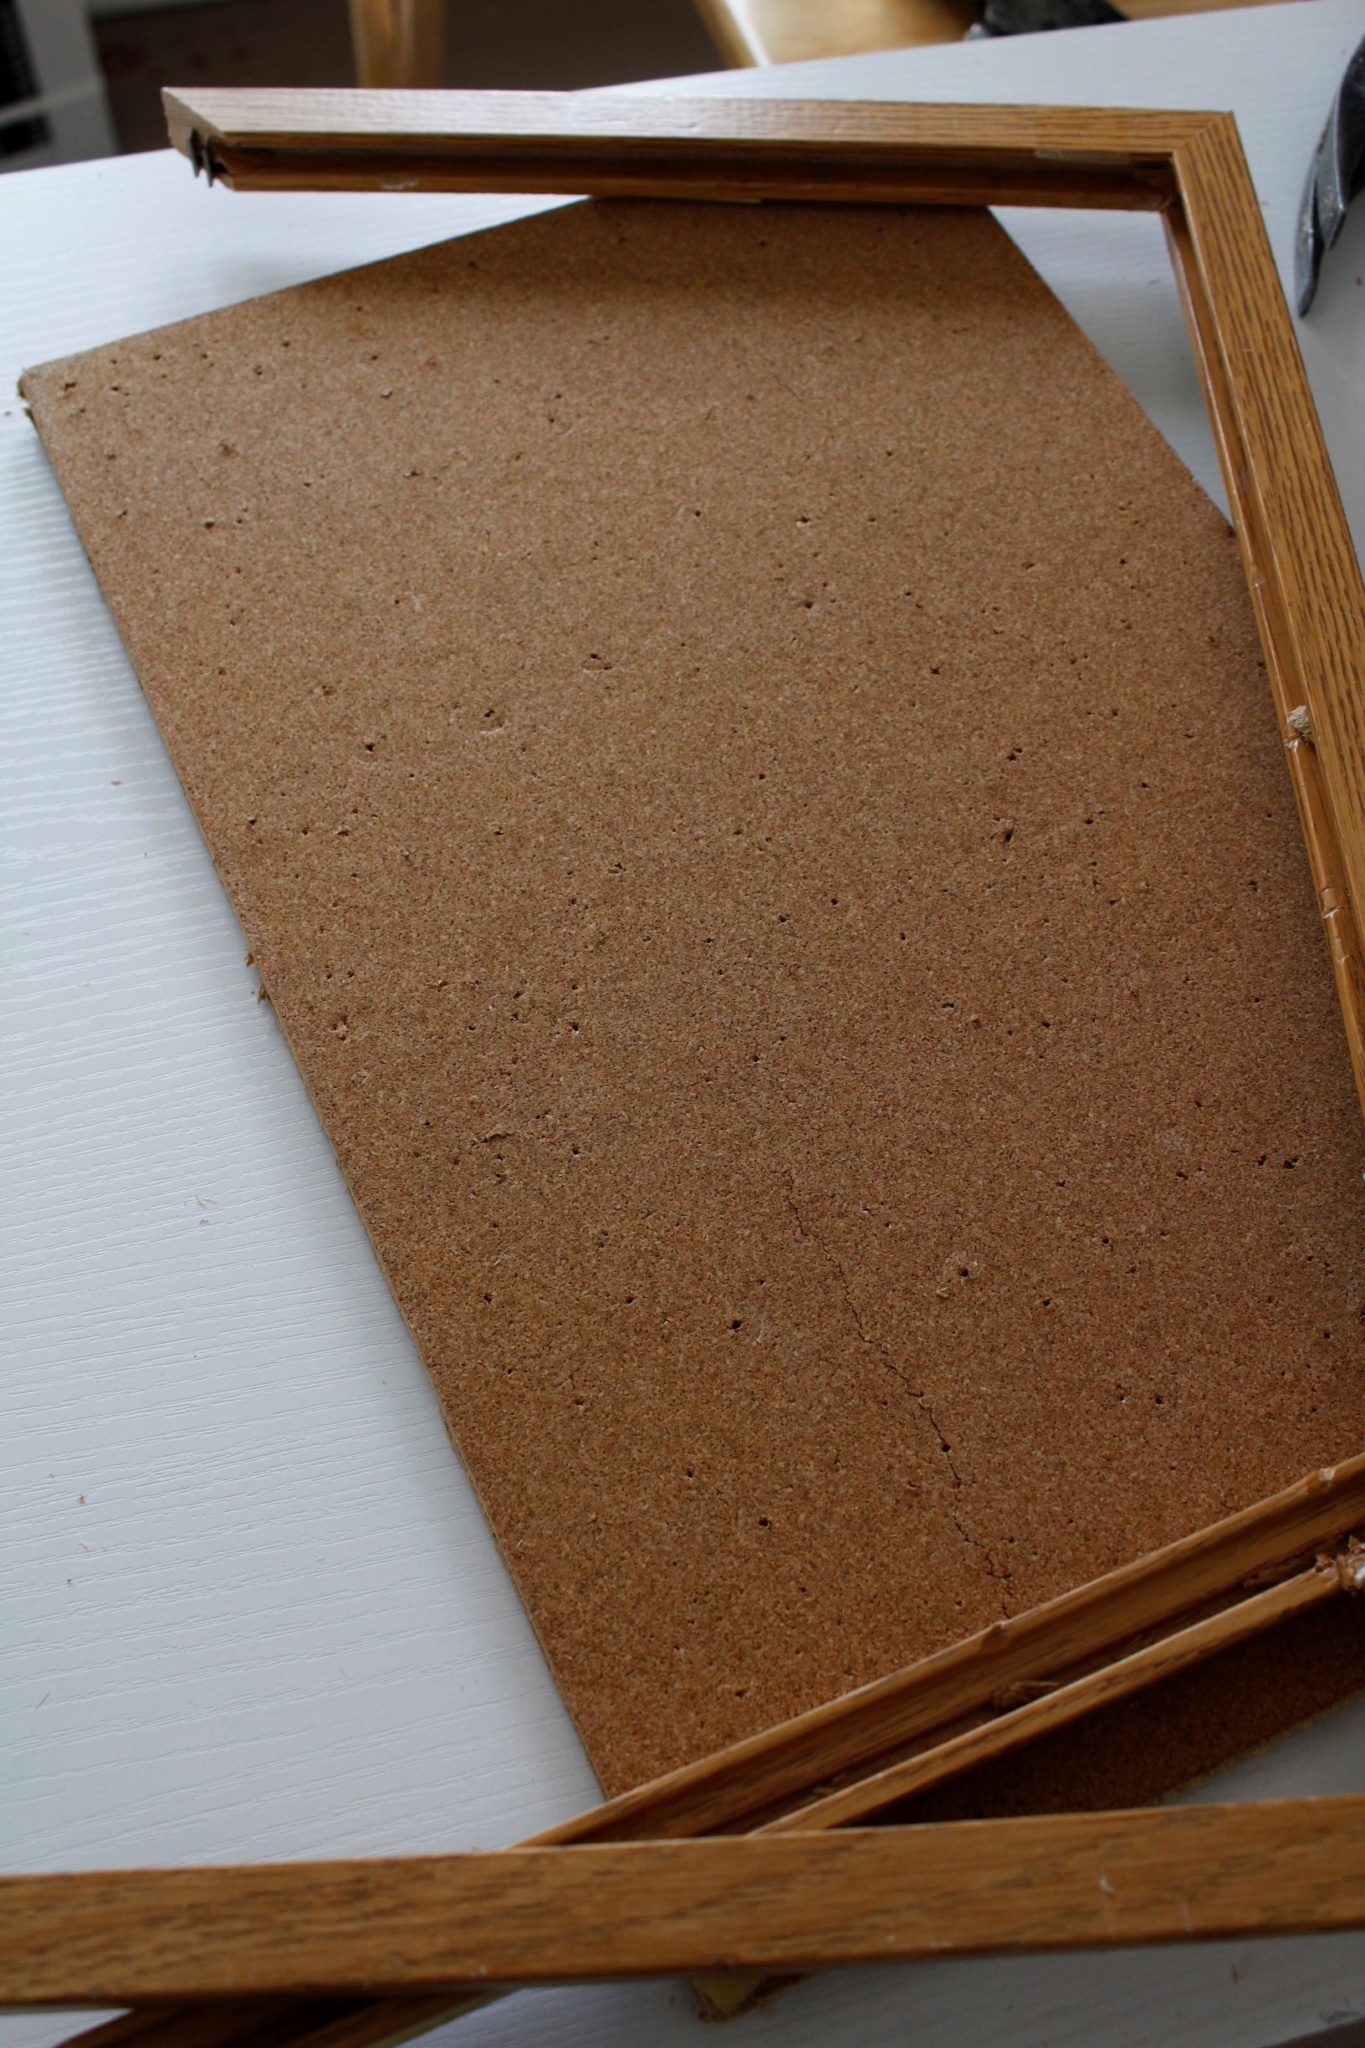
Step Five: Remove the cork from its frame. I didn’t want to ruin the frame because I had plans to use it for another project but unfortunately, it was that or gouge my cork board. But, as luck would have it, this mishap turned out to be a godsend! (More on that coming up).
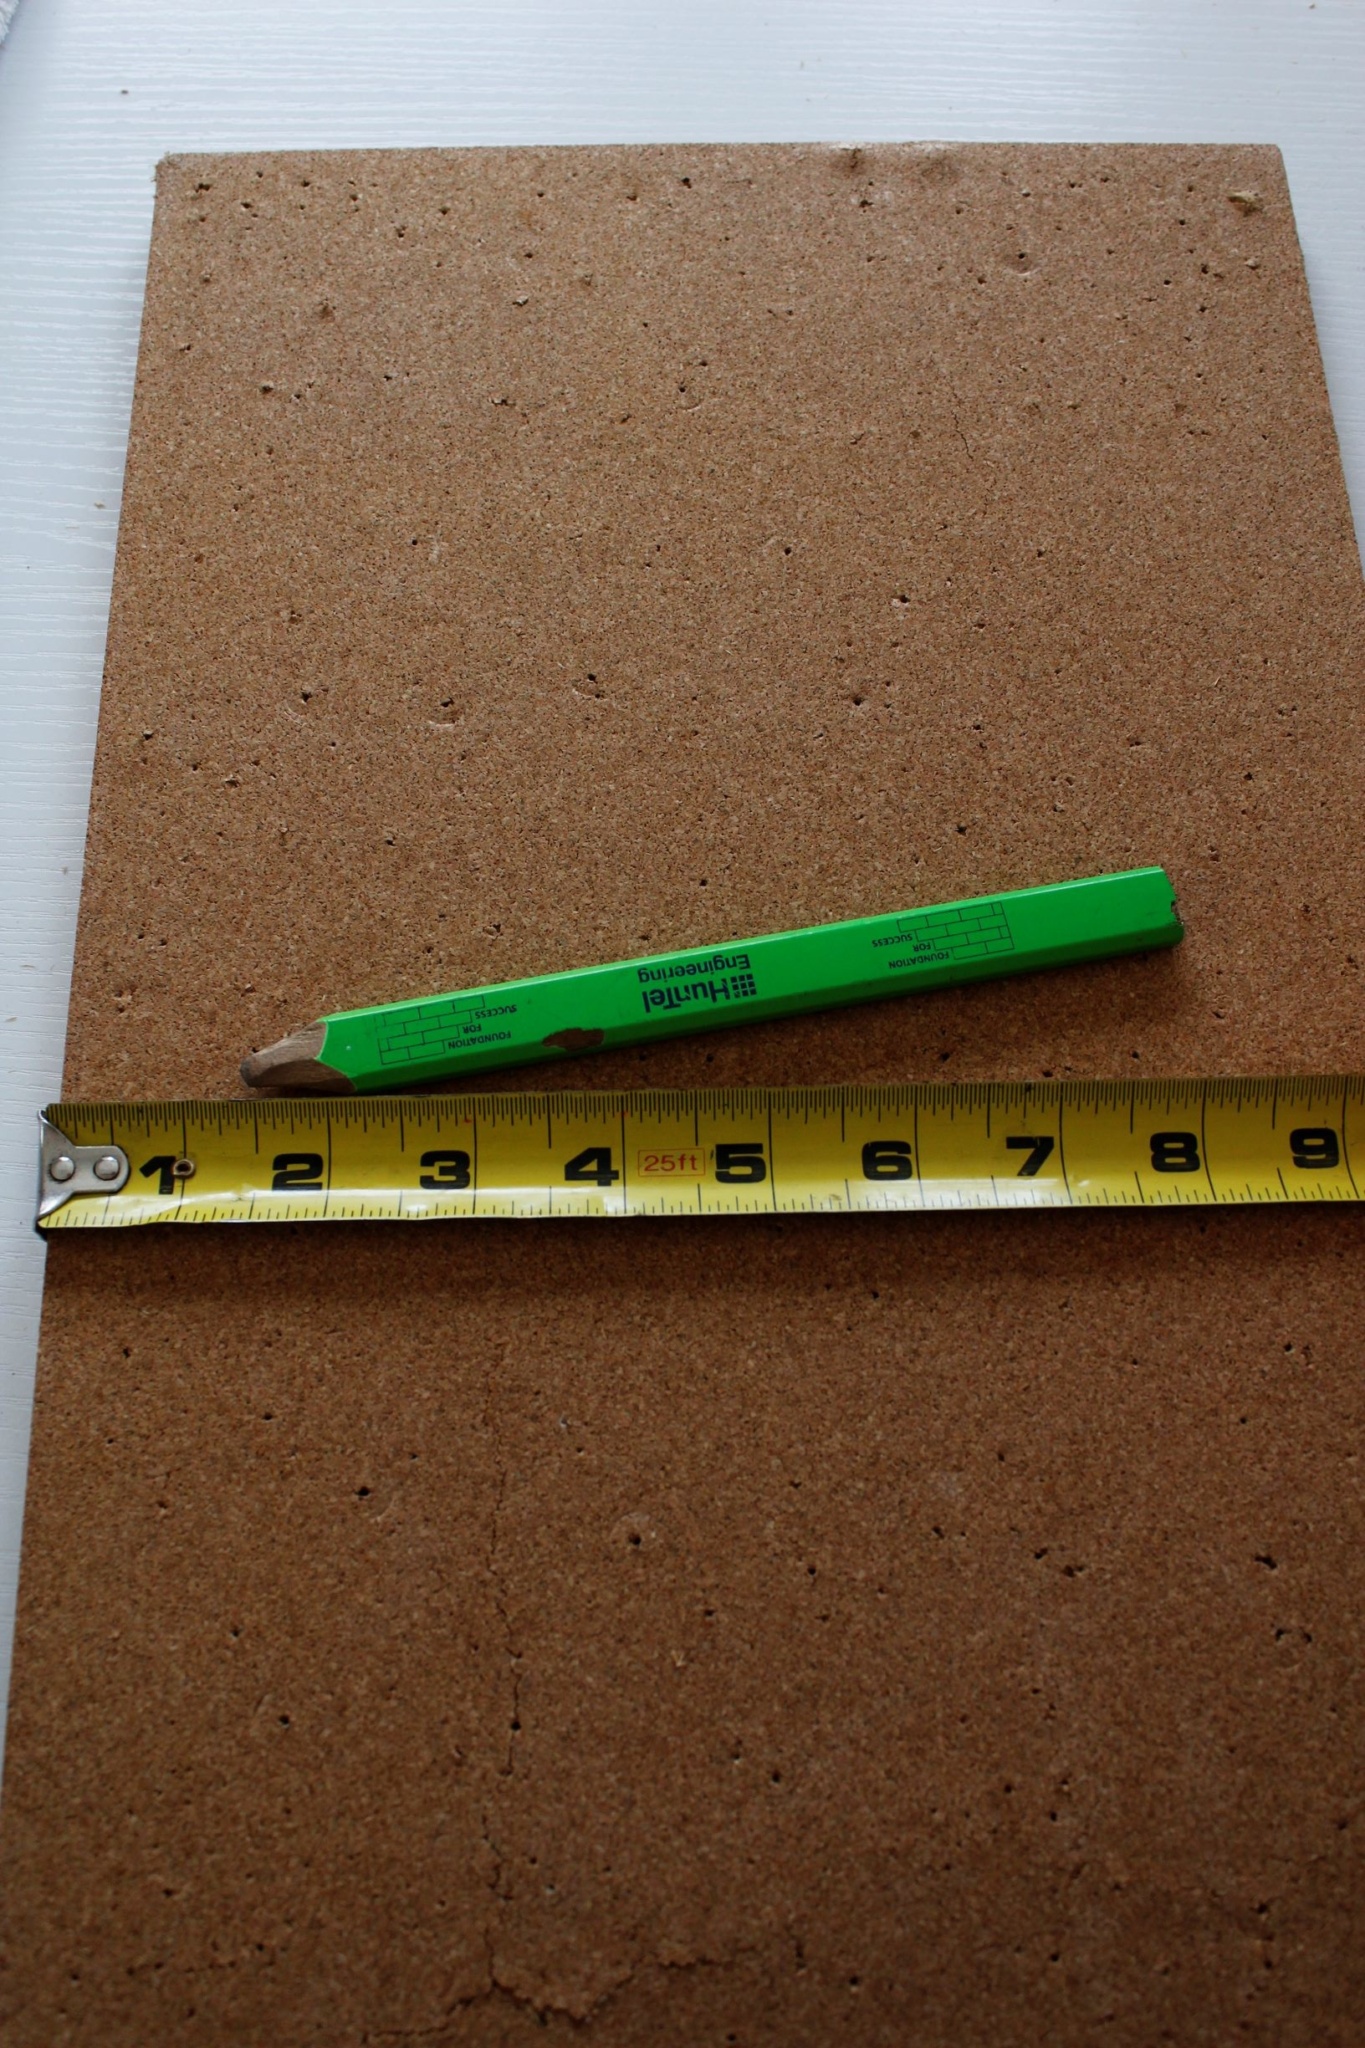
Step Six: Measure and cut the corkboard. Since I had plans for the bottom section of the insert board, I decided to cut my corkboard into a 10″x10″ square for the top section. Once cut, I put some glue on the back of the corkboard and pressed it down in place on the insert board.
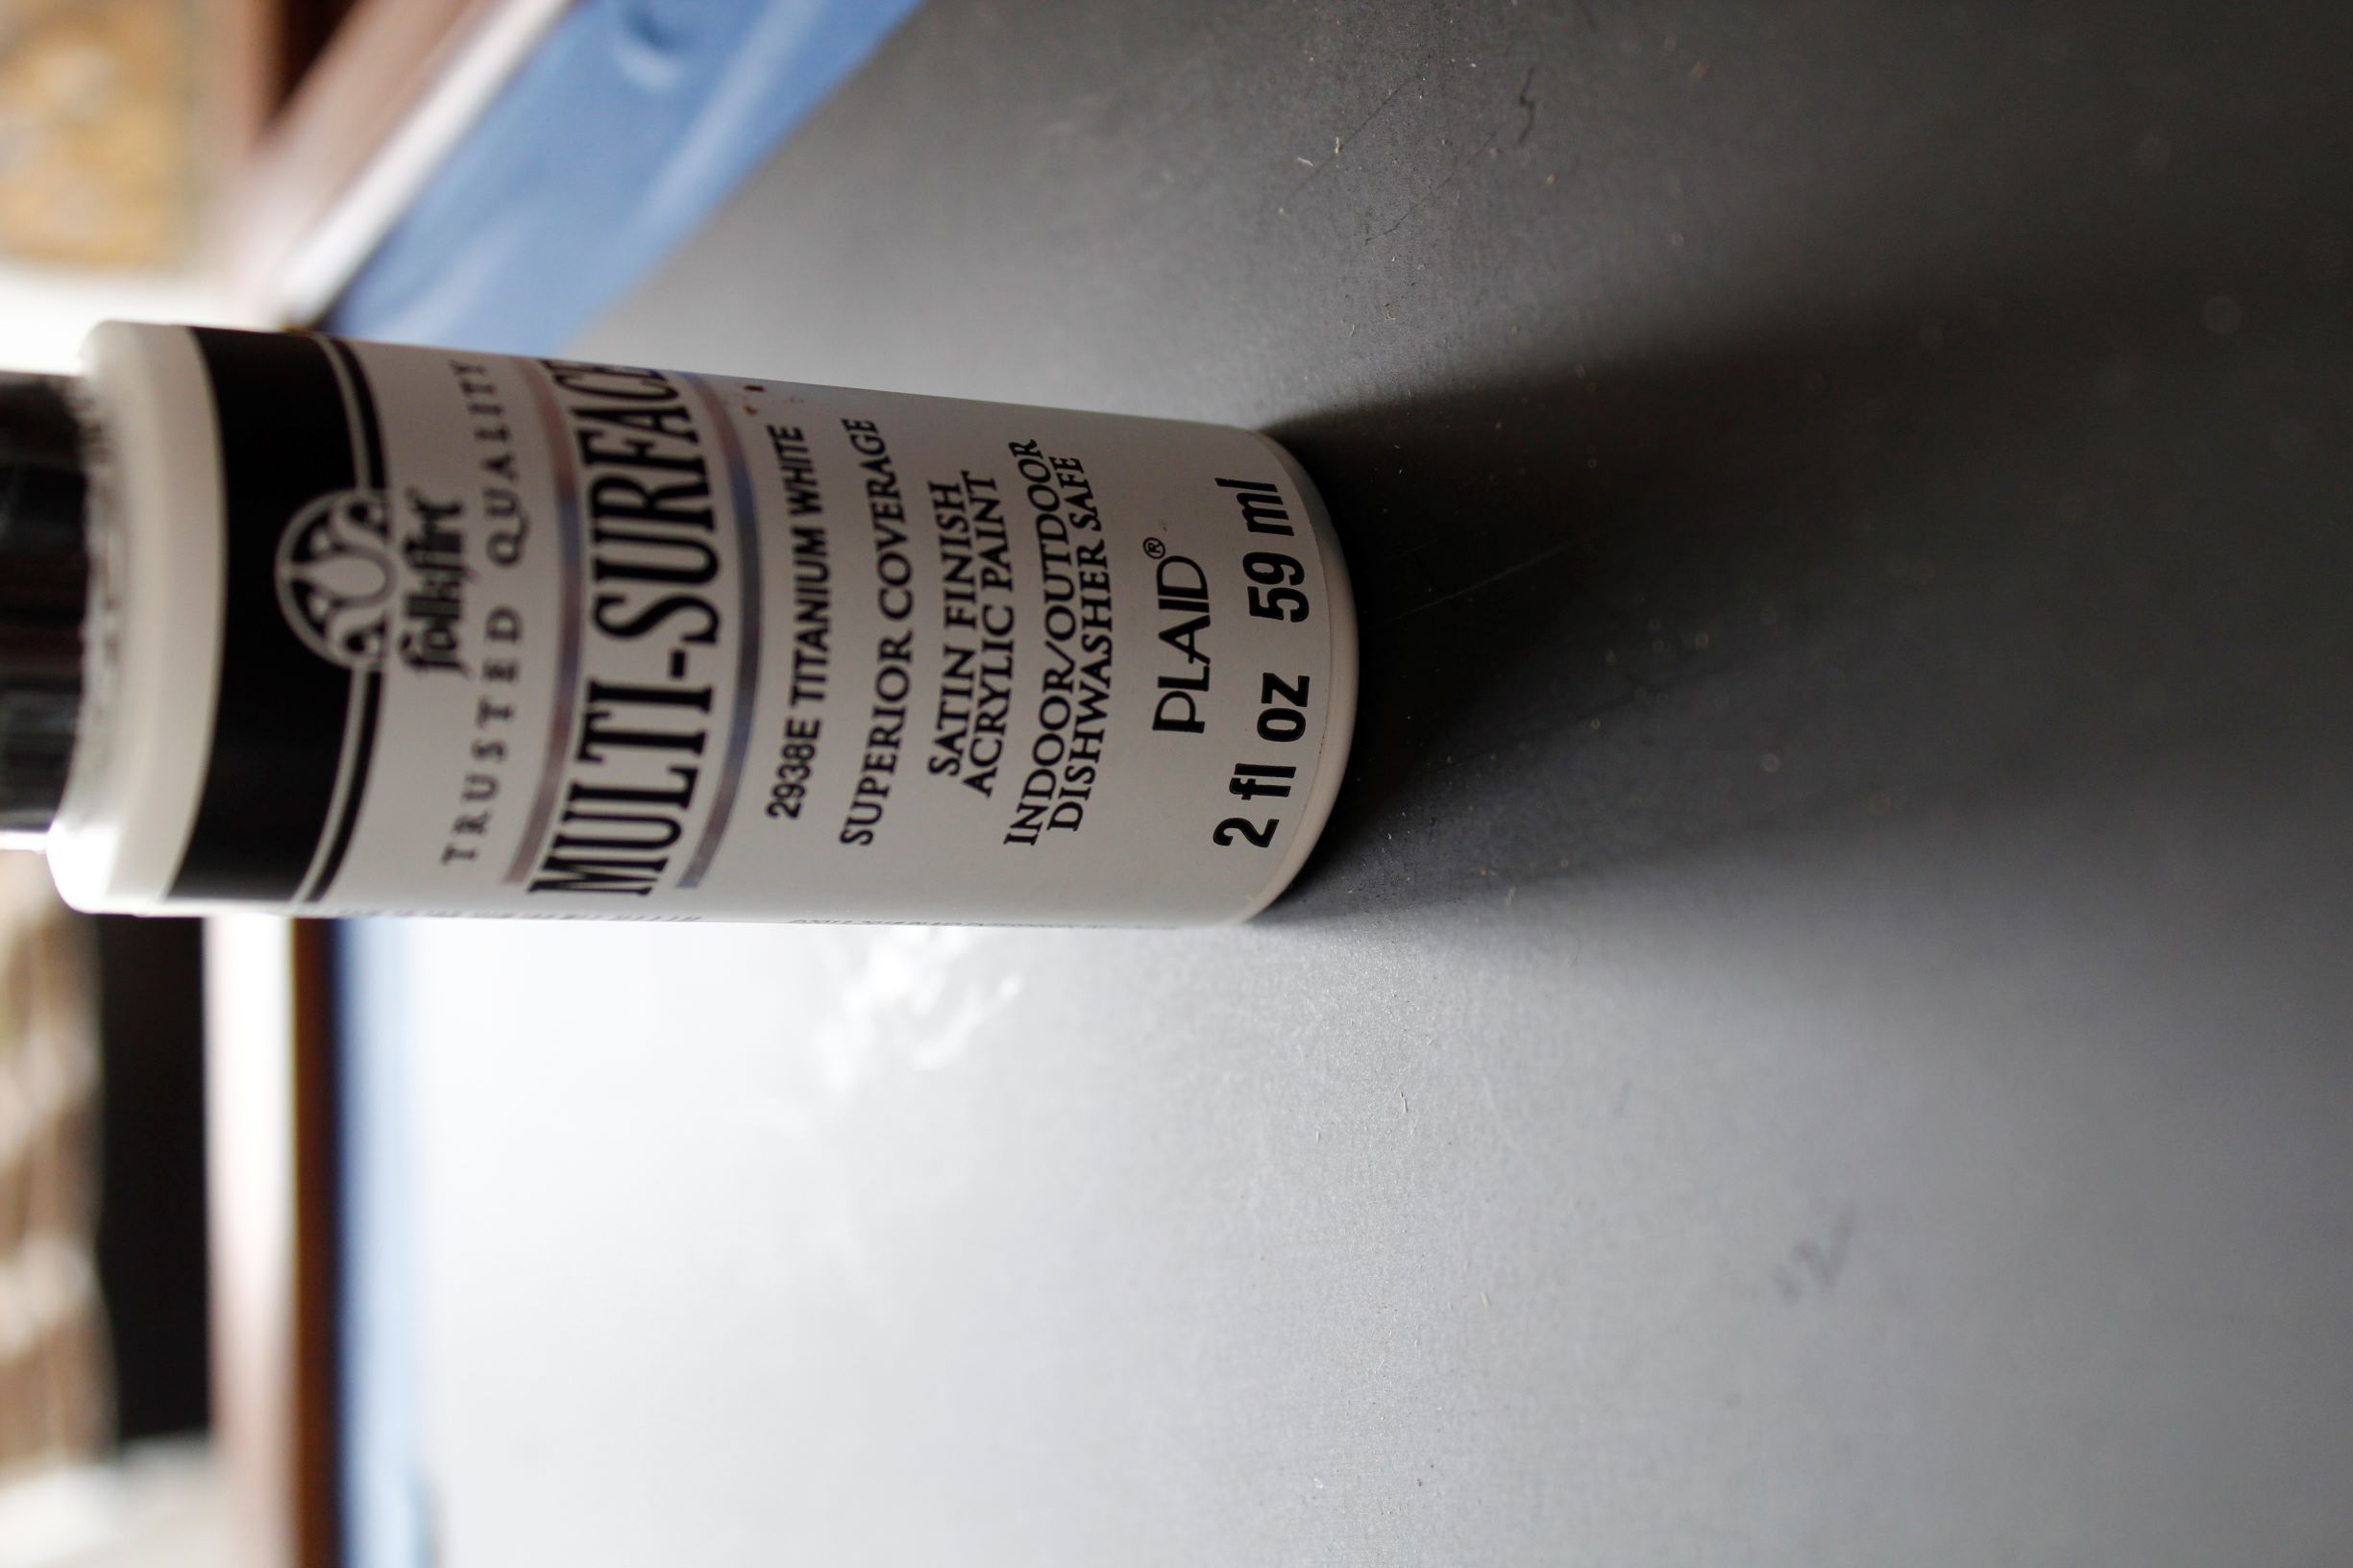
Step Seven: Paint the frame. I would have loved to keep the wood look of the frame, except it was a bit more reddish toned than I like and it also had plenty of dings. Those usually don’t bother me but with this cheap kind of wood it just looks…well, cheap, so paint it is! I always keep plenty of Folk Art paint on hand because I love how it covers and it dries SUPER fast! After I sanded down the frame and wiped away the dust, I gave it two coats total.
Note: I also taped off the chalkboard side because I didn’t want an oops! They happen-trust me!
Step Eight: Measure, Cut and Attach Garden Netting. Yes, you read that right. I said garden netting. Please don’t judge me, but hey whatever works! I wanted some kind of mesh looking wire at the bottom of my insert board for holding mail, etc and I just happened to have some leftover garden netting from last year in the basement. Originally I was going to staple the netting to hold it in place but instead, I decided to cut the netting a bit longer and simply fold the ends over with my needle nose plier. It worked out great-just be careful when cutting the wire. The ends are sharp! I would definitely recommend using gloves.

Step Nine: Attach Ledge for Chalk, pins, etc. Remember when I mentioned back in step 5 that it wasn’t so bad that I had to break apart the frame that the corkboard was in? Well, it wasn’t because after step 8 was done I realized I didn’t have any place to keep my chalk or pins. The whole idea behind an organizing unit is to have everything you need at your disposal, so… I glanced over at the broken frame and an idea came to. And you guessed it. It was pure luck that one of the broken pieces was the exact length I needed to fit on the base of the corkboard.
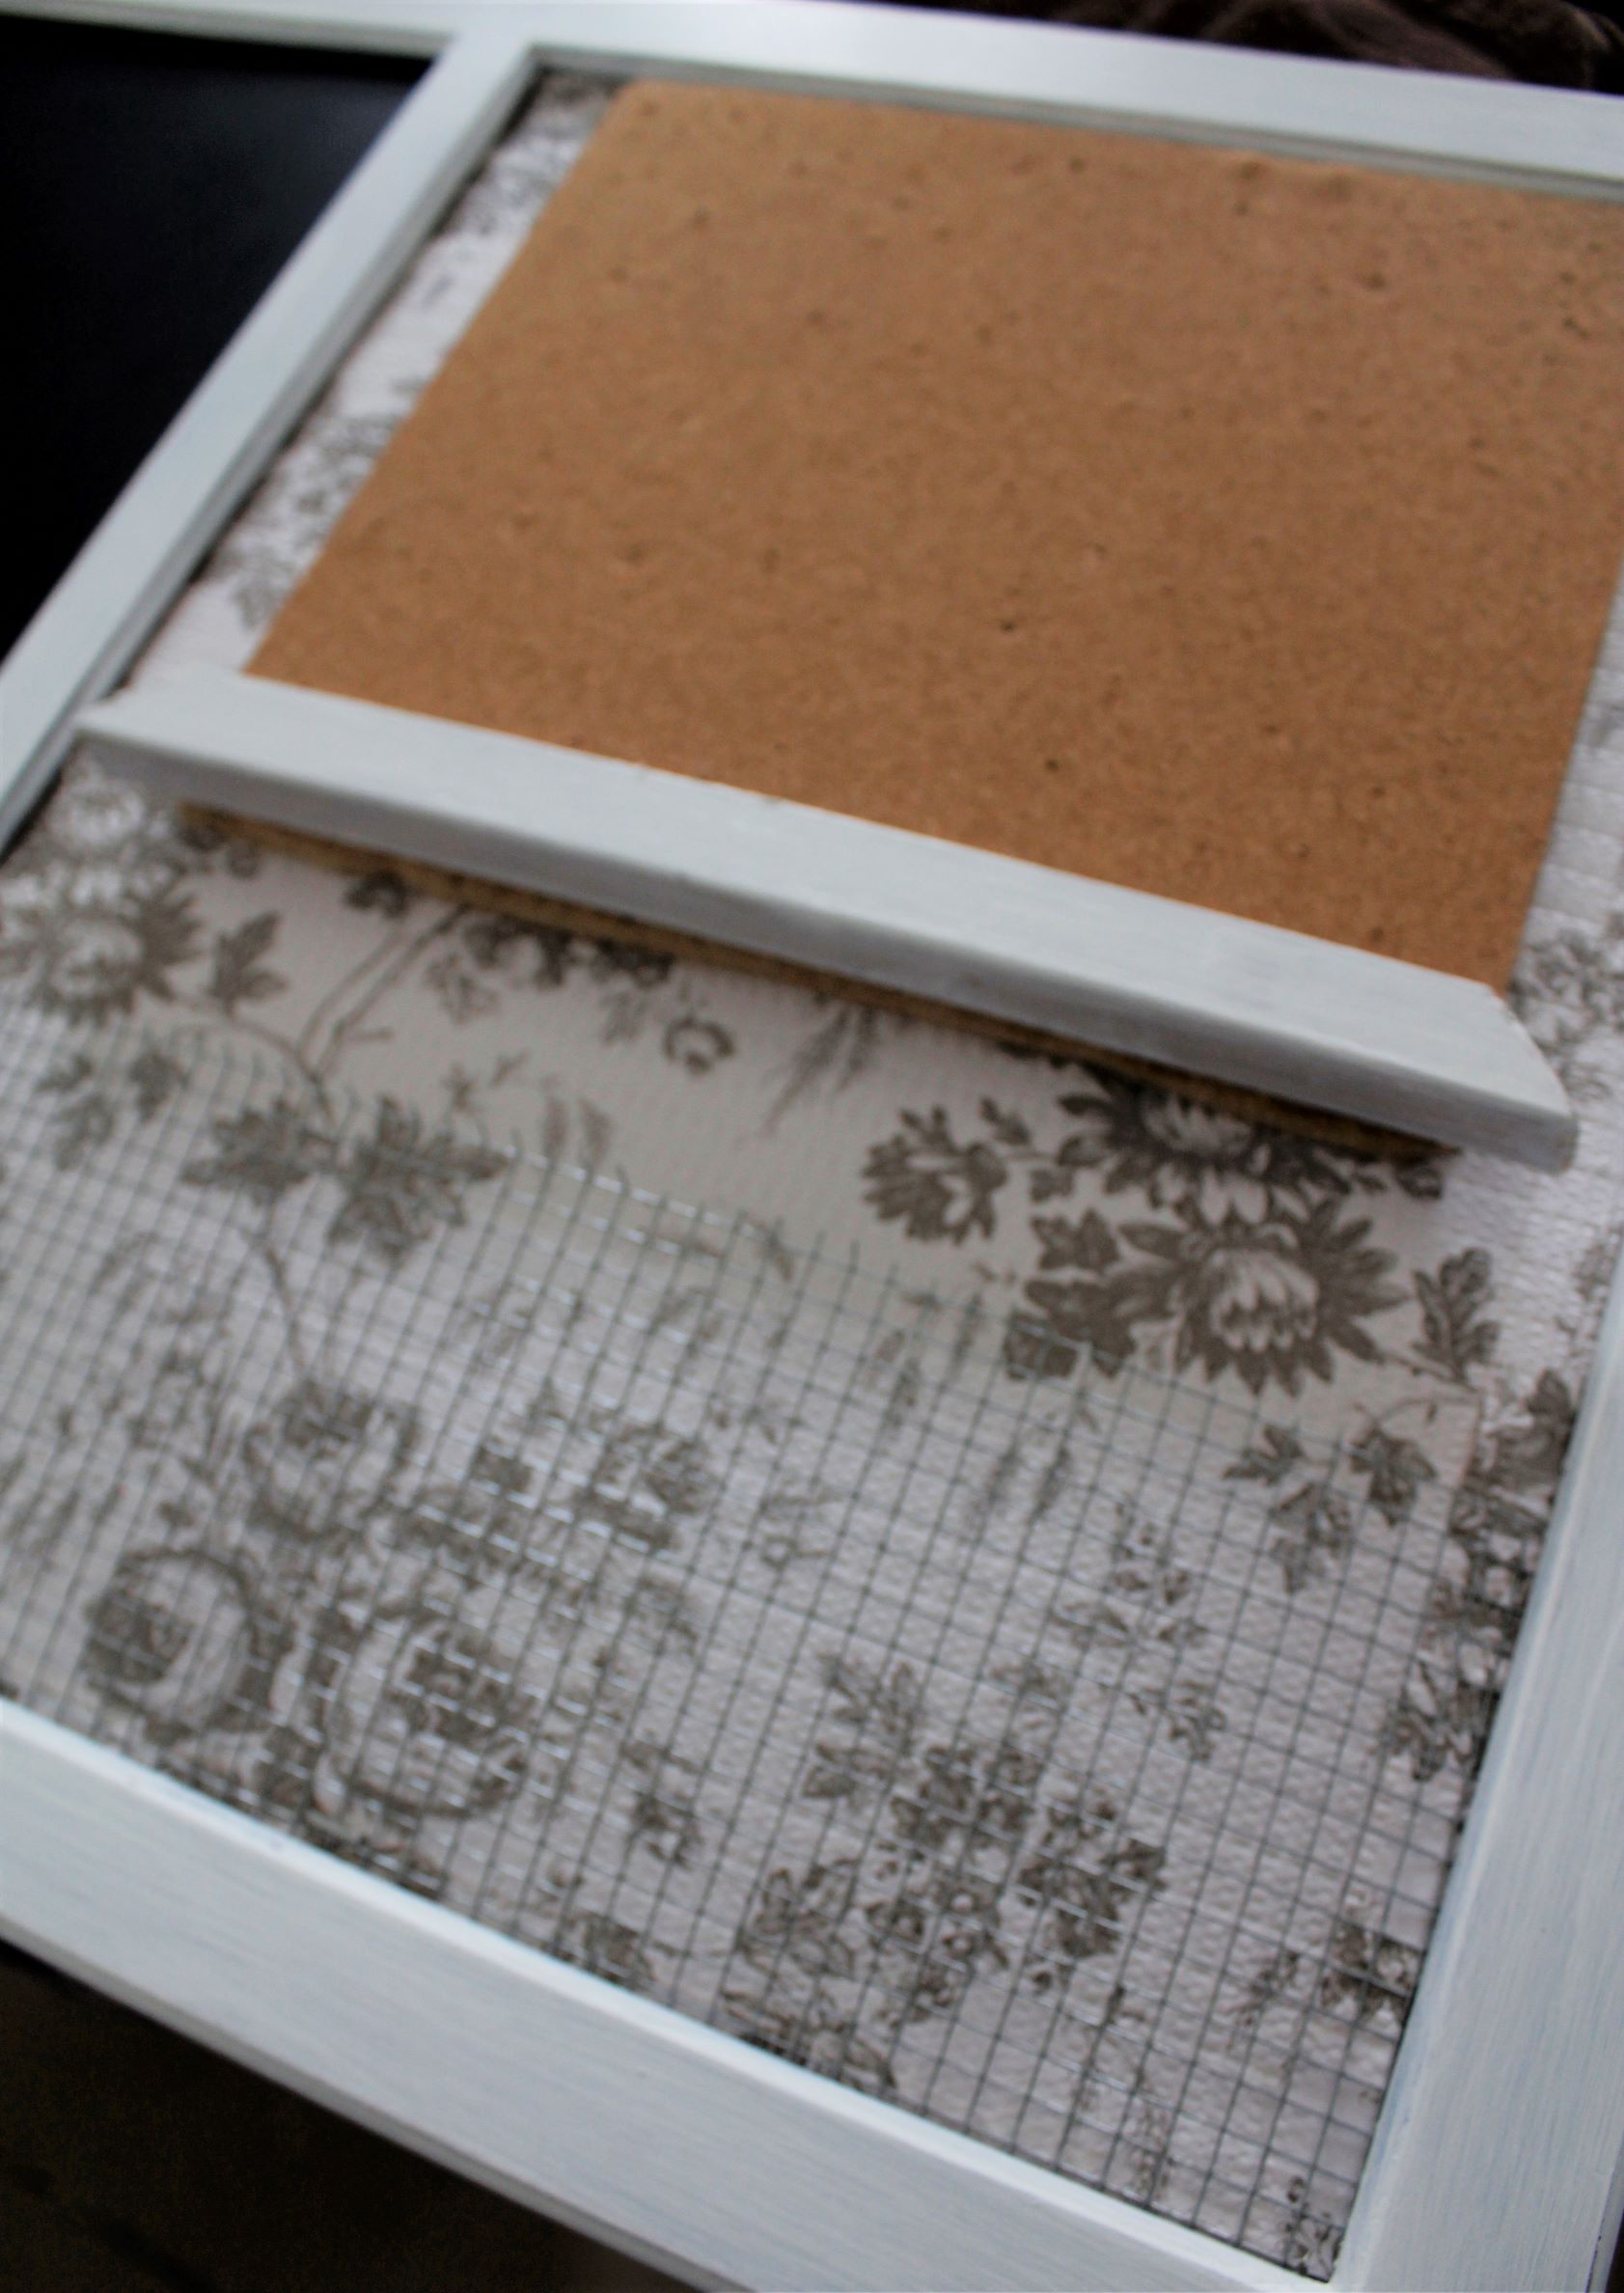
All it took was painting the frame piece 2 coats of the same white paint and gluing it onto the corkboard.
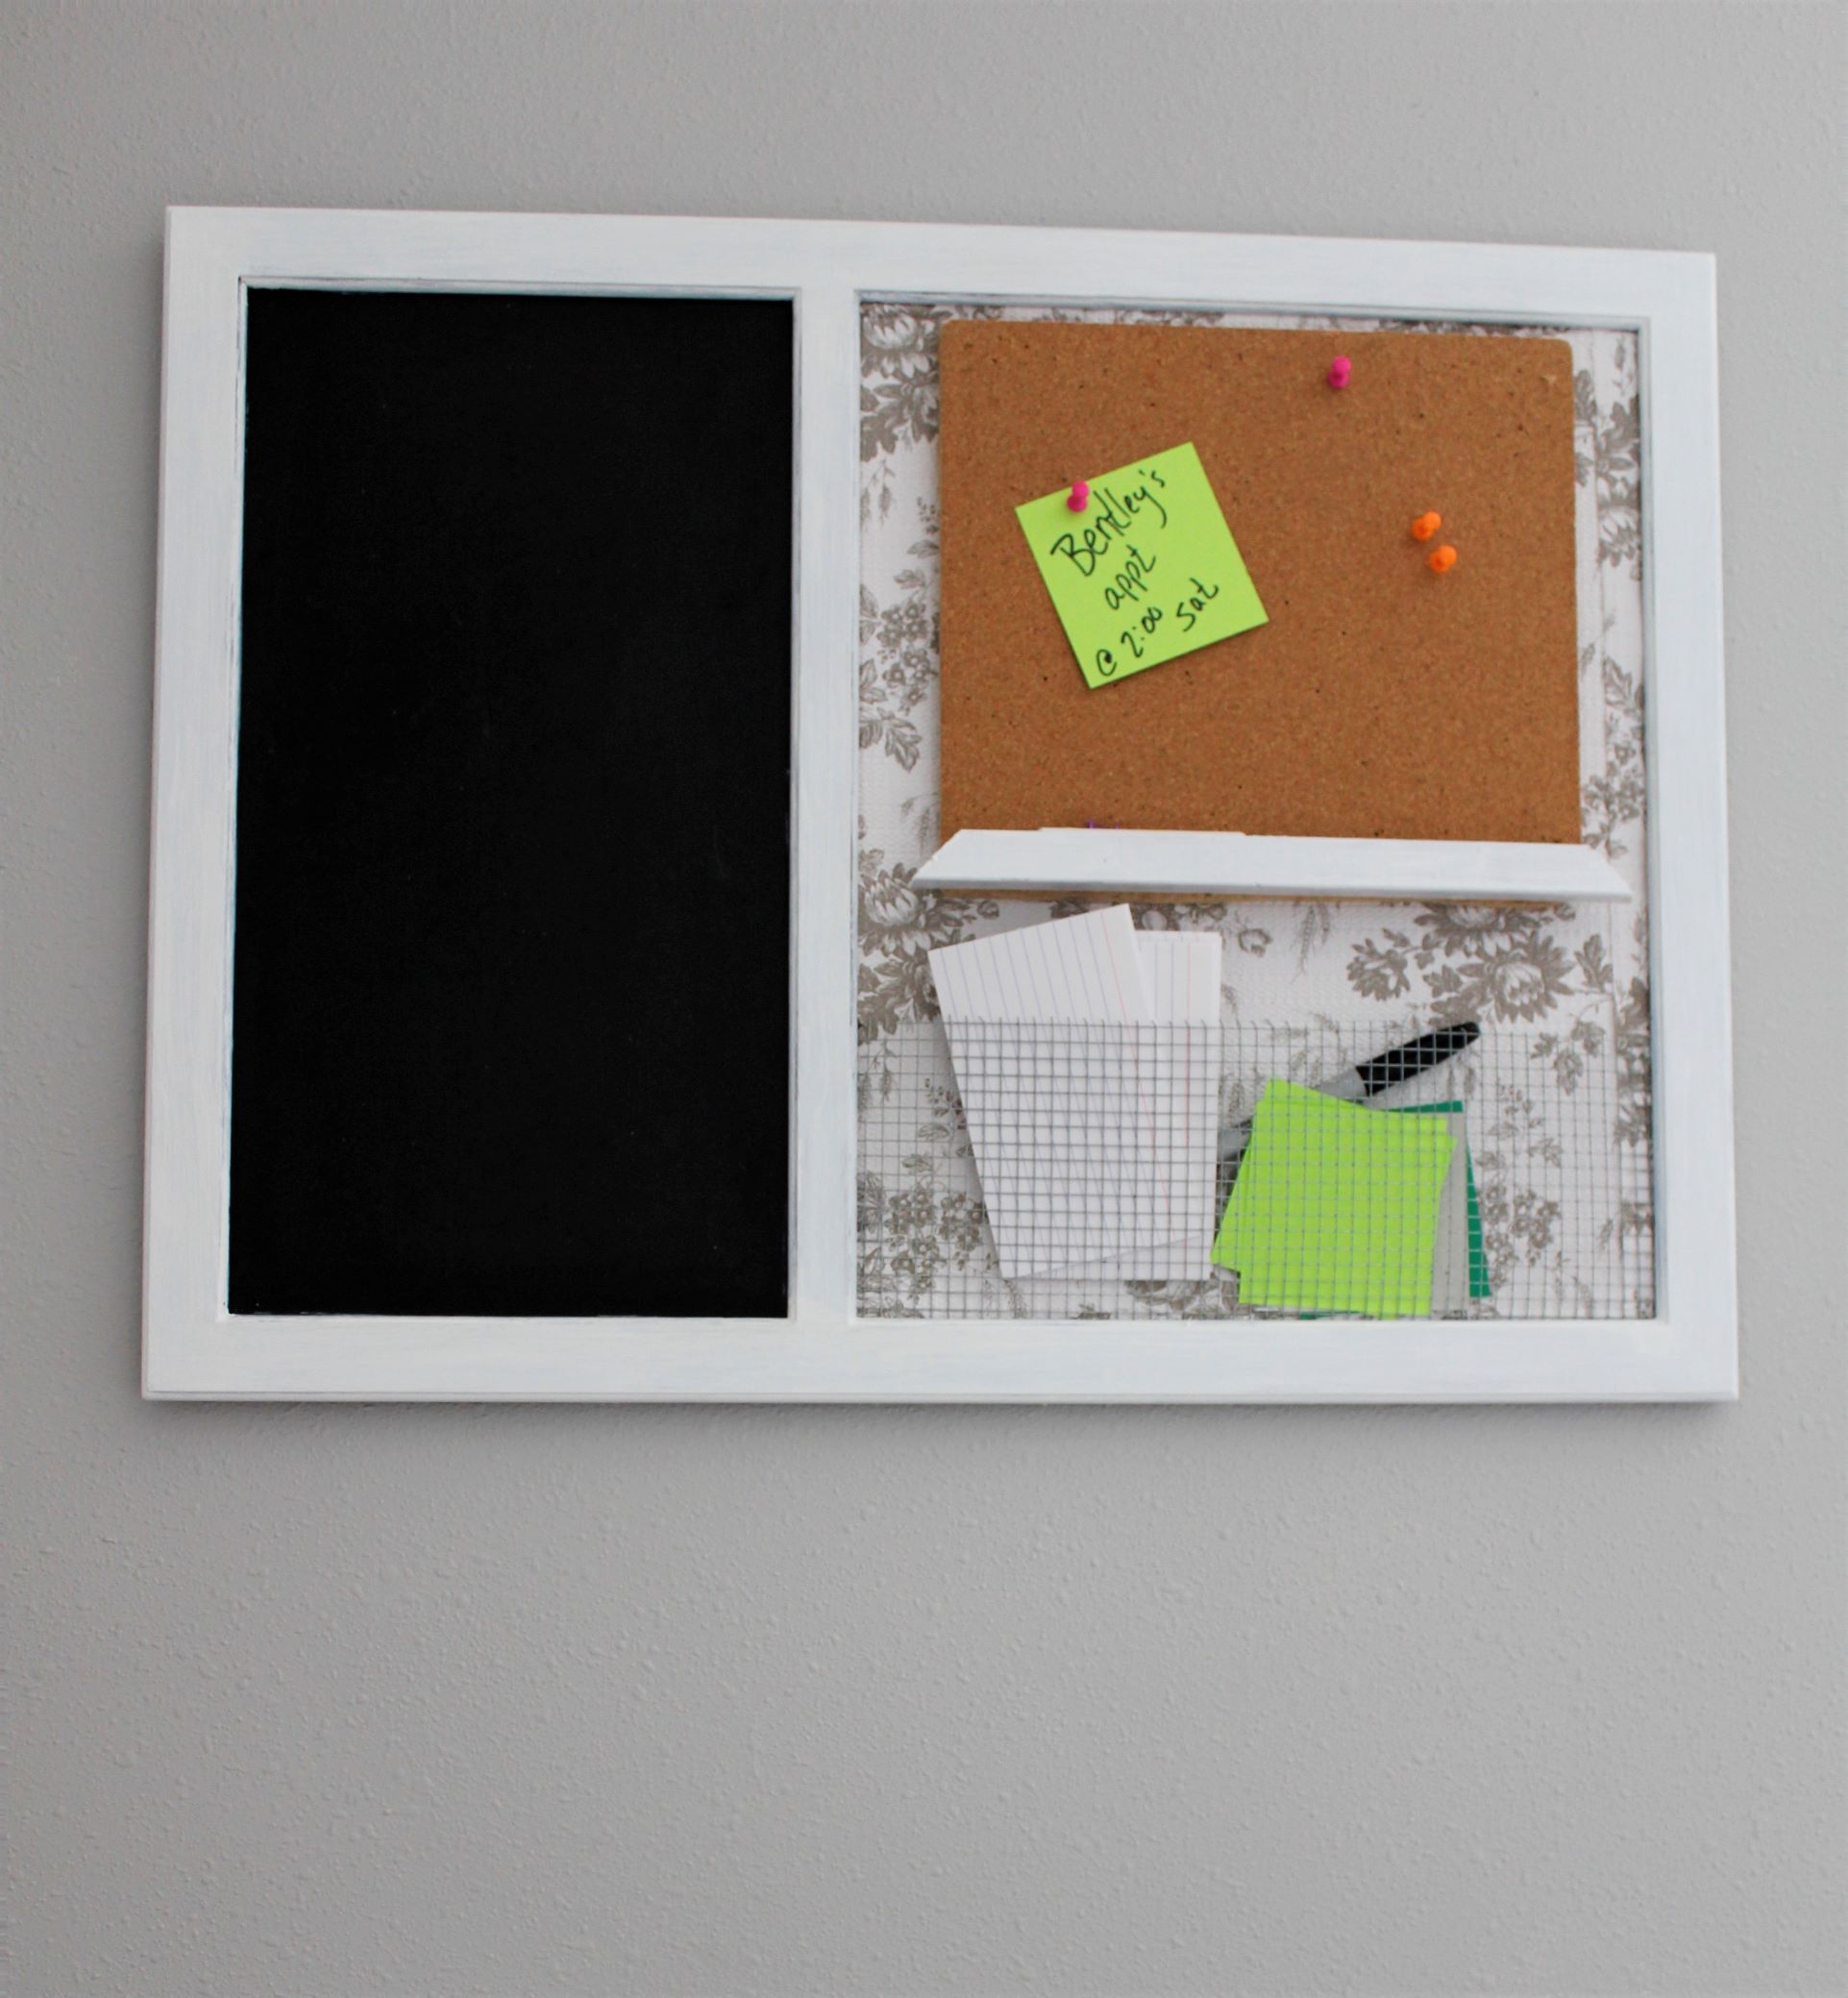
And here it is! My first Trash to Treasure project in a VERY long time-COMPLETED!
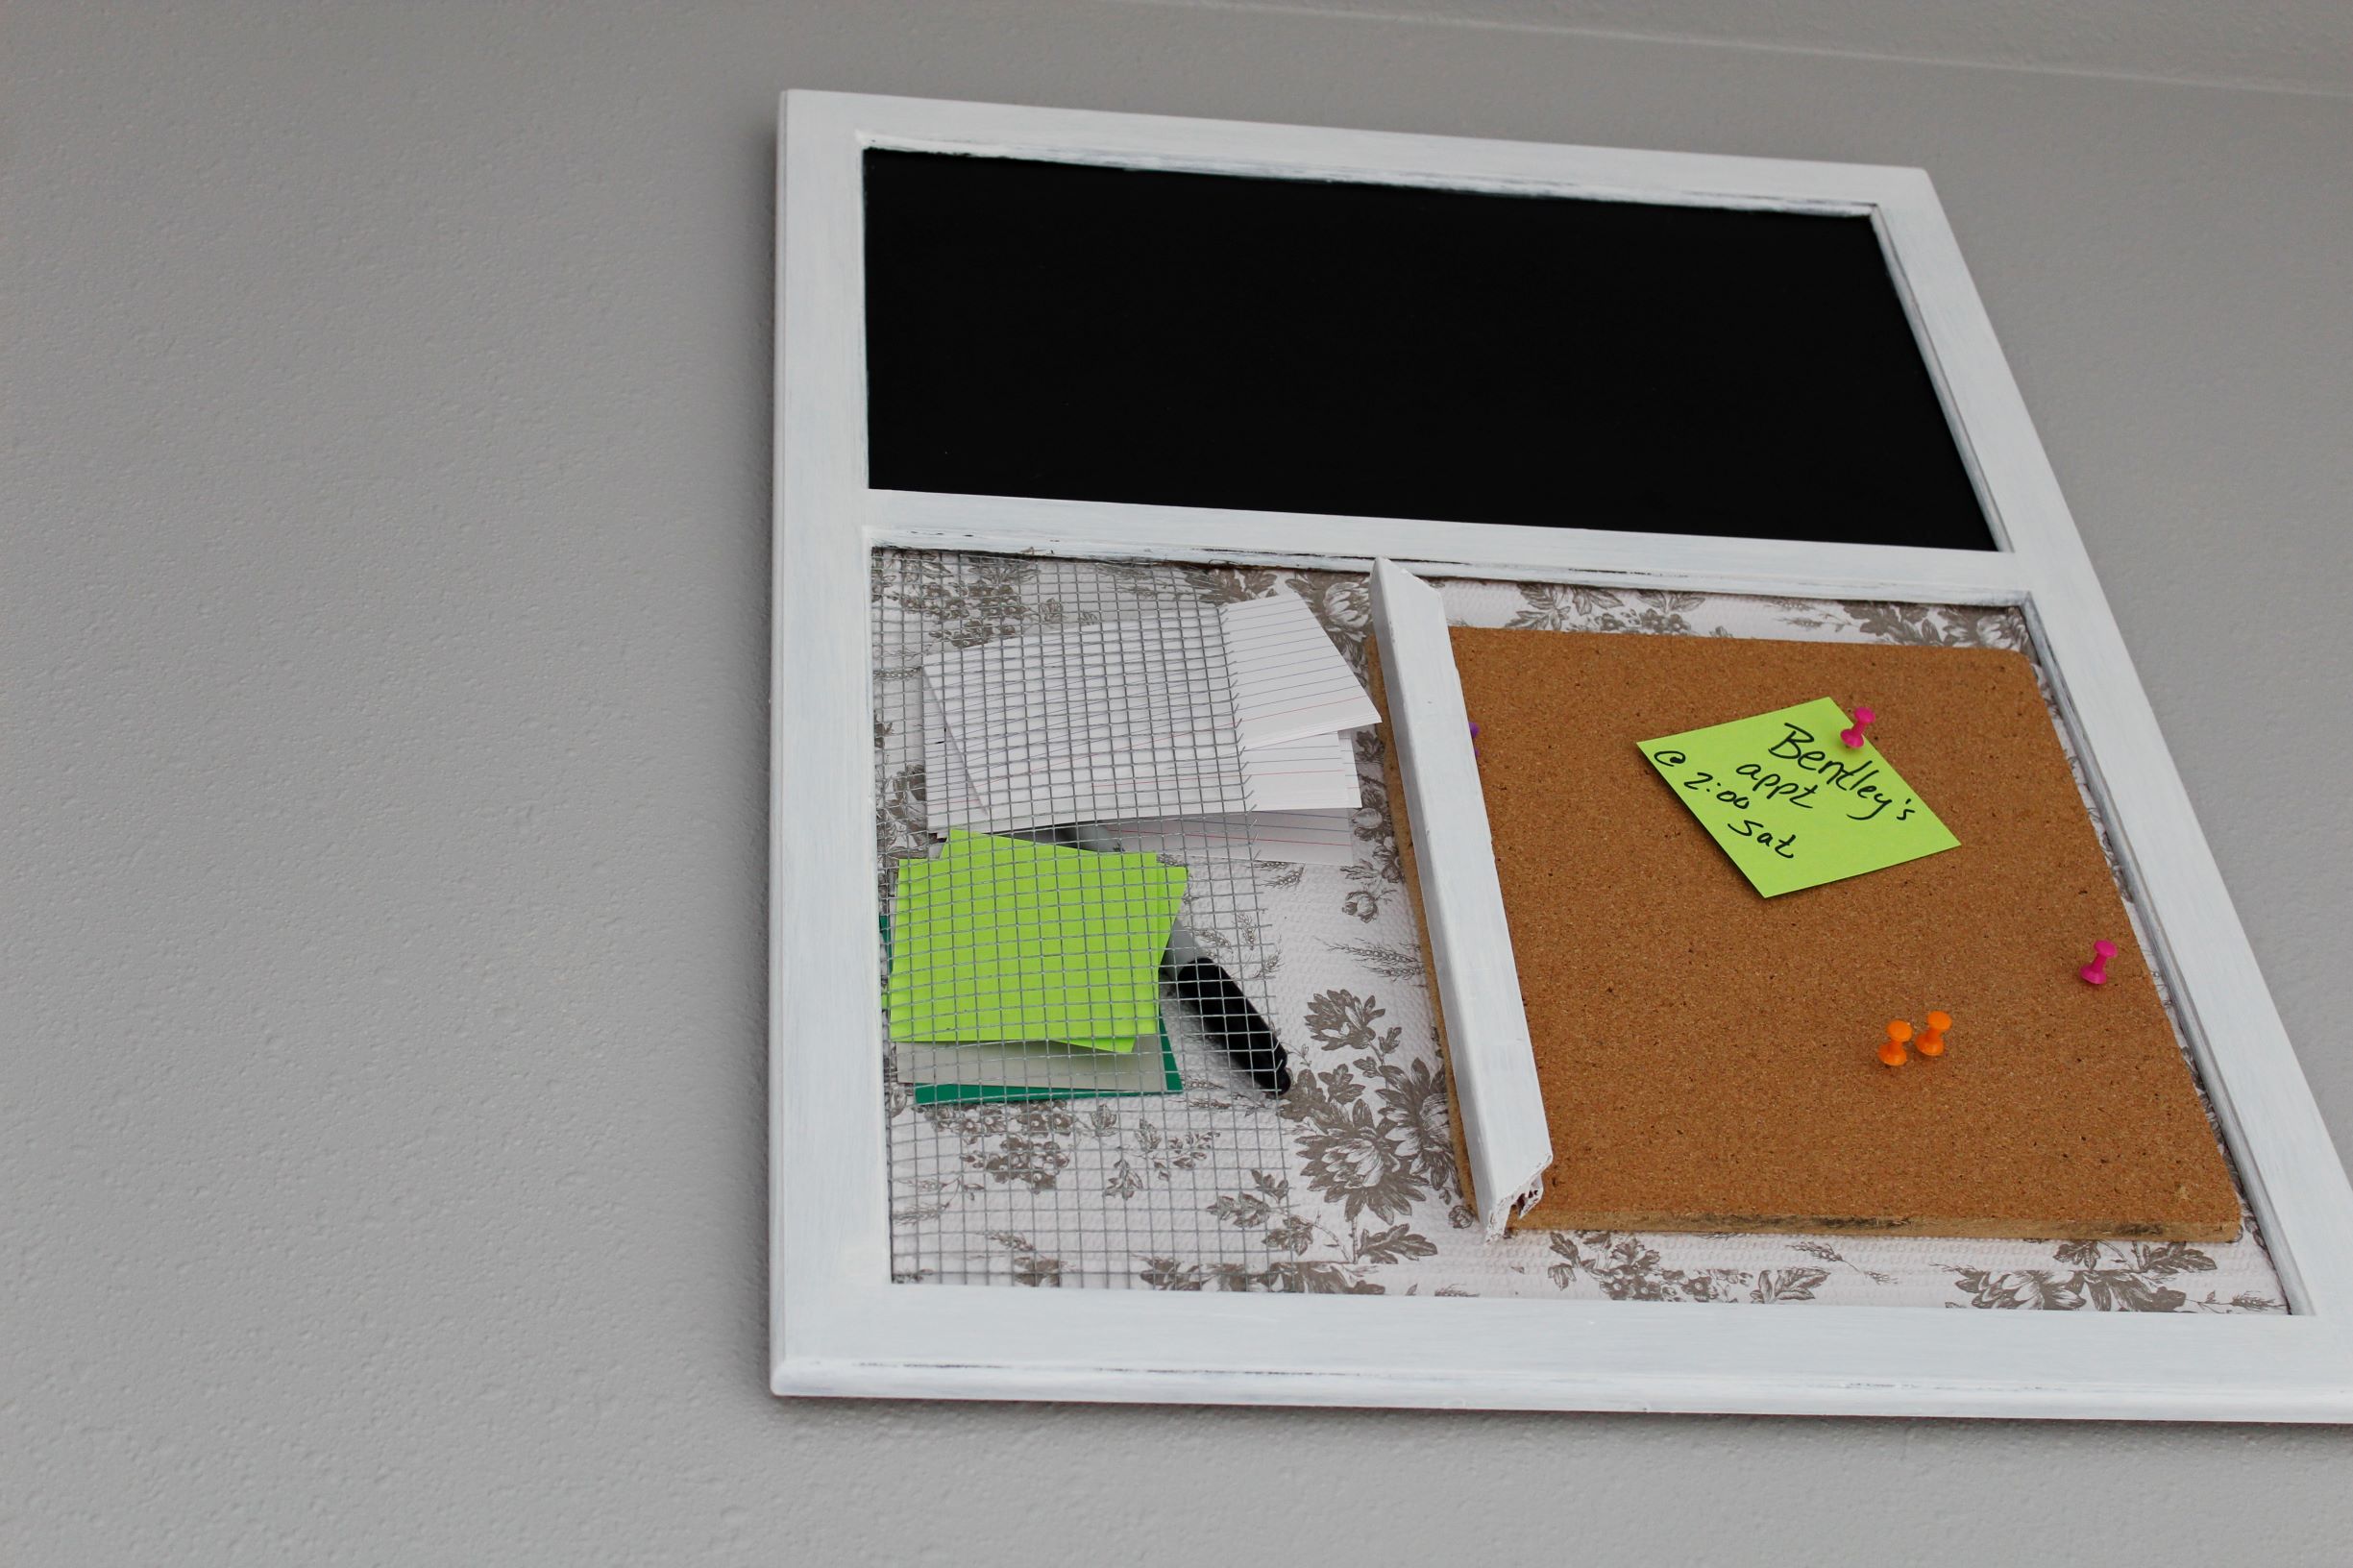
I absolutely LOVE how it turned out!
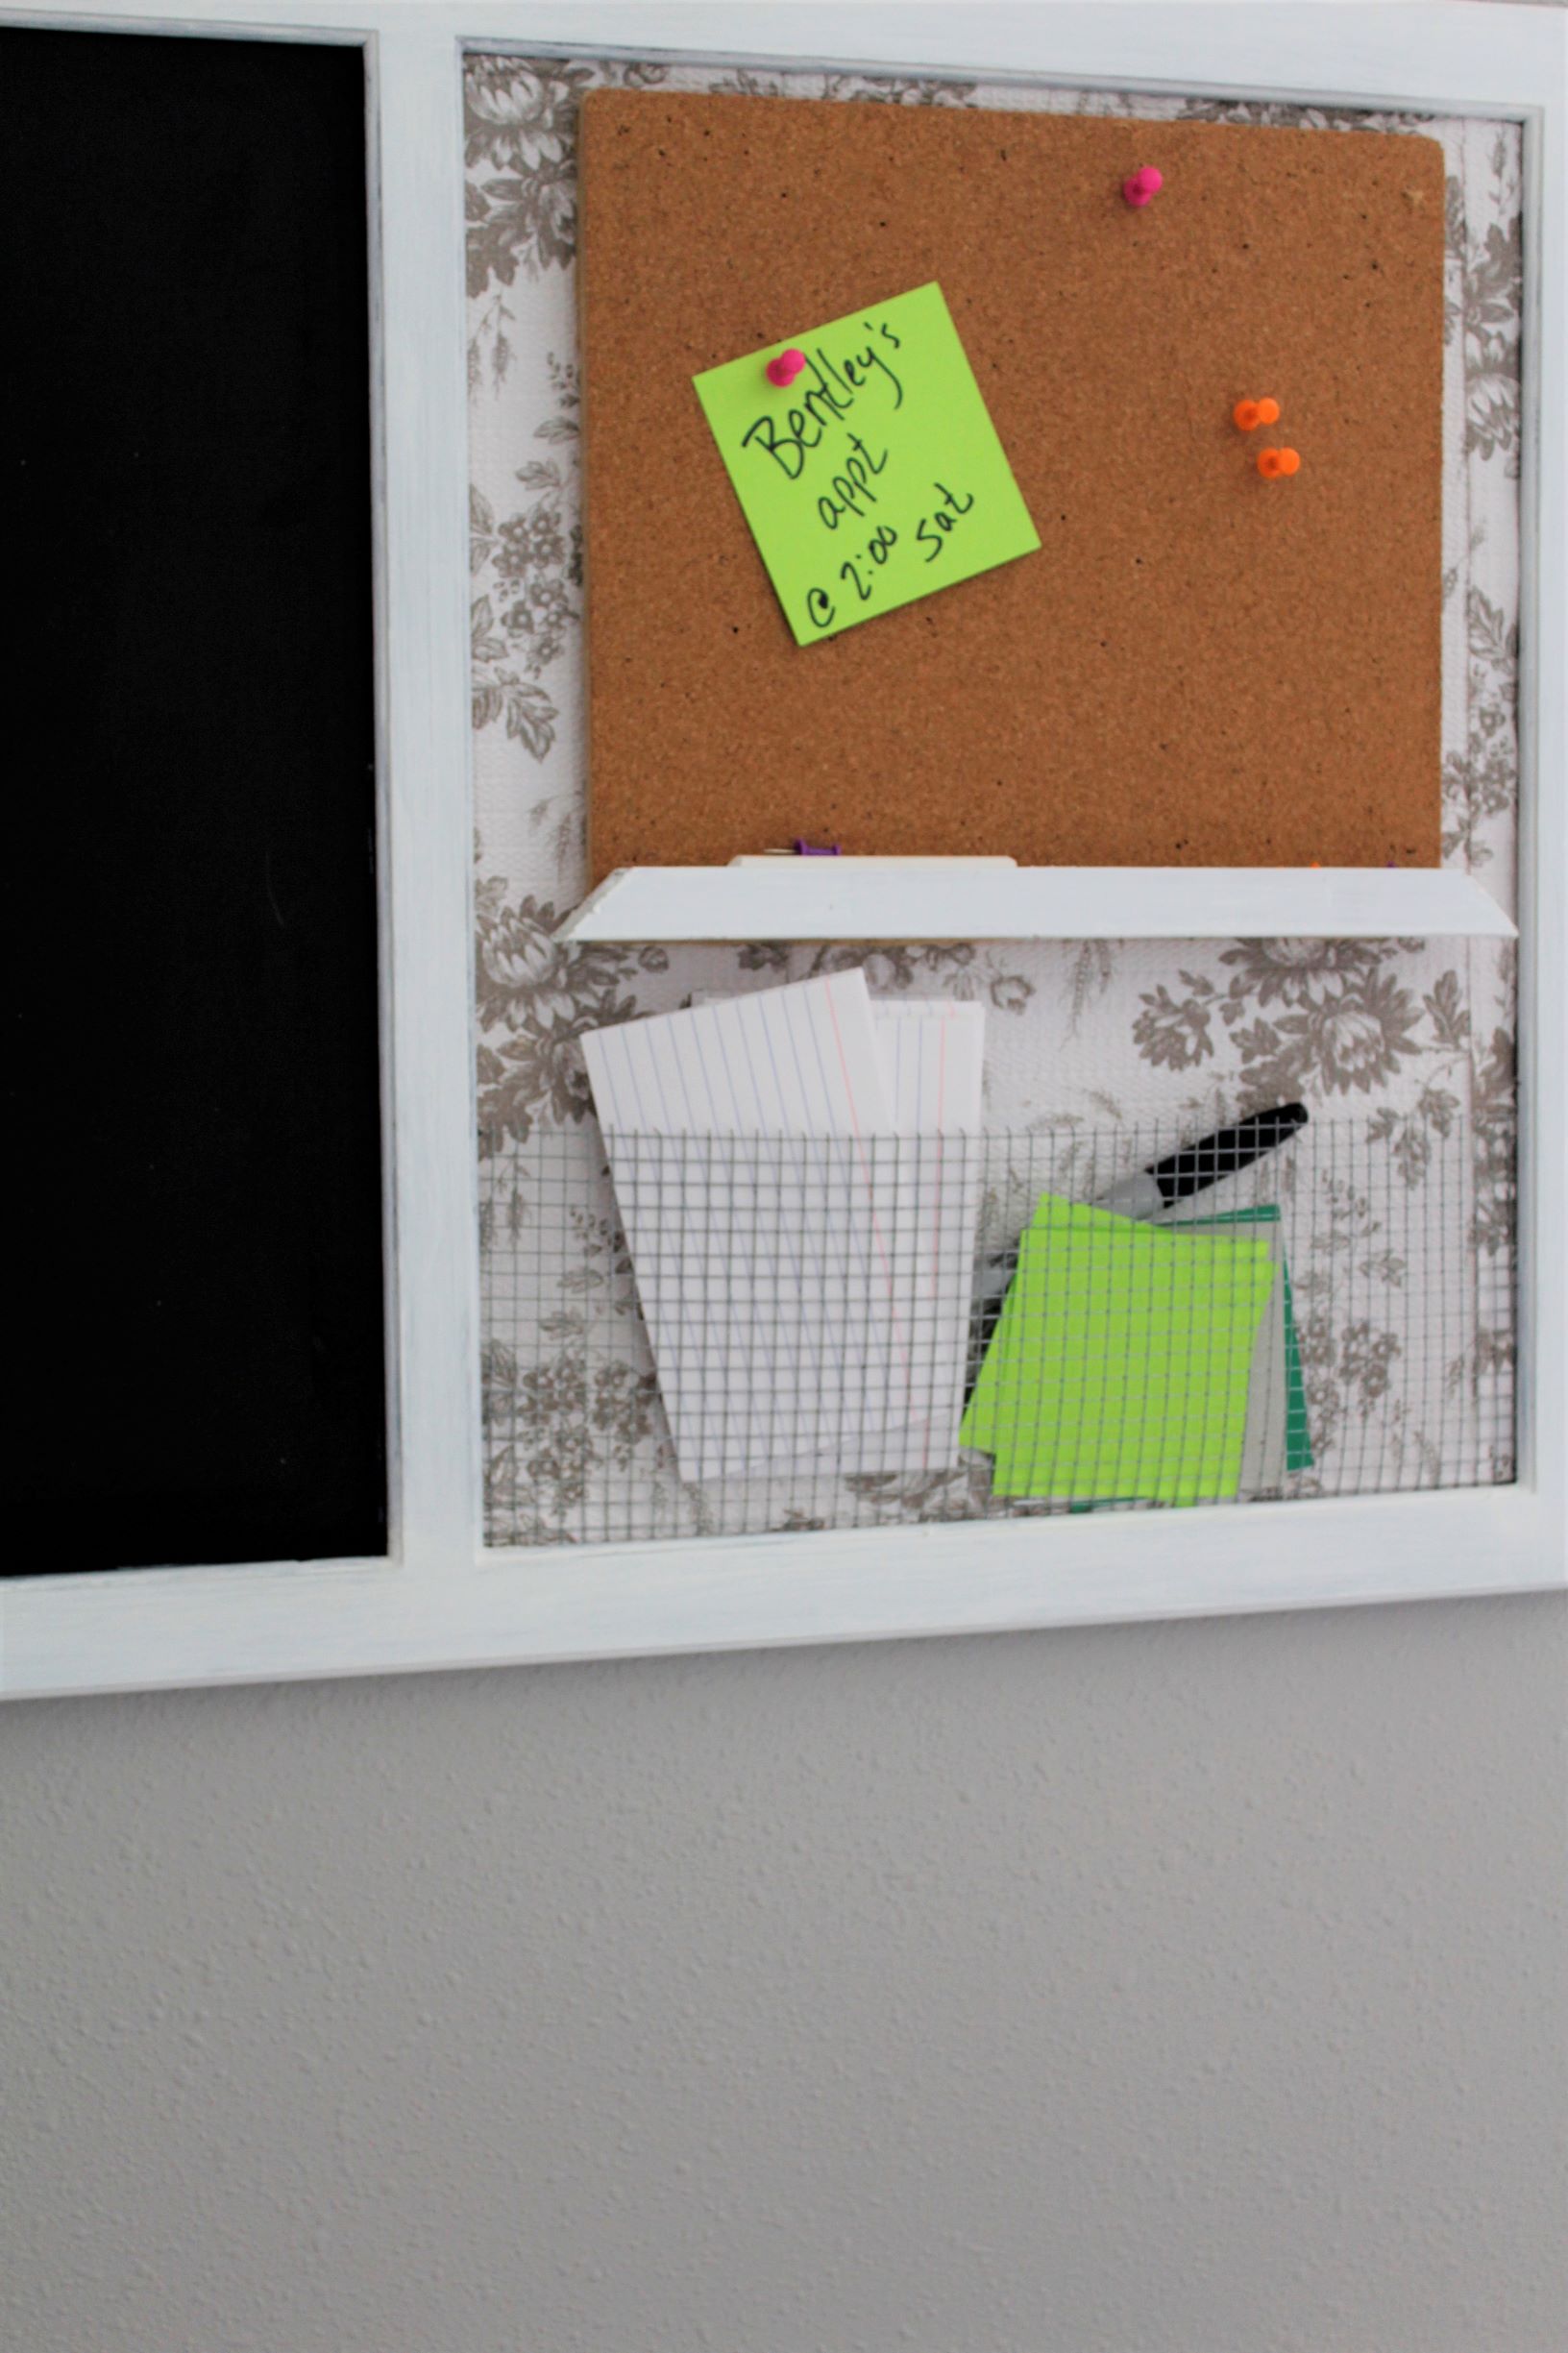
It has everything I need to keep organized. The chalkboard for quick notes. The corkboard for reminders. The ledge to hold my chalk, pins, etc. And the mesh pocket for other supplies or mail I need to go through.
The wall looks a little bare with just this organizer but it won’t be for long. I’m already working on a couple of other DIY projects that I’ll be sharing very soon!

I also wanted to give a big shout out to my dear blogger friend Karen over at To Work with My Hands.
Karen has an entire series on How To Thrift Shop Like a Pro and it has helped me so MUCH! Her tips and advice are priceless and have truly inspired me to get back to the hunt for treasures.
I hope this project has inspired you to think out of the box. Yard sales are coming soon to our area and I cannot wait to find more treasures!!!
Have a great weekend!

This is awesome and your excitement to be creating again was the best. Love how you used wire and the background is perfect. Came together so farm like and I love it. You’ve given me an idea for my office.
Have a great weekend and hope it’s warming up a little.
Aw thank you, Carole! I am definitely so excited to be creating again! I enjoy it so much and there is just something about turning an idea in my head into a reality that always puts a smile on my face! It’s been raining here for the last few days but the temps are warming up for sure! Have an awesome weekend! Hugs!
What a transformation. It turned out super cute. I love going to thrift stores and finding a deal. I’ll have to keep this one in mind. Pinning for future reference.
Thank you so much, Patti! Finding deals at our local thrift stores has been few and far between lately, but when it happens it’s so much fun!!! Good luck thrifting!