
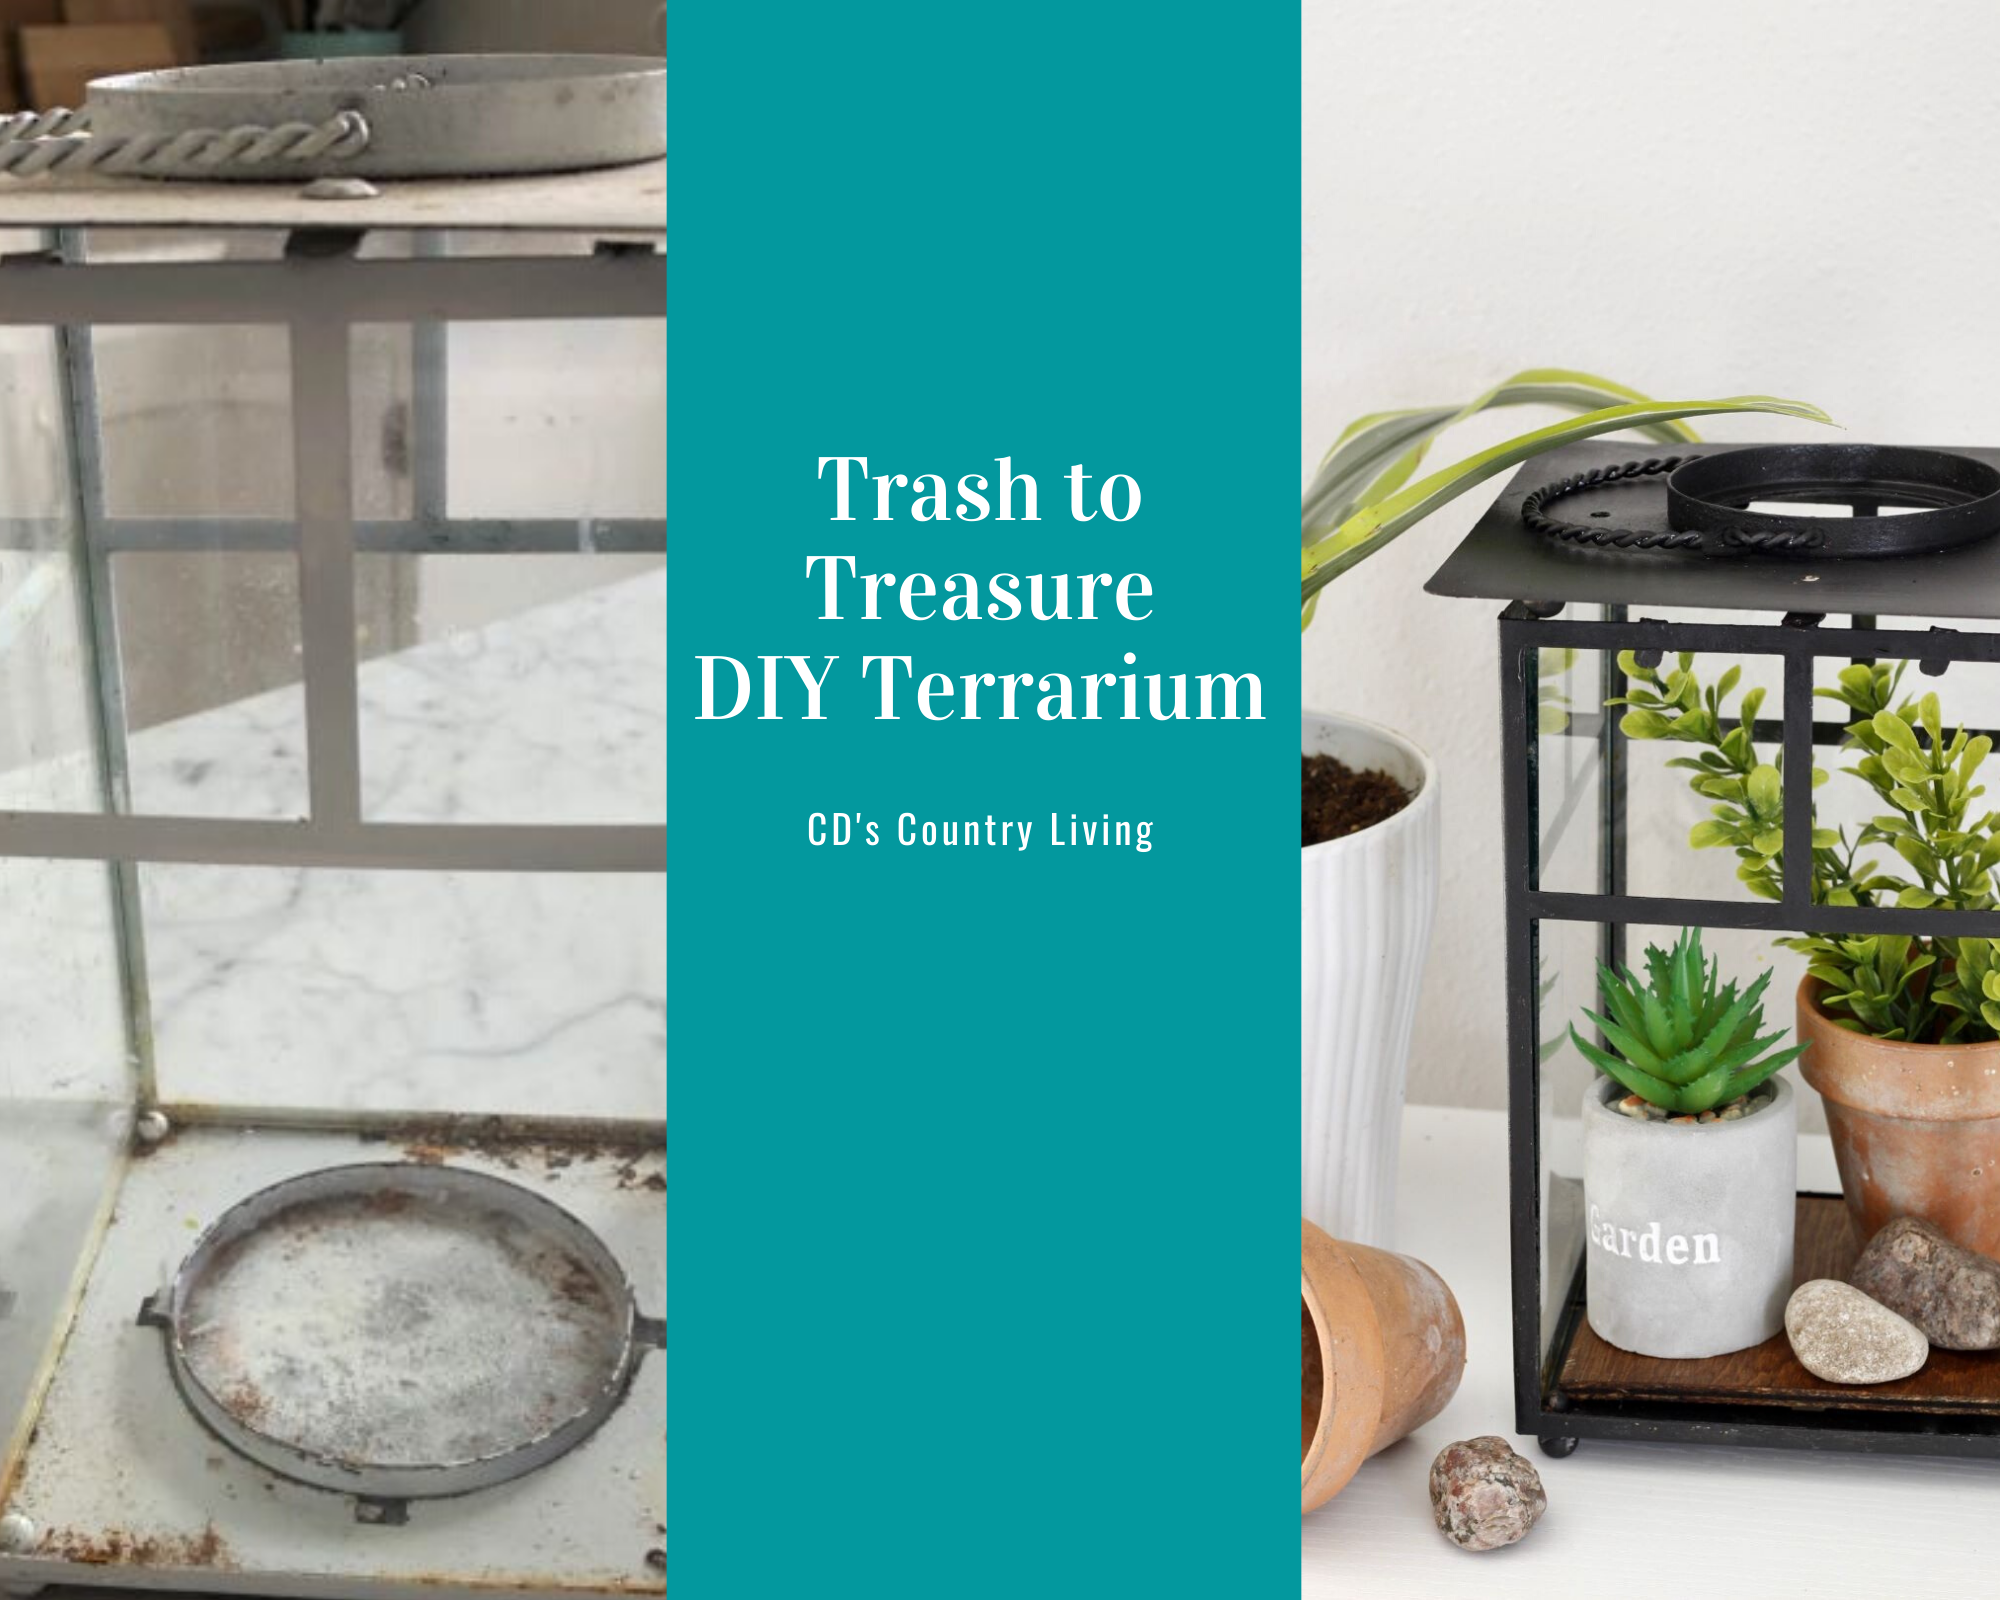
Trash to Treasure- DIY Terrarium!
How to Create an indoor garden terrarium using a rusty old lantern!
Hello, sweet friends!
I hope today’s post finds you all well!
I’m super excited about this DIY because it’s something I’ve been wanting to do for some time now!
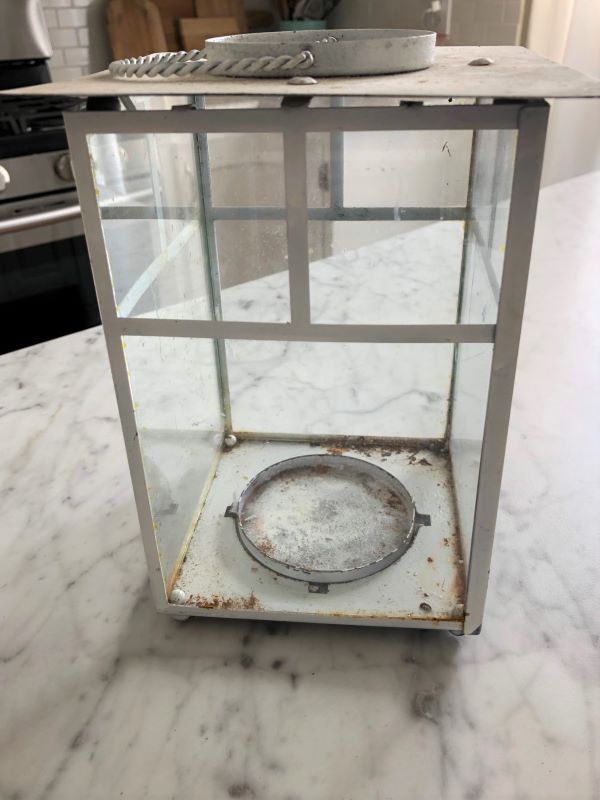
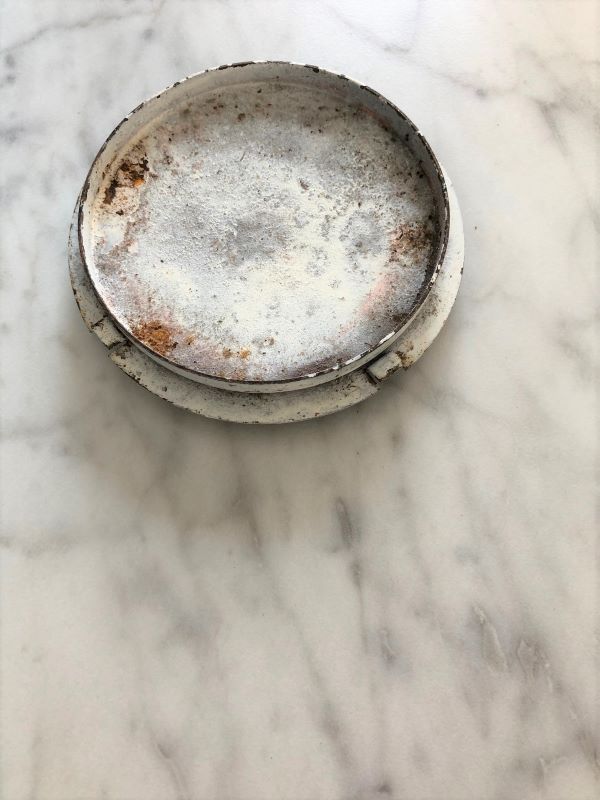
It all starts with this rusty old lantern! I bought it YEARS ago and used it on our back deck for many of those years. The weather and years were obviously not kind to the lantern, and yet, I didn’t have the heart to throw it away. All it needed was a good coat of spray paint and it would be brand new! Right? Well, that was easier said than done.
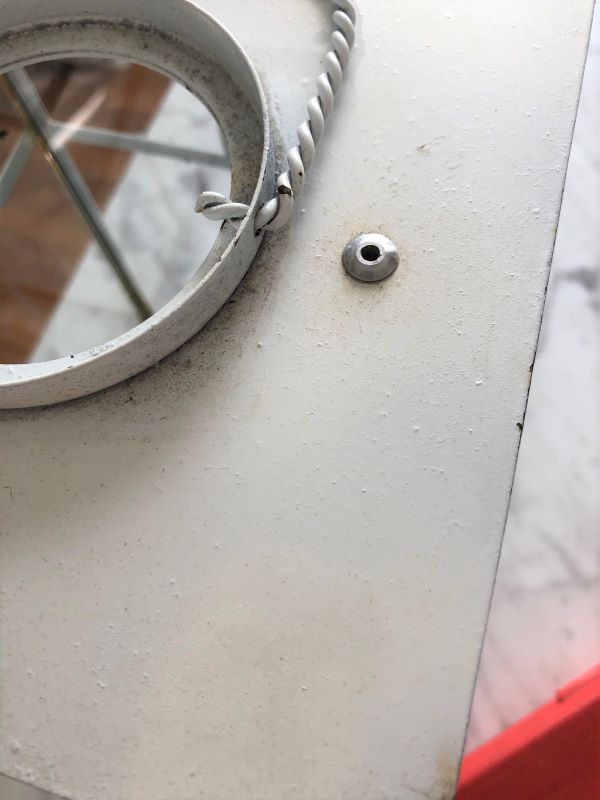
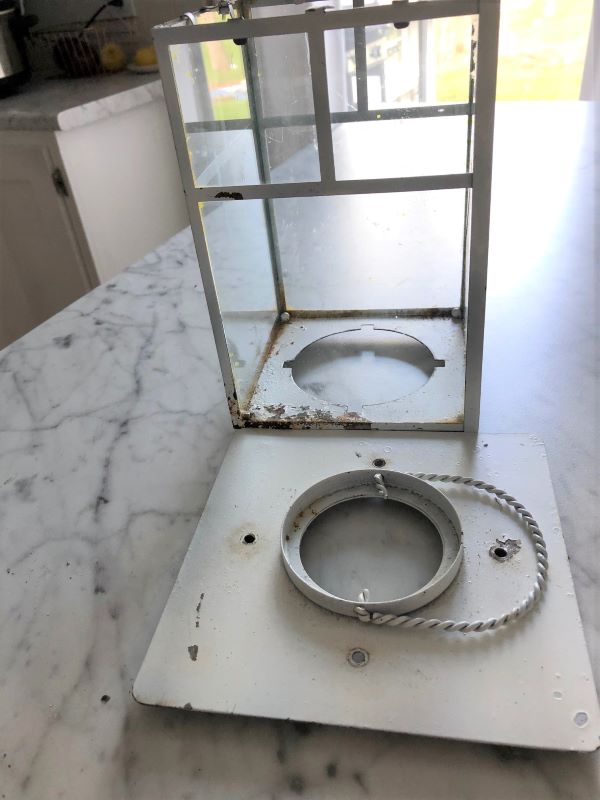
To take the lantern apart (and remove the glass panels) to paint it, required removing the rivets on the top! That is where the challenge came in! They were stuck and I mean GOOD!
After several (very gentle) attempts with a drill so as not to break the glass, I was still unsuccessful. That’s when I called in Michael for assistance!
The good part of this story is he was able to remove the rivets. The bad part of the story? One of the panes of glass broke!
UGH!!!
I seriously could have cried at that moment because I really wanted to give the lantern new life, so we could use it on the back deck again this year. But it wasn’t to be.
I suppose most folks would have probably thrown that poor lantern in the garbage. But not this girl.
That lantern was getting a makeover with or without the broken pane!! But it wasn’t going to be a lantern anymore.
NOPE! I decided right then and there that this poor rusty-and now broken lantern was going to become…wait for it!
A TERRARIUM!!!
It’s something I’ve always wanted to make but for some crazy reason never did!
Since I would need access to add and remove plants for watering or replacement, the broken pane was perfect! And so was this lantern after all!
Materials/Supplies Needed:
(Affiliate Links to products used may be provided for your convenience. You can find our full disclosure here.)
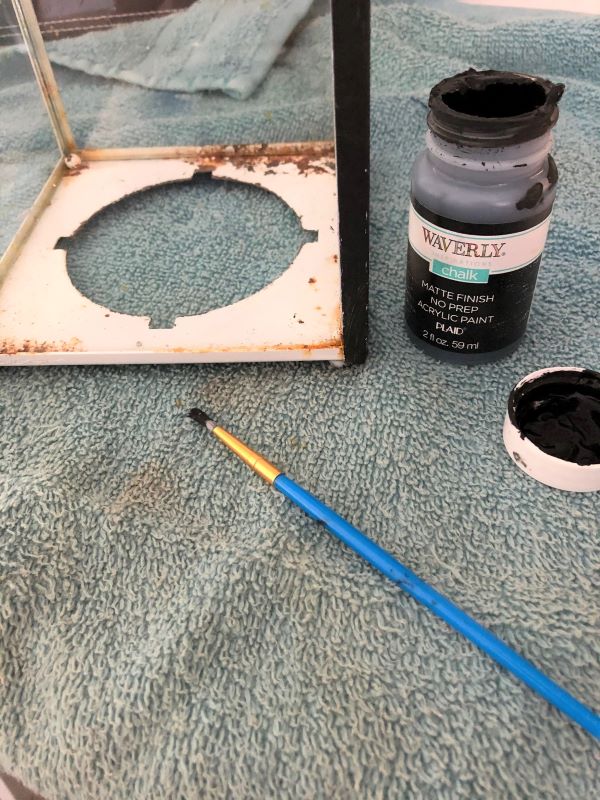
Paint (I used Waverly Chalk Paint-Black) You could also use spray paint but it was 28 degrees outside so that wasn’t an option!)
Paintbrush (small artist brush)
Pliers
Pre-cut piece of scrap wood
Clear Coat
how to turn a lantern into a terrarium!
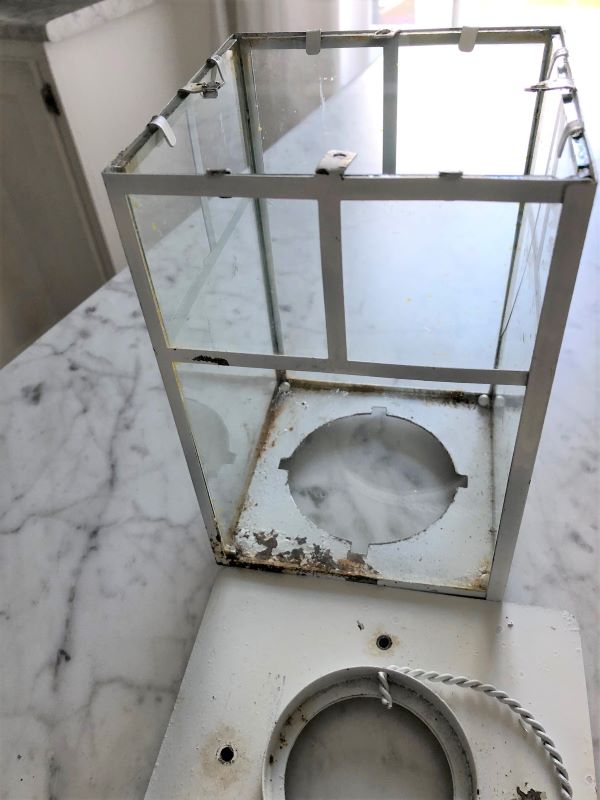
Carefully remove the glass panels
I’m not going to lie, friends. It felt like I held my breath the entire time I did this! **TIP: There really is no good way to remove the glass panes, other than S-L-O-W-L-Y!
I used small pliers and gently pulled up on the middle tab that held the top and then each of the two tabs that hold the panels in. Once they were up far enough, I pulled the glass panel forward and gently pulled up. The glass came out quite easily! (Thank goodness).
Prepare the lantern for paint
I used just simple soap and water, along with an old toothbrush to scrub away years of dirt and flakes of rust. Then I rinsed it good and let it air dry for about 30 minutes.
Paint the lantern
**The best and fastest method would be spray paint for this step but as I mentioned it was 28 degrees here so that wasn’t an option!
Instead, I used my absolute favorite paint! You can use it on anything and it coats amazingly well! I used two different small artist brushes to get into the nooks and crannies of the lantern. It took a bit more time than spray paint but it was worth it.
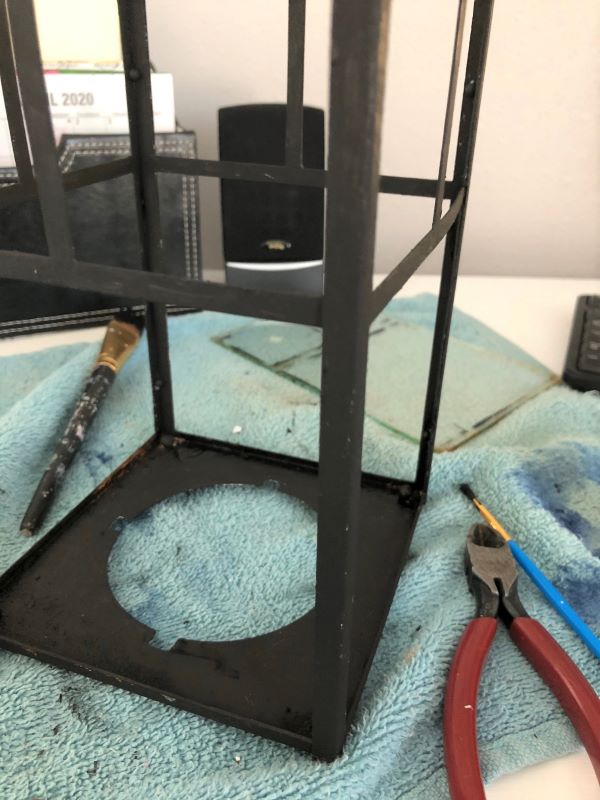
As I mentioned this paint covered well after one coat. All it required was a few touch-ups here and there. Then I let the paint dry completely for about 1 hour.
Spray the Lantern with one of Clear Coat (optional)
Thankfully the forecast called for warmer temperatures later in the week so I waited until then to take the lantern outside and give it a coat of clear coat enamel. This step is totally optional but I did it to protect the finish of the chalk paint from any wear and tear. (Moving plants in and out). If you use a good spray paint you can probably skip this step.
Measure and cut a piece of wood for the bottom of the lantern.
This step is totally optional too but this was the bottom the lantern began with. I’ve always had trouble keeping it on plus I wanted a different look.
Sorry, I didn’t take a picture of this step (my bad). But basically I measured the bottom of the lantern from the inside to the inside and then cut a piece of scrap wood I had in Michael’s scrap pile to fit.
Stain the wood
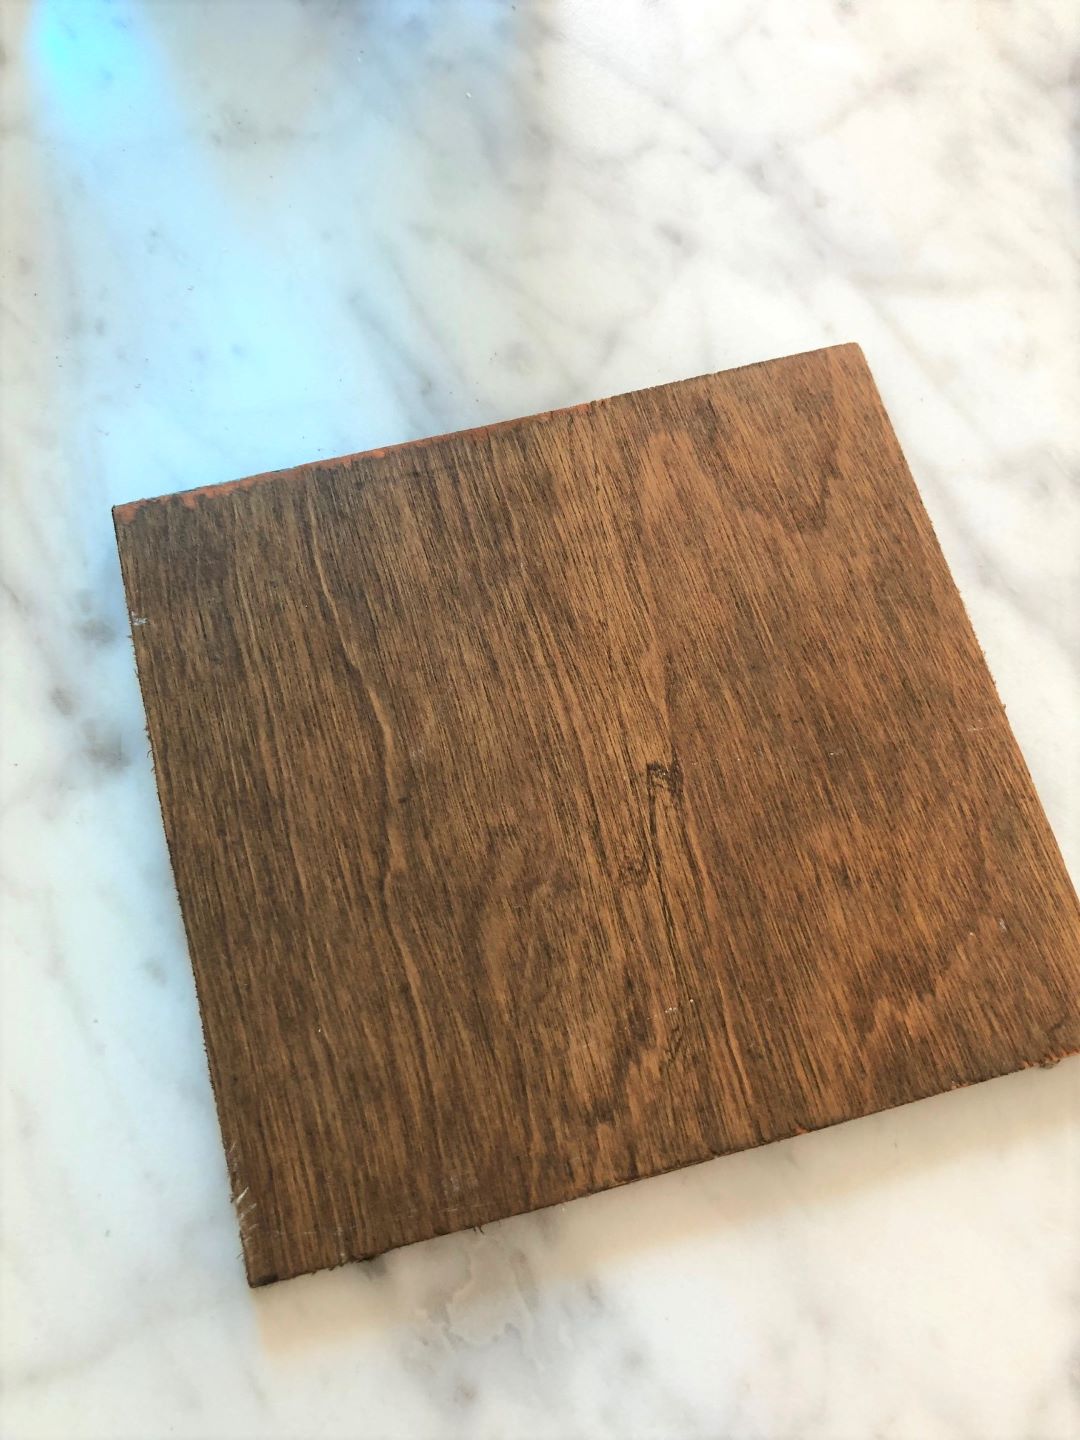
I grabbed my favorite stain color (Early American) and gave this inexpensive piece of wood one coat. Then I let it dry completely. (about 30 minutes)
Clean your glass panes
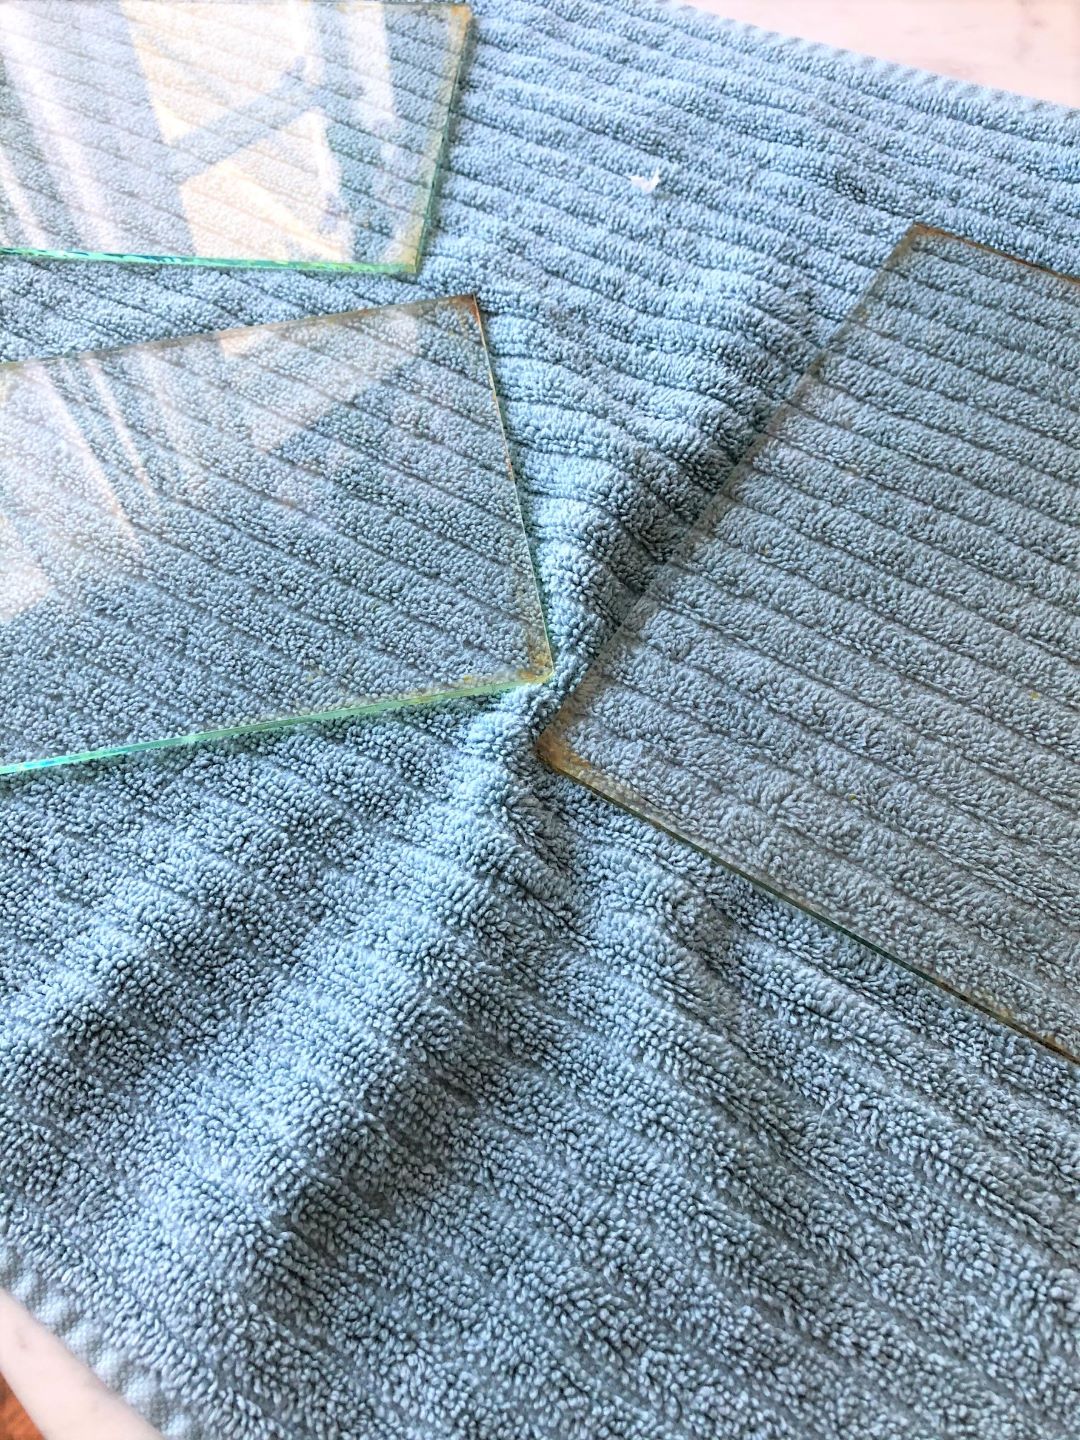
Initially, I just used soap, water, and a good scrub brush to remove the grime and goo that had built up on the glass. ***Be careful of the sharp edges
Then I took a solution of vinegar and water and sprayed each panel and wiped them clean.
Reassemble the Lantern
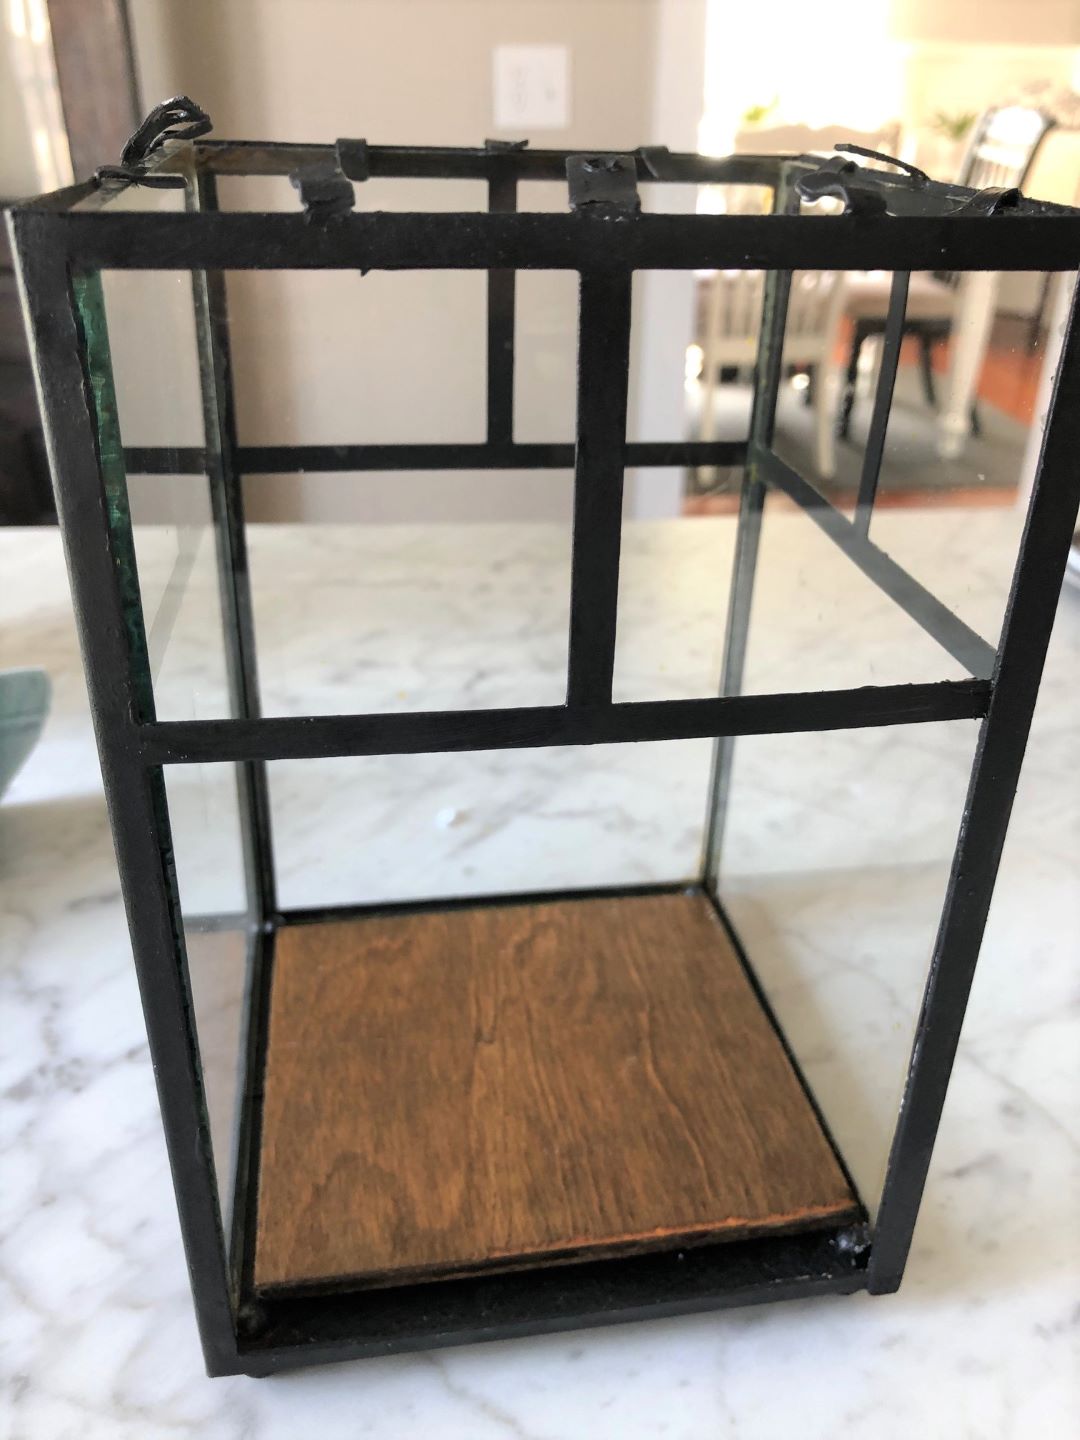 I held my breath through the entire process of putting the glass panes back in again. LOL! You just need to work slowly and carefully. Just set the glass pane in place and then gently bend down on the tabs until they just barely touch the glass. When all the panes are in, set your wood bottom in place.
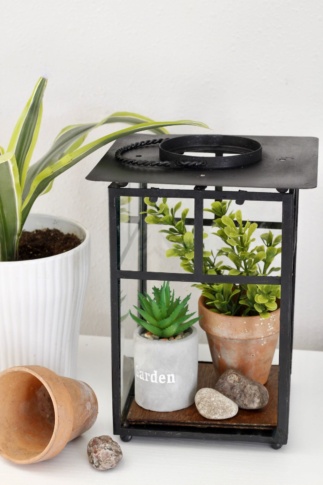
Fill your Terrarium!
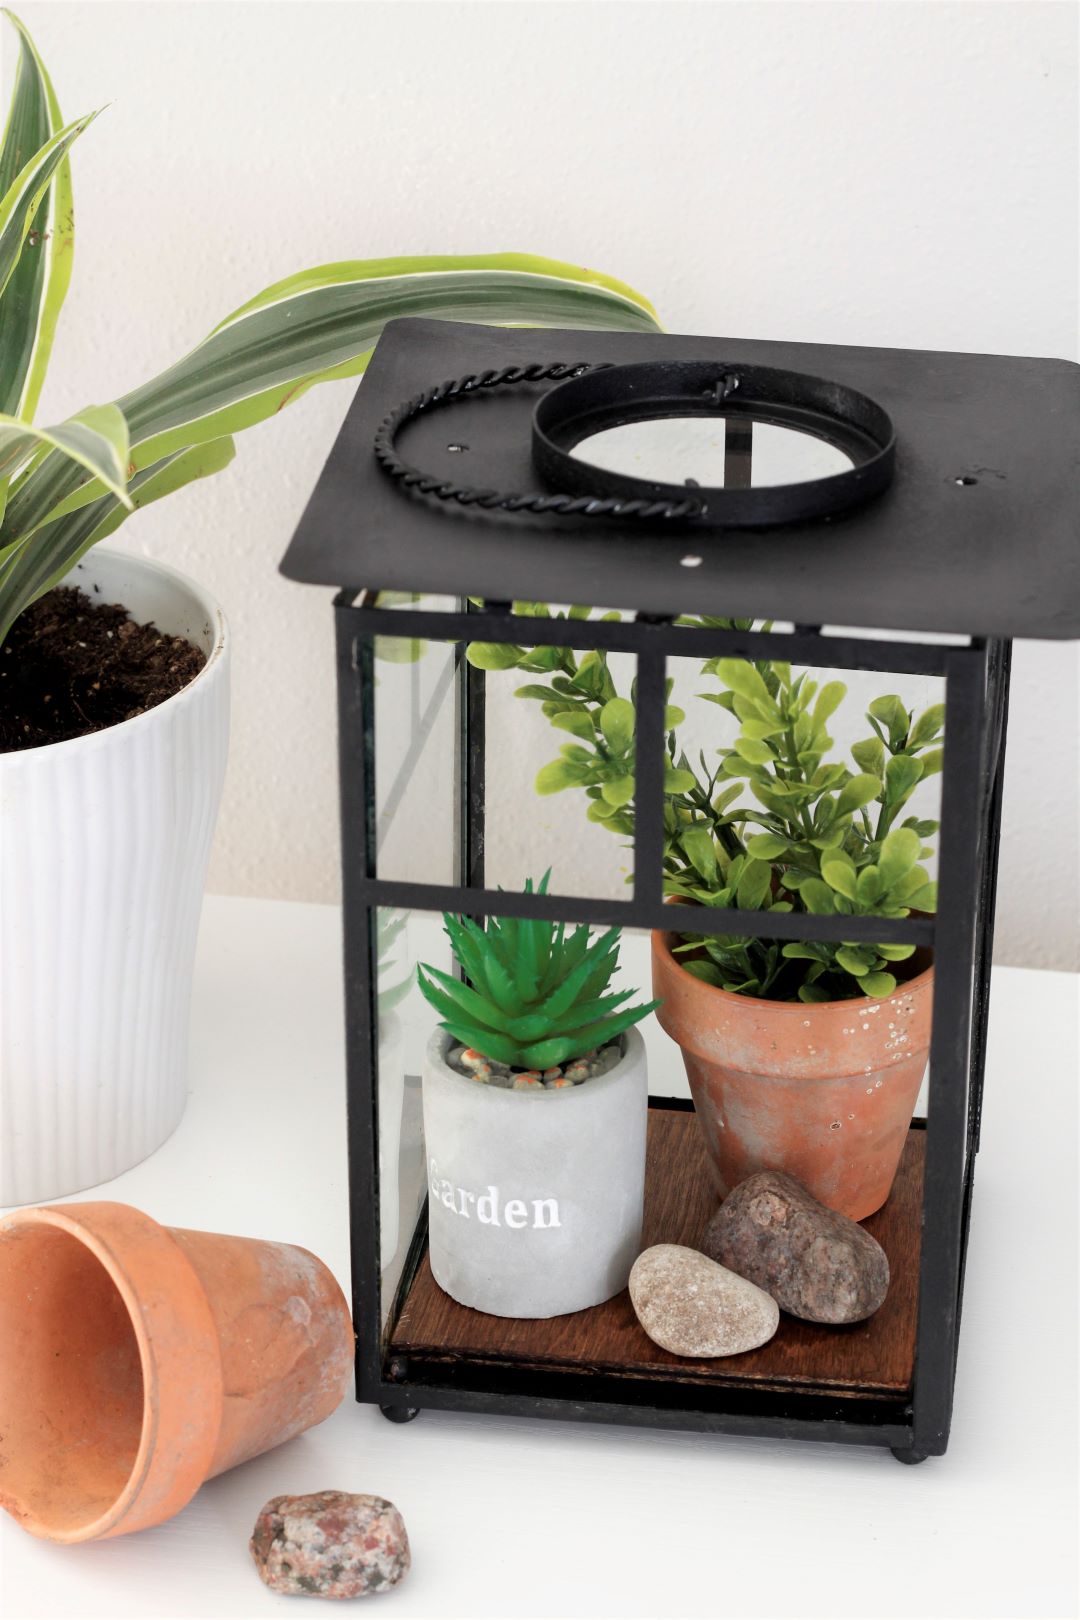
My plan is to put a few REAL succulents in here whenever this pandemic is over and I can pay my favorite garden nursery a visit! But for now I just added a few mini faux plants and some rocks from my outdoor garden.
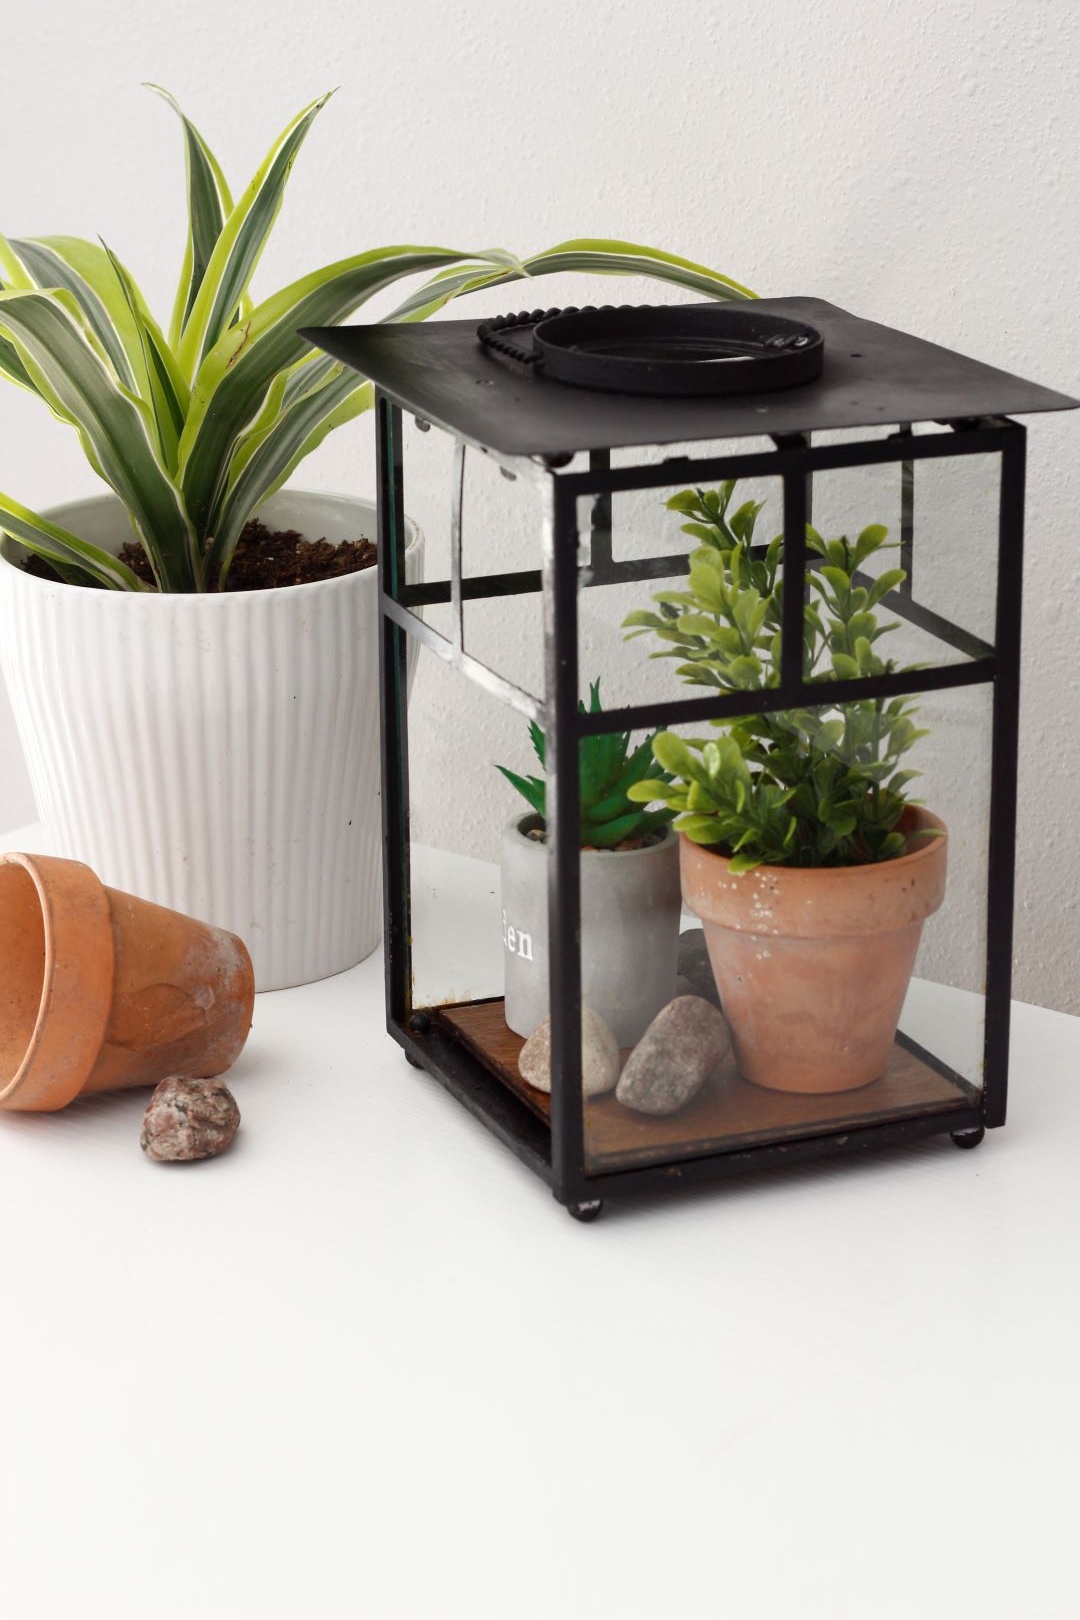
I really LOVE the rustic look of my DIY Terrarium, and I’m super thrilled that I was able to save and give new purpose to that old rusty lantern!
I’d like to think that glass pane breaking was meant to be. After all, if it hadn’t I’d probably still never have a terrarium!
I hope today I’ve inspired you to look at those old-rusty items a bit closer before you throw them away! Why not give them a fresh coat of paint or a new purpose?
Trash to Treasure-DIY Terrarium!

If you liked this Trash to Treasure-DIY Terrarium check out these posts!


Thank you so much for stopping by!
Stay Well!


At Christmas I took our faded lantern to update and while removing the glass I was a wreck. Thankfully I didn’t break it however I kept thinking even if the glass did break I could easily turn this into something fun like you have. This terrarium is a great idea and later if you get tired of that you could switch it out with an ivy plant and use as a hanging planter. It’s neat how you’re always thinking outside the box and sharing your creativity with others. Love!
That’s a great idea, Carole! Thank you! Yes, it was quite the challenge removing that glass but I’m so glad it worked out! Every time I look at that terrarium I can’t help but smile! It was just meant to be! Have a great weekend!
This is so cute!!! It’s a good thing the glass broke or you wouldn’t have such a cute terrarium. ? I love the little succulents inside. I have an old lantern very similar that’s just collecting dust. Now I know what to do with it!
Hopefully you’ll be able to get to the nursery soon. Have a great weekend!
Oh my goodness Thank you, Michelle, I can’t wait to be able to get out of the house and do ‘normal’ things! I’m sure it’s the same for you! Thankfully the weather here is warming up so I’ll be out in the gardens working for awhile! Have fun creating with your lantern! The skies the limit!
My weakness is lanterns and painting. Any time I can get my hands on a lantern I bring it home….same as painting, anytime I can paint something I do it. ha! I love the look of your revamped lantern. Looks so much better black and great idea adding the wood to the bottom. Happy Friday Christine.
Thank you so much, my friend! I’m the same way with paint, Terrie! I seriously think anything can be fixed with just a coat of it! LOL! Have an awesome weekend!
Your terannium is beautiful so glad you saved it you have given me an ideas for mine thanks for sharing
Thank you so much, Mary! I’m so glad I saved it too! This was such a fun project and I’m so glad it inspired you! Have a fabulous day!
YOU COULD JUST GO TO A GLASS PLACE AND HAVE A NEW PANEL CUT. YOUR WORK PAID OFF THE LANTERN IS BEAUTIFUL.
Thank you so much! You are SO right though, Gert! I could definitely have done that but I guess my busy little brain took over too quickly and I thought of another way to use it!