
Spring Stencil Challenge!
Happy Monday, ya’ all!
I hope you don’t mind if I interrupt our regularly scheduled Monday Morning Musing post-for a little DIY!

I’m over the moon excited to be teaming up with eight AMAZINGLY creative bloggers- for another DIY challenge!

This time it’s all about SPRING!!
That magical time of year when the robin’s come home to roost.
Trees begin to bud.
And tulips, daffodil’s and crocus (just to name a few)burst through the cold-hard ground-in search of a warmer-brighter sun.
Soon those pretty flowers will be in bloom and then it will be time for planting!
That is the inspiration for our Spring DIY Challenge.

I’ll admit I was a bit worried when I found out the challenge involved stenciling. Let’s just say I’m still in the ‘learning’ process. But when I found out the stencil was one of my FAVORITE quotes…I put aside my concerns and got busy planning what I would create with it.
My first thought was I wanted to make a sign, but our reclaimed woodpile was looking pretty thin-so that wasn’t an option.
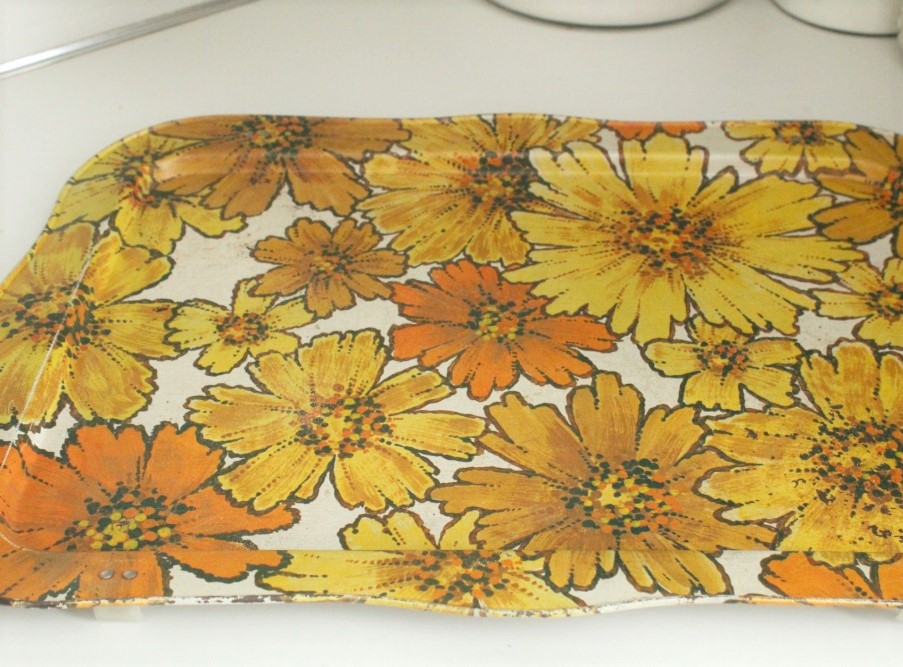
And then one day I was shopping at a local thrift store, and I found this old TV tray for $1! I’m sure everyone in the store thought I was crazy when I headed to the check out with my 70’s daisy tray-but I ignored their smirks. I had a plan. I wanted to create an aged-chippy-rusty sign which would be the perfect addition to the fence in our side garden.
***Since it was 30 degrees outside-I was forced to do my project in our basement. It’s not the brightest place for photo taking so I apologize.
(**Affiliate links are provided for your convenience. If you make a purchase we will receive a small commission at no cost to you. Thank you for supporting our blog and family.)
Materials Used:
- Rust-Oleum White and Black Flat Spray Paint
- Poly-Clear Coat
- Paint Brushes
- Foam Brush
- 60 grit sandpaper
- Elmer’s Glue
- Foil
- White craft paint
- Stencil
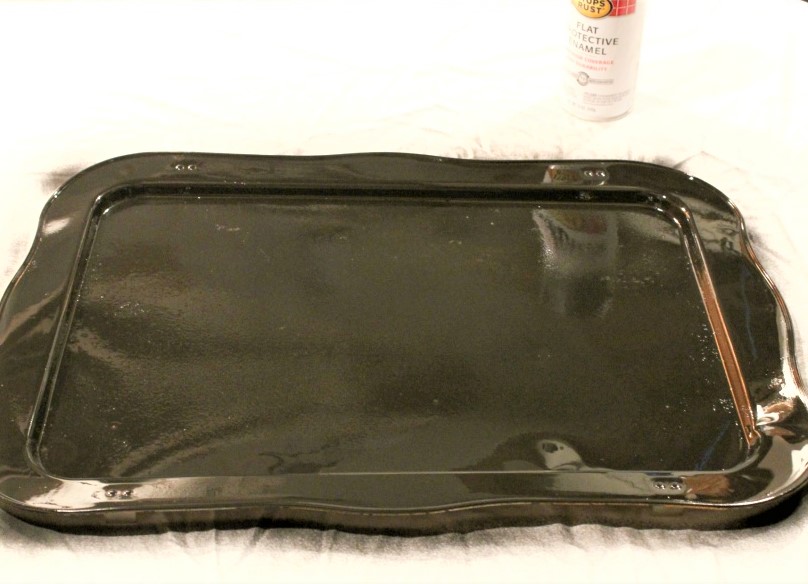
The First Step
Apply a base coat to the tray. I gave the tray one thin coat of the black flat paint-and let it dry for 2 hours. Once dry-I sanded down the tray and applied one more coat. I let this coat dry overnight.
Step Two:
Aging the tray. I started with an ‘age’ old paint technique (LOL)-using Elmer’s Glue. I brushed a thin coat of glue in spots that I wanted just a bit of crackle-and thicker coats where I wanted more crackle. When the glue started to get tacky (about 3 minutes)-I sprayed my topcoat on using the flat white paint.
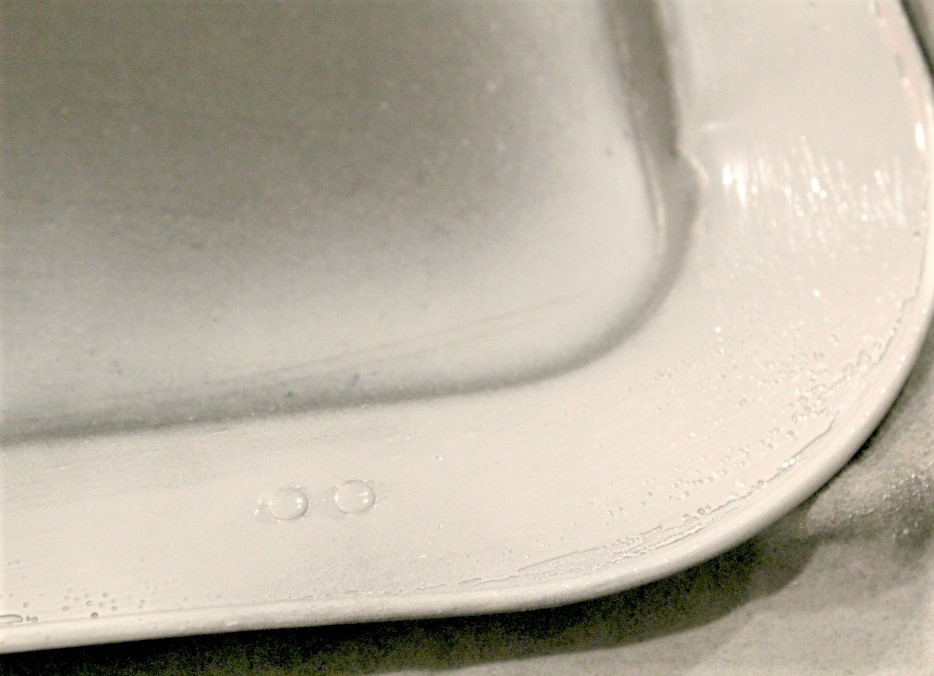
The areas that I had placed a think coat of glue almost immediately started to crackle.
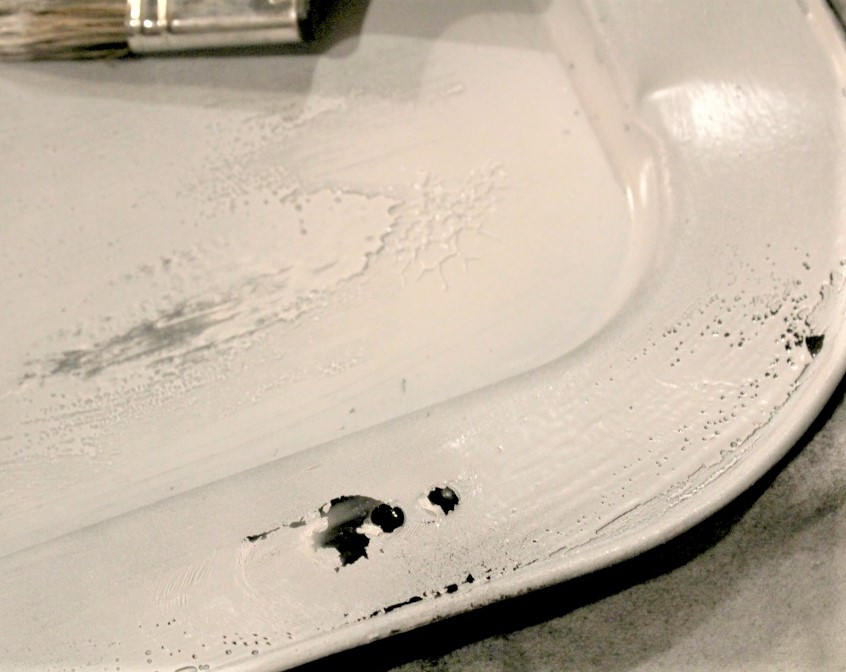
The thicker glued areas took a bit longer. I allowed them to dry for about 5 minutes or so, and then I began dragging my brush over those spots-which caused some of the topcoat to pull away-which is exactly what I wanted! YIPPEE!!! Once I had the effect I was looking for-I allowed the top coat to dry overnight.
Step Three:
-Add your wording.
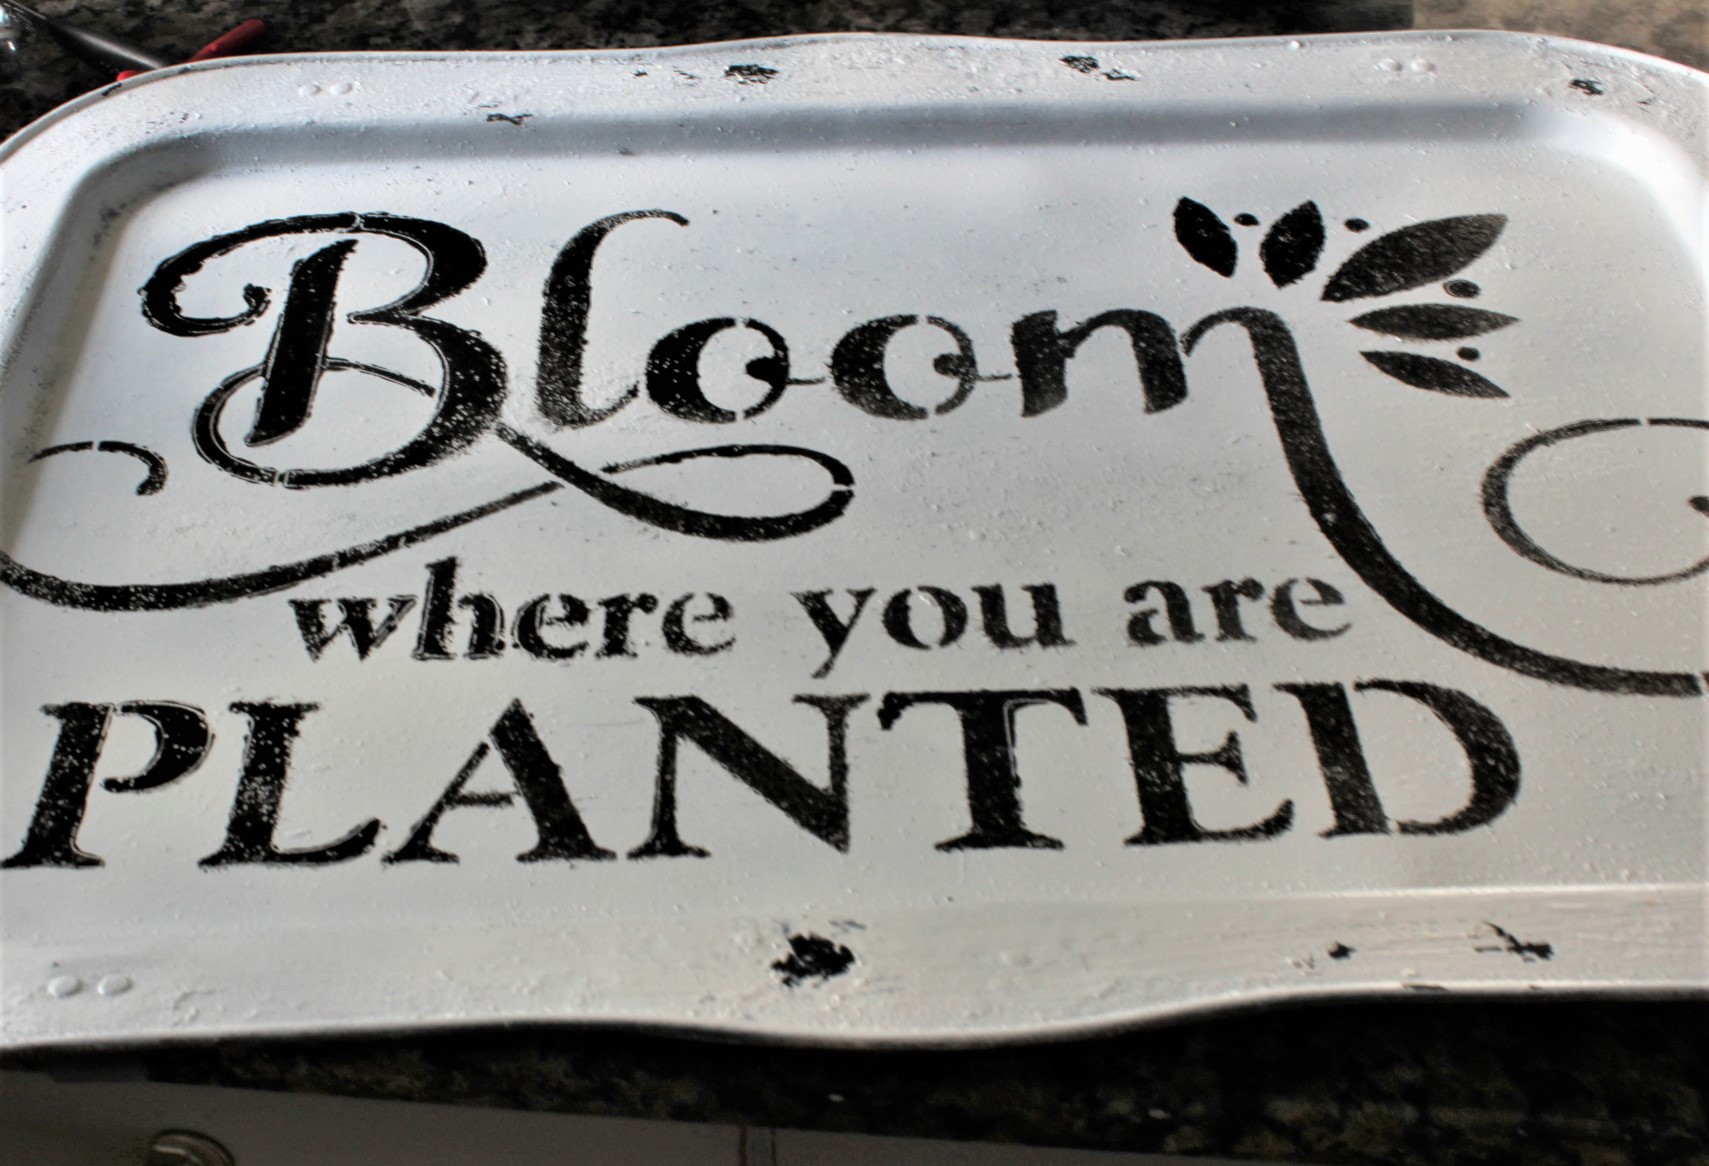
My first attempt didn’t go so well. (I told you I’m still learning!)
Step Four:
Age the lettering to match the rest of the sign.
I started by smudging white craft paint with a foam brush-around the loopy loops, and a few of the letters. I was looking for that mottled look that comes from plenty of wear and tear. Next, I lightly sanded the entire stencil-more in some sections and less in others.
I let the letters dry for about 2 hours, and then I brushed a think coat of glue over sections of the letters and loopy-loops. Again, once the glue had reached the tacky stage-I sprayed on the Poly-Clear coat. I let this dry overnight and then it was ready to hang!
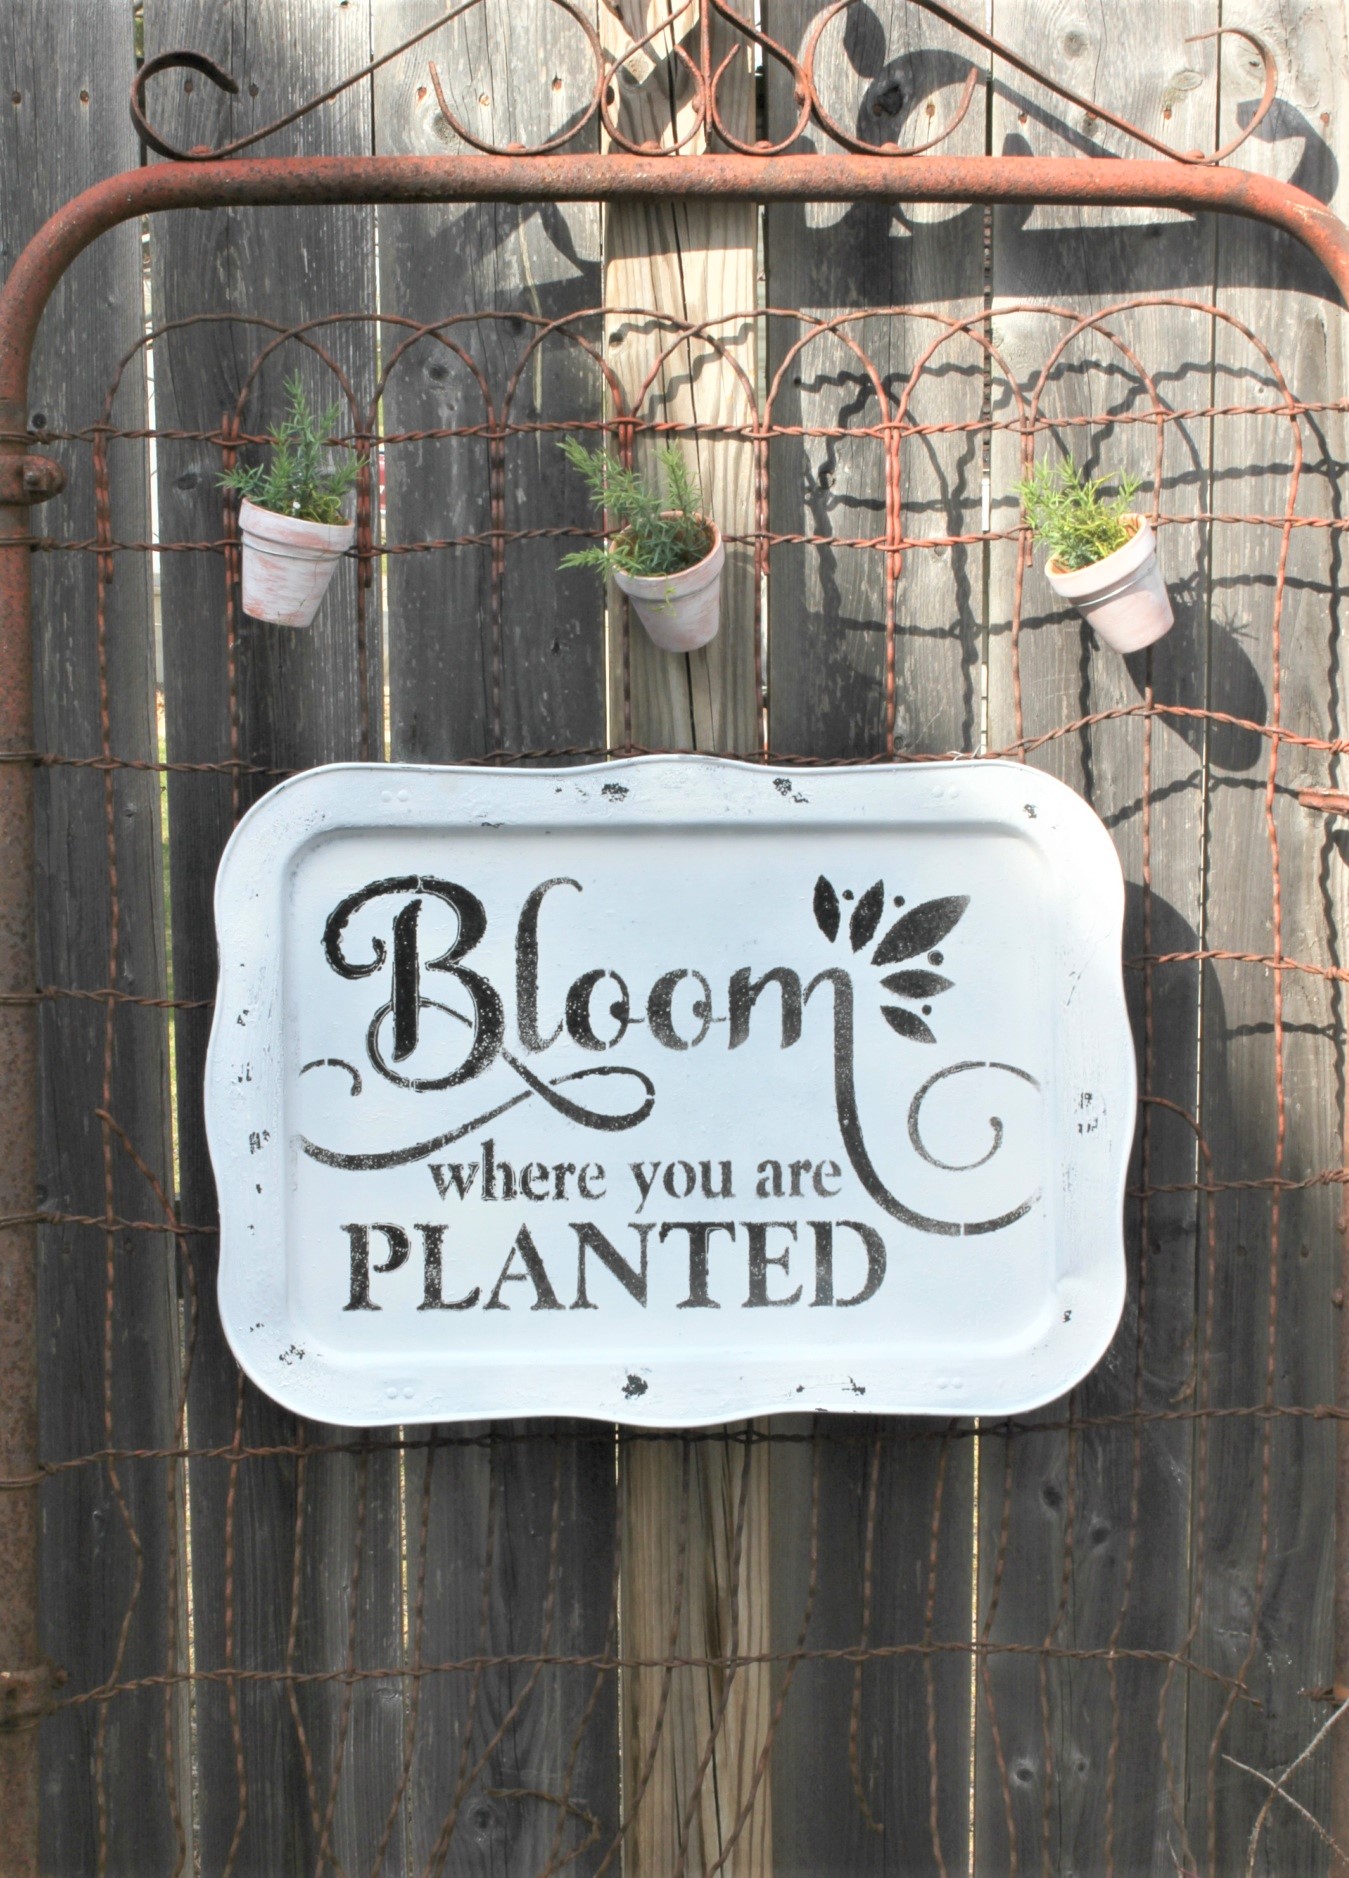
Hubby picked up this old rusty gate last year at a rummage sale. I thought it would be the perfect backdrop to my aged garden sign! Since the Tv Tray had the hooks on the back for latching to the metal holder-I simply ran some wire between the hooks-bent the ends and wrapped them around the wire on the fence. Then I pinched the wire ends closed with pliers.
When the weather warms up (it was a crisp 32 when I hung the sign)-I plan on hanging cute pots with pretty annuals from the gate, but for now, I used a few chippy terracotta pots with faux greenery.
What do you think of my re-purposed tv tray-garden sign?

You can check out what all the other gals did with their stencil by clicking the links below!

Happy Spring!!!
Blessing and hugs,

Hi CD,
What a fun sign. I love the rustic, vintage feel and it looks fab on the rusted old gate. Looking forward to working with all of you this summer for the next challenge. Oh, and I love your little collage of us, too fun!
I think this is a neat project, my aunt had TV trays just like the one you found at the thrift store. Very clever and I like the crackling effect it adds a neat level of detail. The white against the rust is weathered fence is great.
So cool and vintage decor! I love love it! Please link this precious post at my Dream Create and inspire party! I love the rust fence! Maria
That TV tray was a real find. I love how you transformed it for the garden, and that crackling effect looks so great against the rust. Well done.
Thank you, Angela! I’m so glad you like it! The crackling effect takes time and patience, but for me, it is so worth it!
Thank you, Maria! That rusty fence is one of my most cherished treasures! I will definitely stop by your party!
Thank you, Carole! I’m so glad you invited me to be a part of this challenge! It was so much fun!!
Thank you, Patti! This challenge was so much fun, and I’m definitely looking forward to working with you all again in the summer!
Love this idea. Looks so nice with the gate.
Thank you, Bon Bon!
Thank you for the detailed tutorial on the crackling effect. I had no idea you could use glue.
This is such a rustic looking garden tray. I love it!
You’re very welcome, Susan! For me, it’s the best way to get the crackling effect without spending big $$ for extra product! I always have glue on hand! Thank you so much for stopping by! It was fun working with you! Have a great week!
This is so cute CD! And I love the little planters hanging on the gate. Happy Spring!
Aw thanks, Meredith! I’m so glad you liked it! Happy Spring to you-and I hope you have a fabulous week!