Knock Off Challenge-Pottery Barn Inspired Floor Mirror!
Hello, sweet friends! Today I’m joining our wonderful host, Terrie from Decorate and More with Tip, along with six other talented ladies for another DIY Challenge. This one is all about finding an inspiration store-bought decor piece (usually high end) and recreating it!
If you’re coming over from B4 & Afters, Welcome! I’m just amazed at Liberty’s knock-off chandelier! WOW! It is truly gorgeous!
I saw this floor mirror in one of the sale promotional emails I get from Pottery Barn. Guess what the clearance price was? $313.99!!! OUCH!

Well, I’ve been wanting to make a pretty floor mirror out of this inexpensive mirror that used to hang on the back of my home office door for some time now. Unfortunately, with everything else going on, it just didn’t seem like a priority. Now I had an excuse to get it done!
Of course, it was going to take a little work to get my inexpensive mirror to look anything like the inspiration one. Thankfully, someone in this household(Michael) bought himself the perfect tool this past Christmas. It was going to make this project a lot easier!
So let’s get started!
(Affiliate links provided for your convenience. You can read our full disclosure here!)
Materials/Supplies Needed to create Pottery Barn Inspired Floor Mirror!
Basic Full-Length Mirror ($6.99) @Target
For the Frame:
(2) 1″x 2 5/8″x 64 1/2″ Pine (we had this on hand but you can use any wood you prefer)
(2) 1″ x 2 5/8″ x 15 3/16″ Pine
For the easel back support:
(2) 1″ x 2″ x 42″ Pine
(1) 1″ x 3 1/2″ x 16 3/16″ Pine
Table Saw
Miter Saw
Sandpaper ( 60 & 120 grit)
Drill
Square
(8) 1/2″ wood screws
(2) 2 ” hinges
(12) 1 1/4″ Kreg screws
Mirror Mounting Clips (We made our own but it’s much easier just to buy)
Rust-Oleum Black Paint (Flat)
Putting it all together!
- Cut your 1 x 4’s to size for the frame and easel support. (See above for our measurements)
Michael wanted to use that small piece of wood in the center for a hanging bracket just in case I decided I wanted to do that later. Unfortunately, the wood was warped so we nixed the idea.
TIP: Lay your frame pieces out and do a test run with your mirror to make sure it fits. You don’t want to find out AFTER you do the detailed work that it doesn’t!
2. Sand your frame and easel pieces.
We started with 60 grit and then finished with 120 because that is all we had on hand. I would definitely use a higher grit for finishing if you have it. It just makes the wood so much smoother.
3. Put the frame and easel together using the Kreg Jig.
Having a Kreg Jig tool is not necessary for this project but it sure makes it a WHOLE lot easier to put the frame and easel together! It also ensures a sturdier mirror because you create solid joints. The kit Michael bought comes with everything you need to create the joints and then screw the pieces together.
4. Paint and poly the frame and easel pieces.
I gave each piece a coat of black paint. Then I allowed it to dry for about 1 hour and gave them another coat. I then allowed them to dry overnight. The next day I applied one coat of clear poly (matte finish) to protect the paint from chipping.
(Note: Michael decided to test his skills with his routing tool and made these clips for the back of the mirror! He’s so darn talented!)
5. Center the mirror on to the frame
Place the frame front side down and then place your mirror face down on top. Align both the top and the sides so that the metal casing around the mirror is hidden inside the frame.
6. Mount the hinges onto the easel back support and attach them to the frame
First we pre-drilled the holes and then sunk the screws. (carefully) We needed to set the screws without splitting the wood which was not easy to do. I let Michael start the first side while I held my breath. Thankfully, my side went just fine too.
7. Attach the mirror clips to hold the back of the mirror in place.
As I mentioned Michael made clips using scrap wood, a router, and some 1/2 ” wood screws. These clips come in all shapes and sizes and materials. I just recommend using clips that can carry a good amount of weight and secures well to the width of your mirror.
8. Clean the glass and use your mirror!
I’ll be honest, friends. I think the hardest part of this project was taking photos! Seriously, I never realized how difficult it is to take a picture of a mirror!!! No matter what angle you choose you’re going to have some reflection! So after moving the mirror around in practically every corner of our house, I finally just went with it.
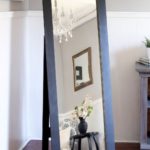
I absolutely LOVE how this floor mirror turned out! Having the easel support allows many different angles. But if I just want to lean it up against the wall, it folds up behind the mirror too!
The total cost for our version of the mirror was $0! Because we had all of the materials, including the mirror!
I hope you enjoyed today’s Knock Off Challenge!
If you’re looking for more knock off’s check out these posts!
Don’t forget to check out the other AMAZING ladies knock off’s! Links are at the bottom of this post!
Thanks so much for stopping by!
Decorate and More with Tip | Cloches and Lavender | B4 and Afters | CD’s Country Living
Sew Sassy by Paula | Patina and Paint | Blessings by Me | Through a Vintage Door





Christine what an awesome job. I was just sitting here thinking of all the bathroom vanity mirrors we’ve taken off the wall and gotten rid of. They would have been perfect for this! Great job. So pretty!
What a beautiful floor mirror! I didn’t quite see how the easel was attached to the back? Great choice for a knockoff project!
Liberty
Ouch! Ouch!! Don’t mind me this is the sound you would be hearing because I just dropped a mirror like this off at the Goodwill because I didn’t have a use for it. Dang it!!
I love how your mirror looks and the tutorial you provided. It looks exactly like the inspirational mirror. Kudos to you and Michael. Awesome job. Yes….mirrors are not a very good thing to photograph.
Thanks for joining me in this challenge. So happy you didn’t back out.
Thank you so much, Liberty! Attaching the easel to the frame was in Step 6. I added an additional photo to the tutorial so I hope it makes more sense now. Thanks for pointing that out.
LOL! I know, right! I probably would have just thrown mine out had I not seen that ad! Thank you so much for inviting me, Terrie! This one was so much fun!
Oh, yes hinges. And I forgot to say that I love my Kreg Jig!!
Oh my goodness, I LOVE ours too! SO much you can do with it!
Hi Christine,
Love this mirror so much. You rocked it out. Isn’t great having a man with tool? I love having my own handyman.
Your photos came out great. Again beautiful job my friend!
Cindy
This turned out beautiful! Thanks for sharing ♥
This turned out beautifully! Great job!
I would never have knows that wasn’t the real deal from Pottery Barn. Great job. Looks amazing!
Oh my goodness! Thank you so much, Cindy!
Thank you so much, Linda!
Thank you so much, Jacquie! I’m so glad you liked it!
Thank you so much, Cindy! Michael is my rock when it comes to so many things but especially these projects. Whenever I get afraid of a power tool he just chuckles and shows me what I’m doing wrong! I have a lot to learn but he’s a great teacher!
This mirror looks amazing! You did a wonderful job!
Thank you so much, Paula!!
Love your mirror , it looks so much better and that colour is fabulous!!!
Awesome!!
Teresa
Thank you so much, Teresa!
This mirror looks amazing Christine! I love how it has the PB feel at a fraction of the price. You’re always so good about giving us tips and tricks along the way. Especially when tackling DIY projects like this which I always appreciate. It’s fabulous – great job! Hugs, CoCo
Oh my goodness, Thank you so much, CoCo! You just made my day! This was such a fun project and I’m so glad you liked it!