
A step by step tutorial for removing and replacing a rotted porch column base without breaking the bank!
If you are a homeowner then you know there is always something that needs fixing, repairing or replacing.
And we all know that some of these projects cannot only be overwhelming and time-consuming, but they can also be expensive.
When we moved into this 100+-year-old home, we had a LONG list of projects. We tried our best to handle those that desperately needed our attention first and then as time and our budget could handle it we dug into those that weren’t in the ‘much needed’ category.
One such repair was the bases of our porch columns.
At first glance, the bases looked to have minor cosmetic issues. A few cracks here-chipped paint there.
Nothing too serious.
But like everything in this old home, if you look a bit deeper you’re bound to uncover a pandora box of trouble.
And boy did we!
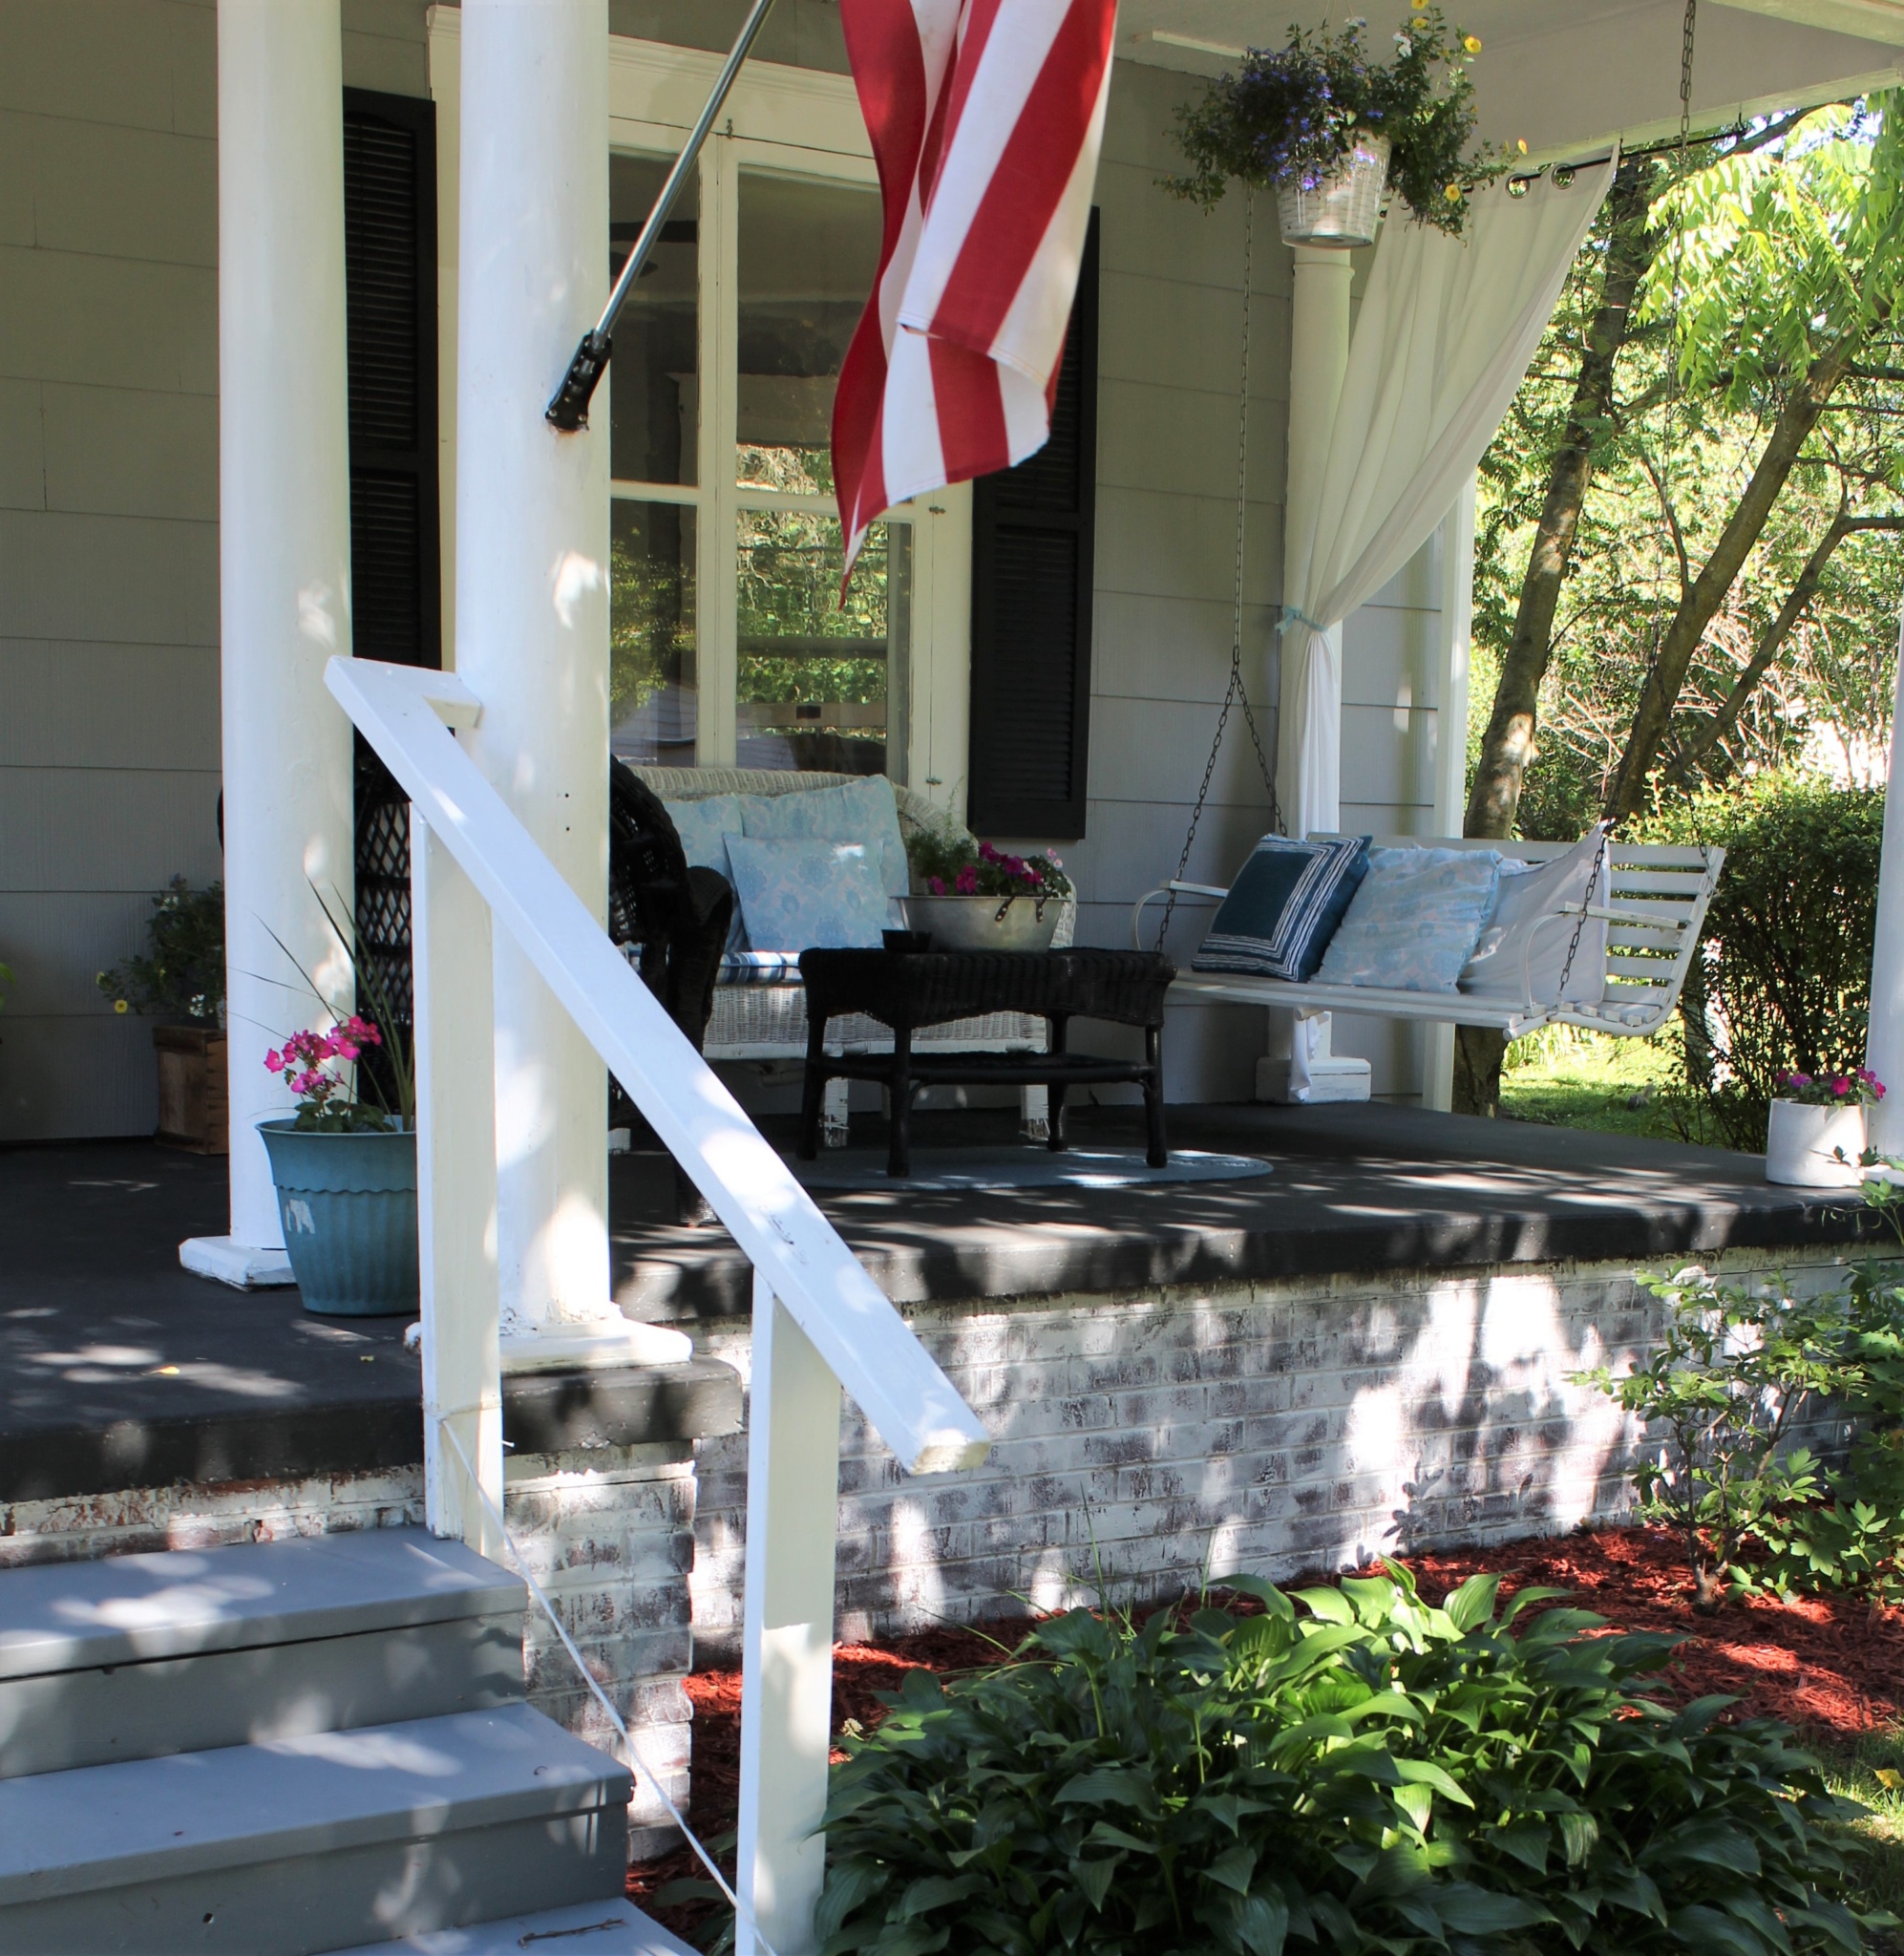
I didn’t take a close up pic of the column base before we started working on them, but here is a photo of our porch two years ago. As you can see the base wasn’t much to look at (a bit puny) and unless you look REALLY close you would never notice the real danger lurking inside-or rather above them.
The truth is a few of the column bases were completely rotten and those that were not would be soon enough. Worse yet, a few of the columns themselves were starting to rot at the bottom.
What this all meant was the porch that we enjoyed so much time on and had shared so many laughs with family and friends would soon not be structurally safe!!!
It was scary, but it was also frustrating because there was no way we could afford to replace all six of the columns.
Wood columns like ours cost at the least $200 each, and even if we went with fiberglass (which I didn’t want) they ran no less than $100!!!!!
But we couldn’t leave them as they were either.
So after a thorough inspection of each column and a bit of research, we decided this was a project we could actually do ourselves and it wouldn’t cost anywhere near what new columns would!
In our case, none of the columns were completely rotten. In fact, most of them only had minor rot. That meant we would have to make some minor adjustments to them but we wouldn’t have to replace them.
Unfortunately, all of the bases were completely rotten. They would need to be replaced.
And since all six of the bases needed replacing, I decided I wanted something more substantial.
Nothing grand or extravagant-no, that just isn’t our style or this home’s style. But I did want something that was worthy of one of our favorite place to spend time with our family and friends. I also definitely wanted something safe and secure and yes, something appealing to the eye.
It took a few hours on Pinterest but I finally came up with what I was looking for.
I will say this project is not for the beginner DIY’er. There is some skill involved (that’s Michael’s department) and it will take some time.
This project did take up the better part of a weekend.
So let’s get started!
Step One: Determine how much rot is on each column and come up with an equal measurement for length. ***This may mean that you cut off a perfectly good area of one column and, not another-but the goal is to make sure each column is level and all rot is removed.
Step Two: Mark each column to the determined length.
Step Three: Build Column Base
Since everyone has a different idea of how they want their column bases to look if ours isn’t it, then you are welcome to skip over this section. (It’s okay I don’t mind :))
For us, we wanted simple and most importantly as cost-effective as possible.
Construction of Base:
(Affiliate links for some of the products/tools we used are available for your convenience. )
Material:
(3) 2″x6″x8′ pressure treated lumber
(4)1″x8″x8′ pressure treated plywood
2 1/2″ 16 gauge finishing nails
drywall wall screws
Tools:
Cordless drill
Table saw
Air nailer
Dremel Rotary Tool Kit
Dremel Router Bit
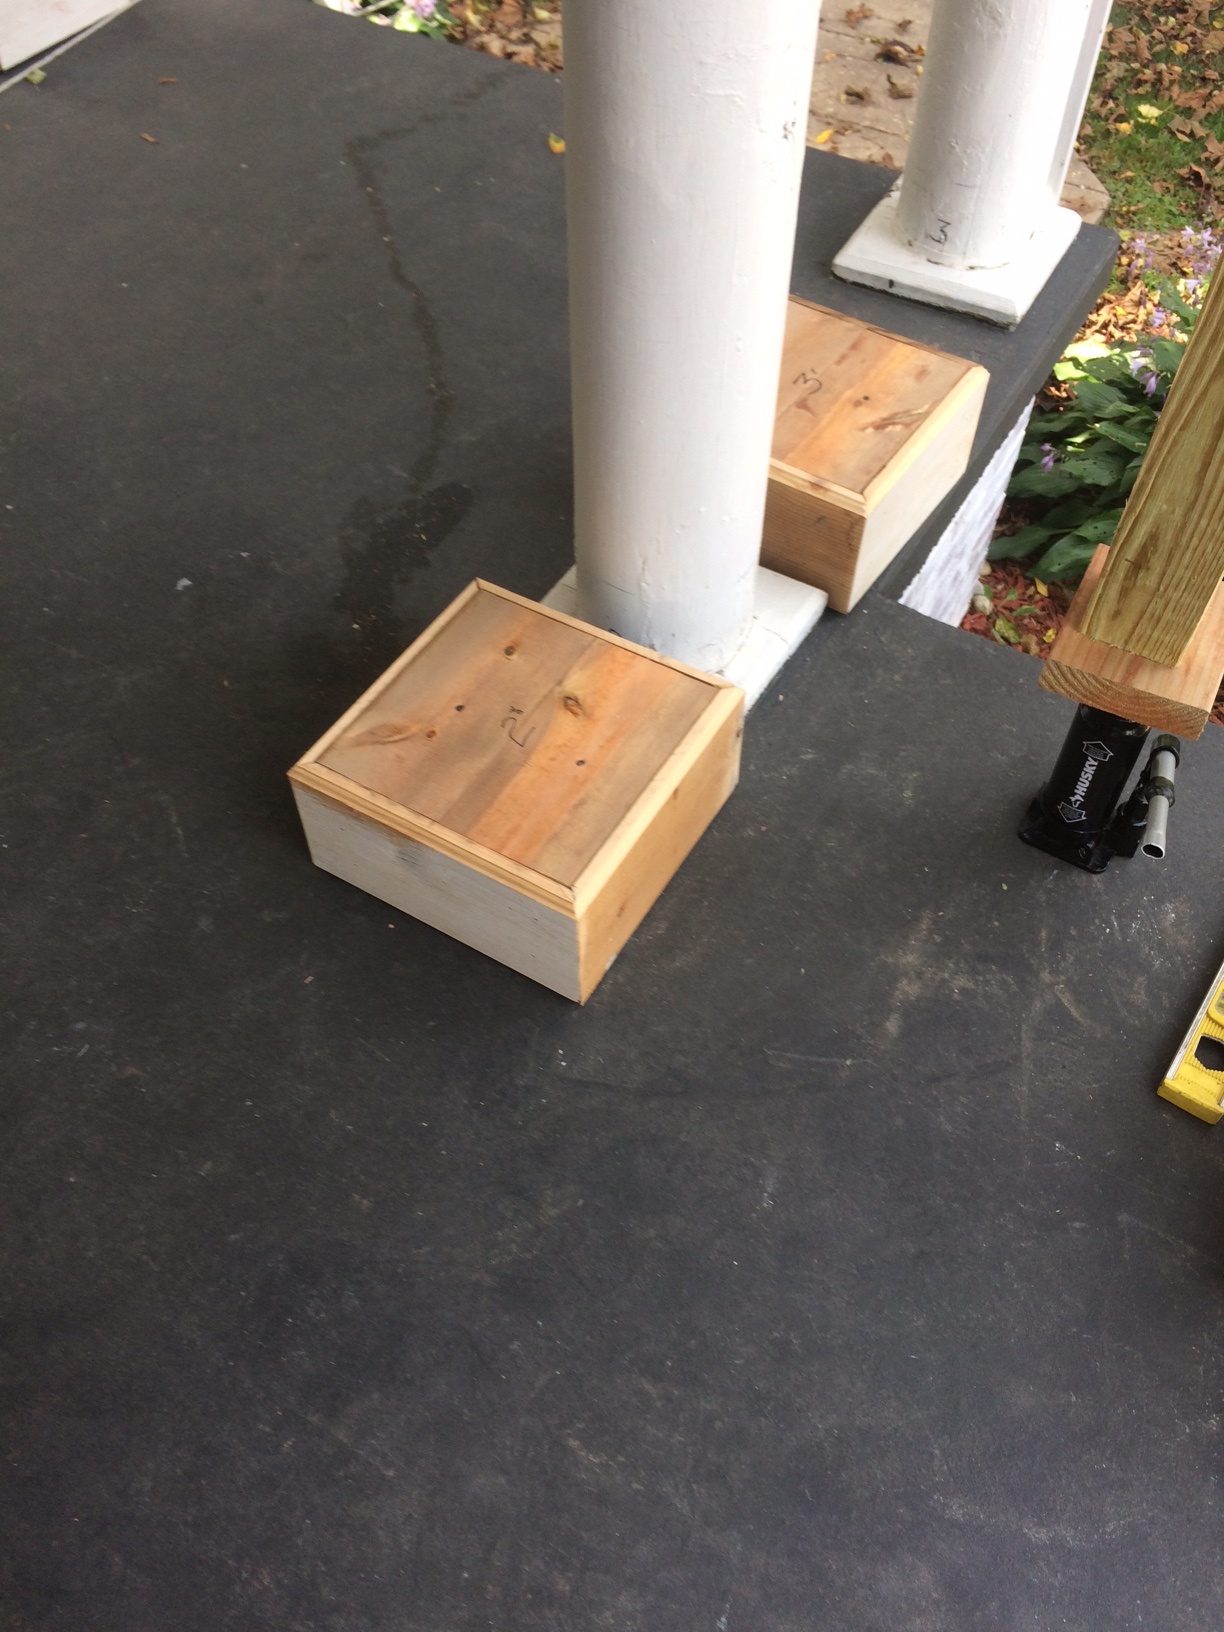
Since our design was basically a square box the construction was pretty simple. Each base measures 12″x12″ square. To start Michael cut the 2″x6″ ‘s to size for the sides and the 1″x8″ for the top using the table saw. **Note the base is hollow like the columns and there is no bottom to the base.
As Michael began assembling the sides he realized it wasn’t as sturdy as he had hoped so he created a double layer for the sides. (It took additional material and time, but we both agreed it was well worth it).
I wanted a bit more of a finished look on the top so Michael used the router and made a simple beveled edge. Once all the pieces were ready he put the sides together using the drill and drywall screws and connected the top with nails.
After all six were constructed it was time for installation.
But first came the tricky (and dangerous) part.
Step Four: Support porch roof and raise column.
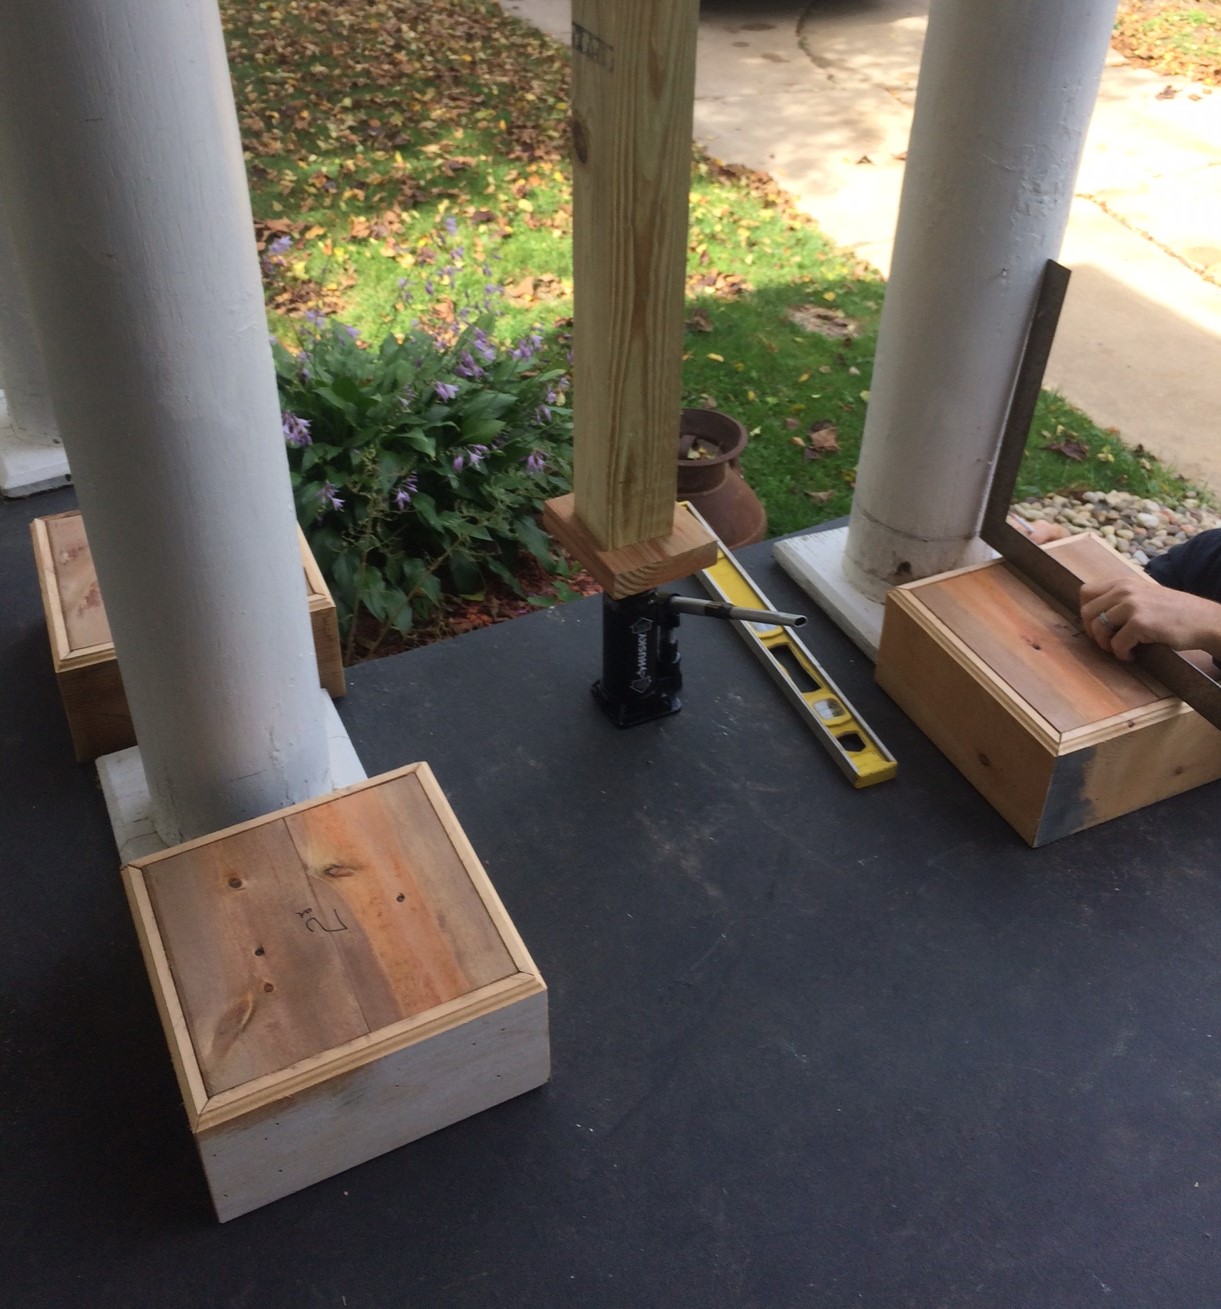
No special equipment was required for this task. All we used was a floor jack and a 4×4 post.
Step Five: Cut column with Skil saw at the pre-determined mark (see Step One)
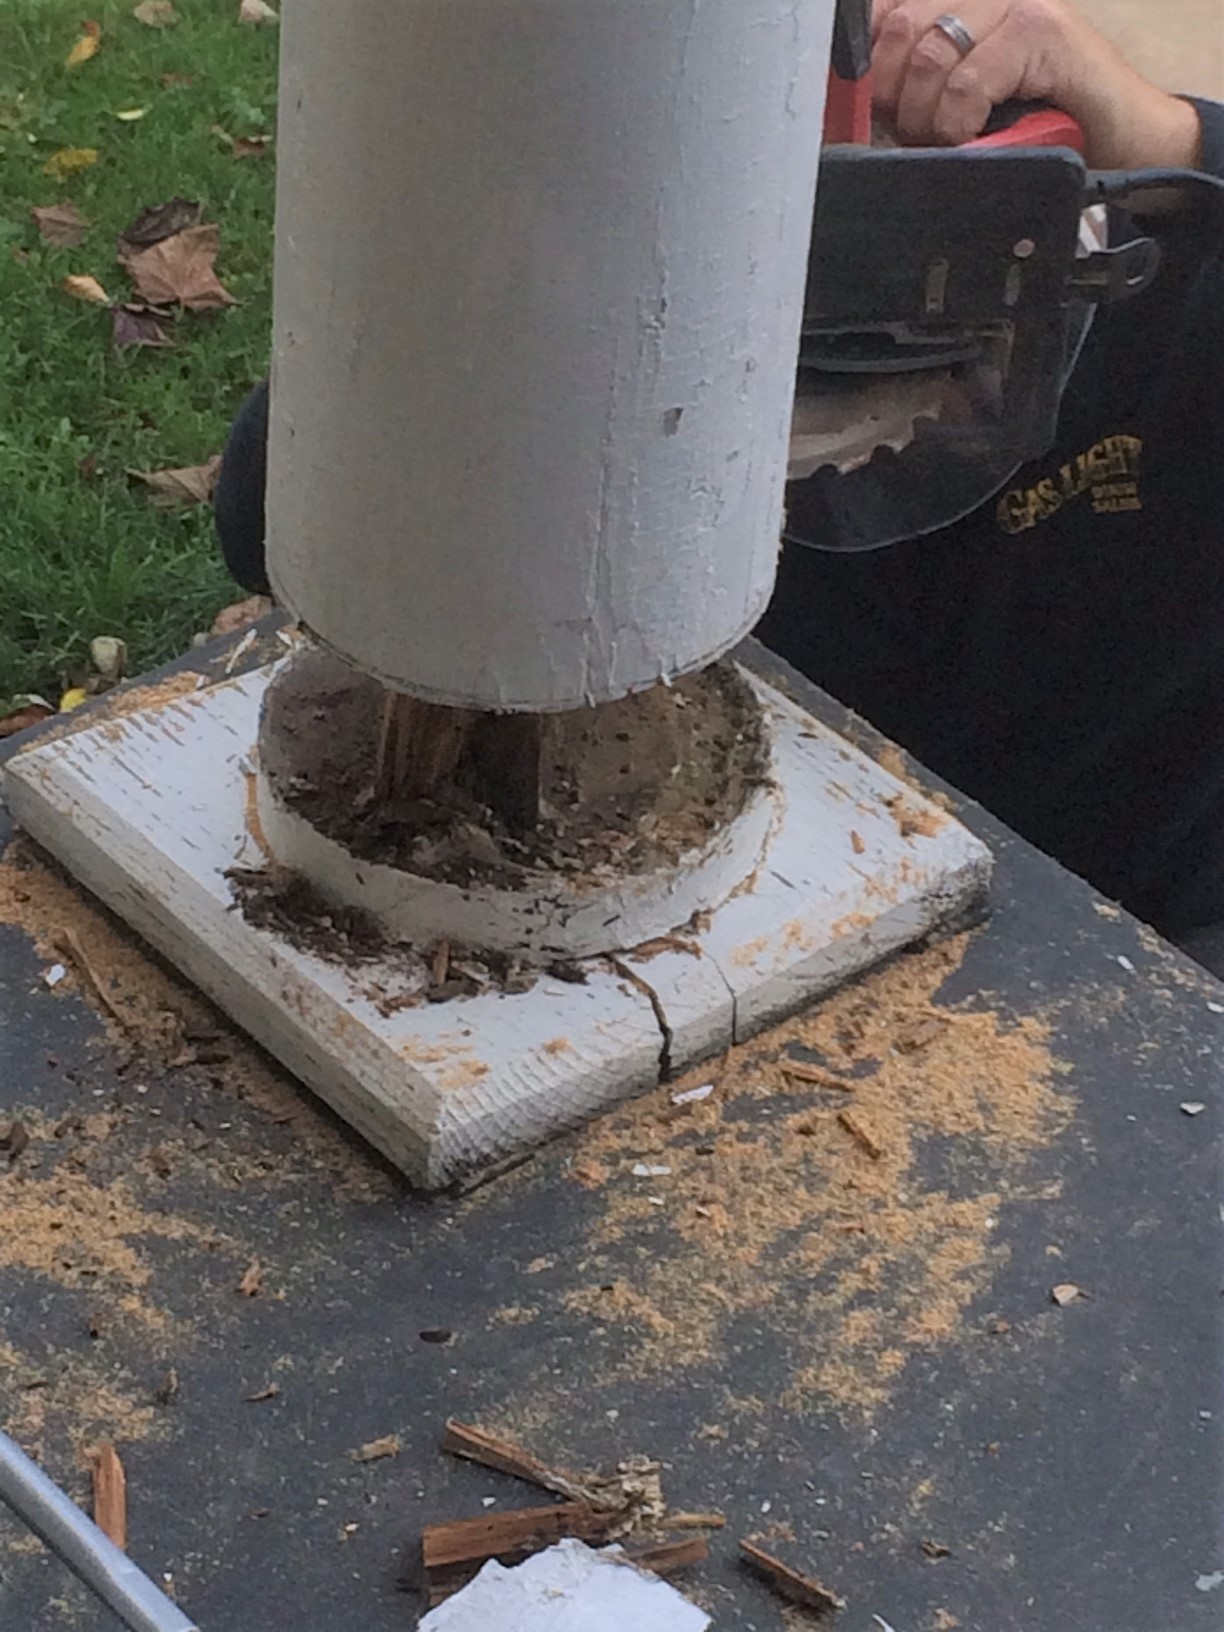
Step Six: Remove old rotted base.
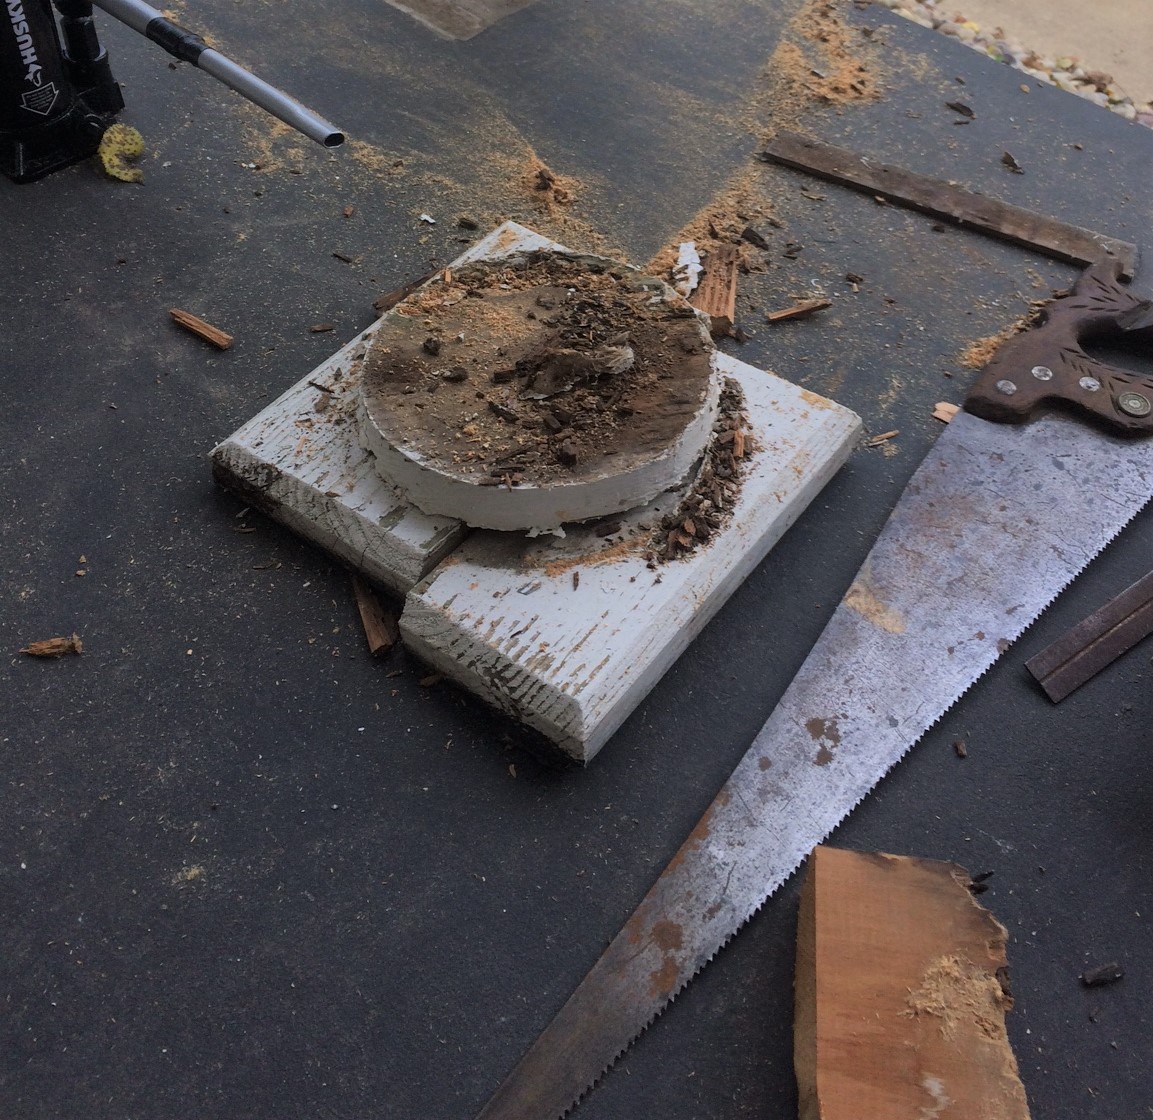
Seeing how badly rotted these bases were was shocking, to say the least! I’m not sure if the bases were original to the home but if so they certainly lasted a lot longer than anyone would expect. Especially since this was not pre-treated wood!
Now that the old is gone it’s time for the new!!!
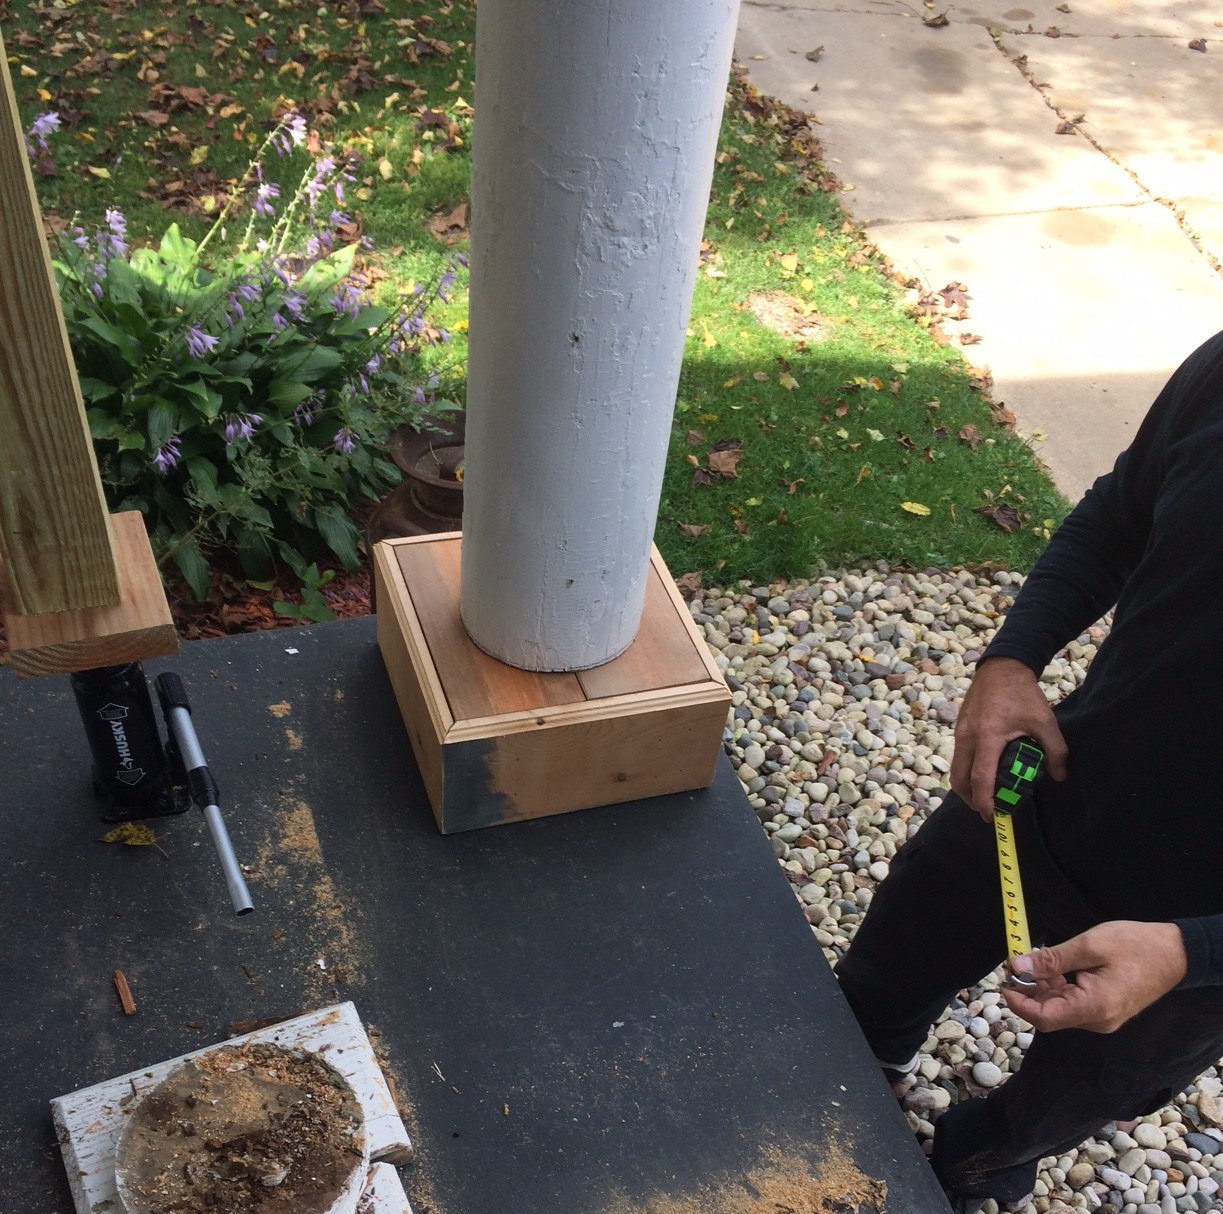
Step Seven: Install and Square up each base.
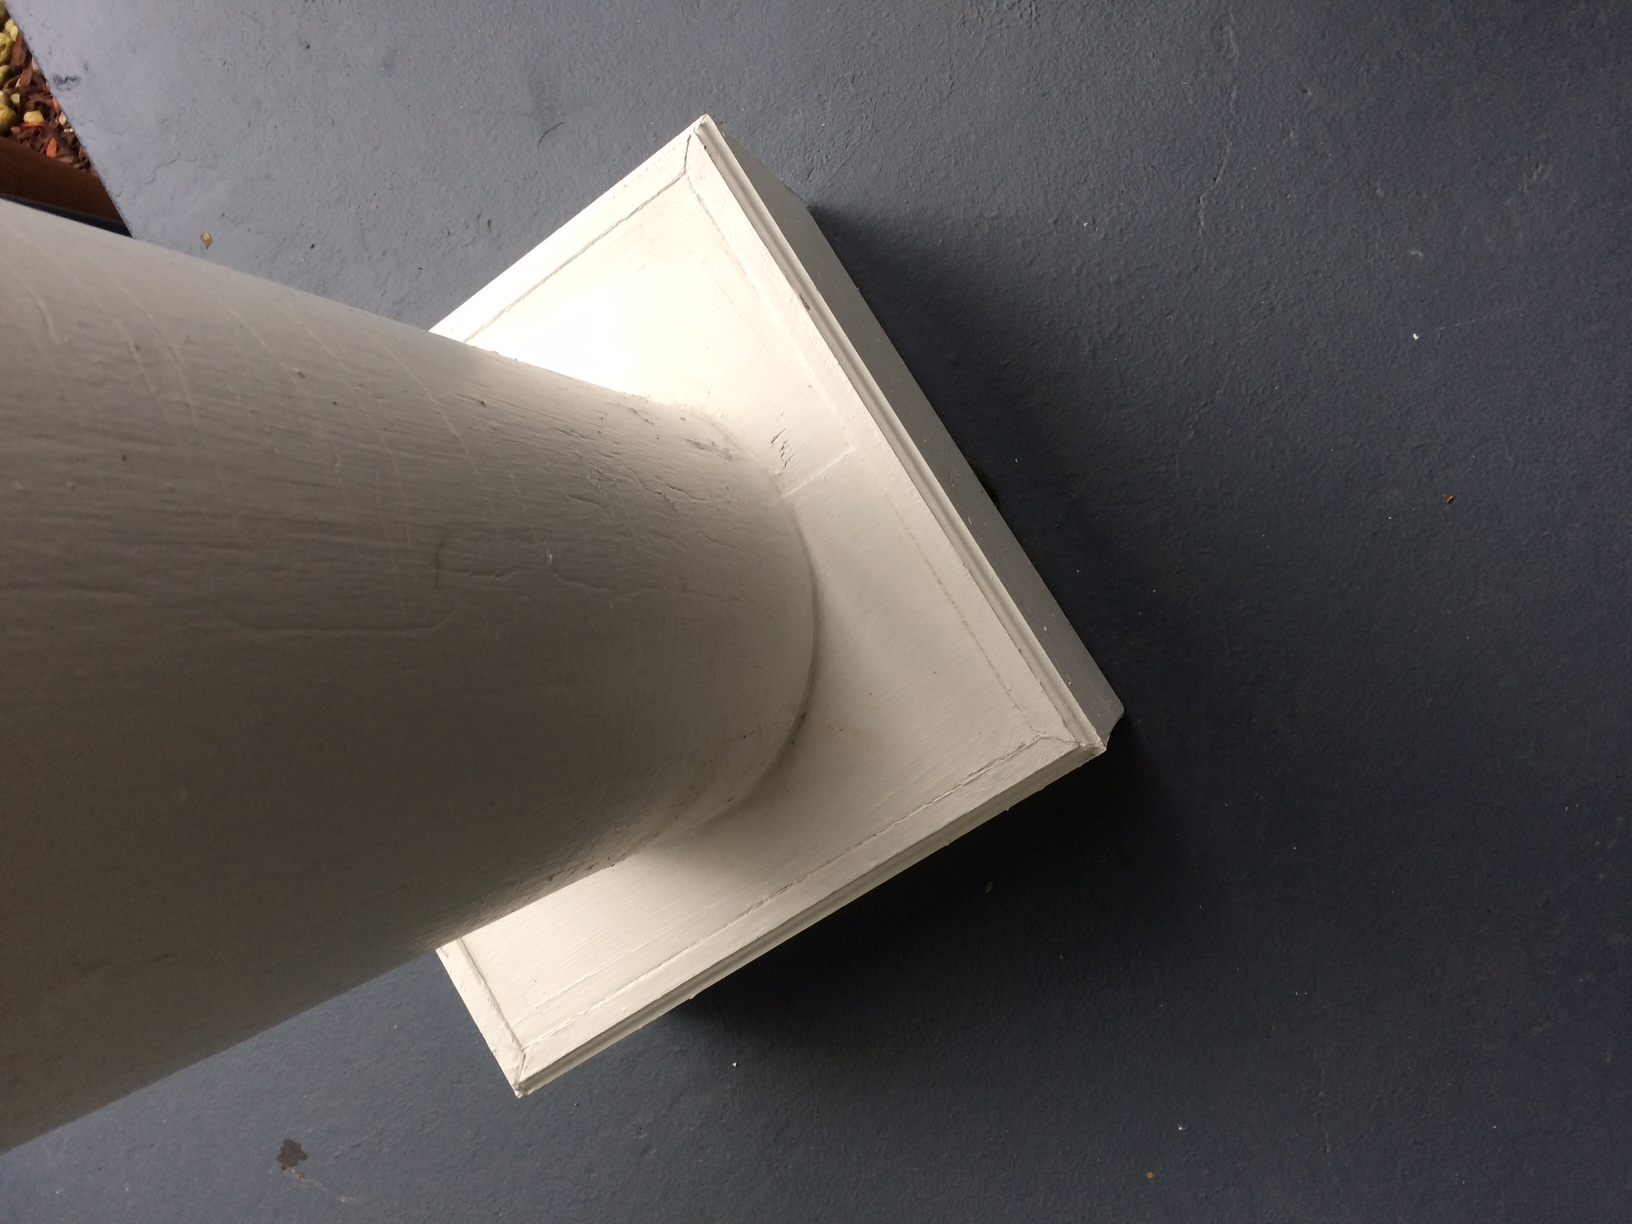
Step Eight: Calk all of the joints.
Step Nine: Give each base two coats of a good exterior primer. (We used KILZ General Purpose Exterior Latex Primer/Sealer– in White.
Step Ten: Give each base two coats of Paint-We used Behr Exterior Satin finish- Marshmallow
I know I’ve said this before but it really bears repeating.
We truly LOVE this porch!!!

We have shared so many laughs and so many memories here- and we feel blessed that we were not only able to repair this special place in a way that gives the integrity and safety back to the home but also that we did it ourselves.
Shortly after we finished the columns we were able to give the floor and trim on the porch a fresh coat of paint.
As for the exterior of the home, we still have two windows to replace and a bit of trim to paint and one gutter to remove and we will FINALLY be done!
It’s taken us pretty much the whole summer to complete the work, but we did it and in the process saved ourselves a lot of $$.
WOW! This post turned out to be way longer than I thought!
That’s DIY for ya! 🙂
How about you? Have you completed any major (or minor) DIY projects this past summer? I’d love to hear about them!
Blessings and hugs,

Awesome project and it looks amazing. My heart goes out to you because I know with an older home the projects seem endless don’t they? Great solution and I may have missed it somewhere but is the porch cement? Love that gray and the dry brush on the brick looks great too. Awesome space and look at all you’re learning from this house.
They sure do, Carole! But they can be a blessing as well! One thing is for sure working side by side on some pretty tough projects sure has brought us closer together and helped us each learn the other’s strengths! This old house sure can be a challenge but each time we overcome one it feels so good that we can’t wait to move onto the next one! Thanks for stopping by my friend! I always love to hear from you!