
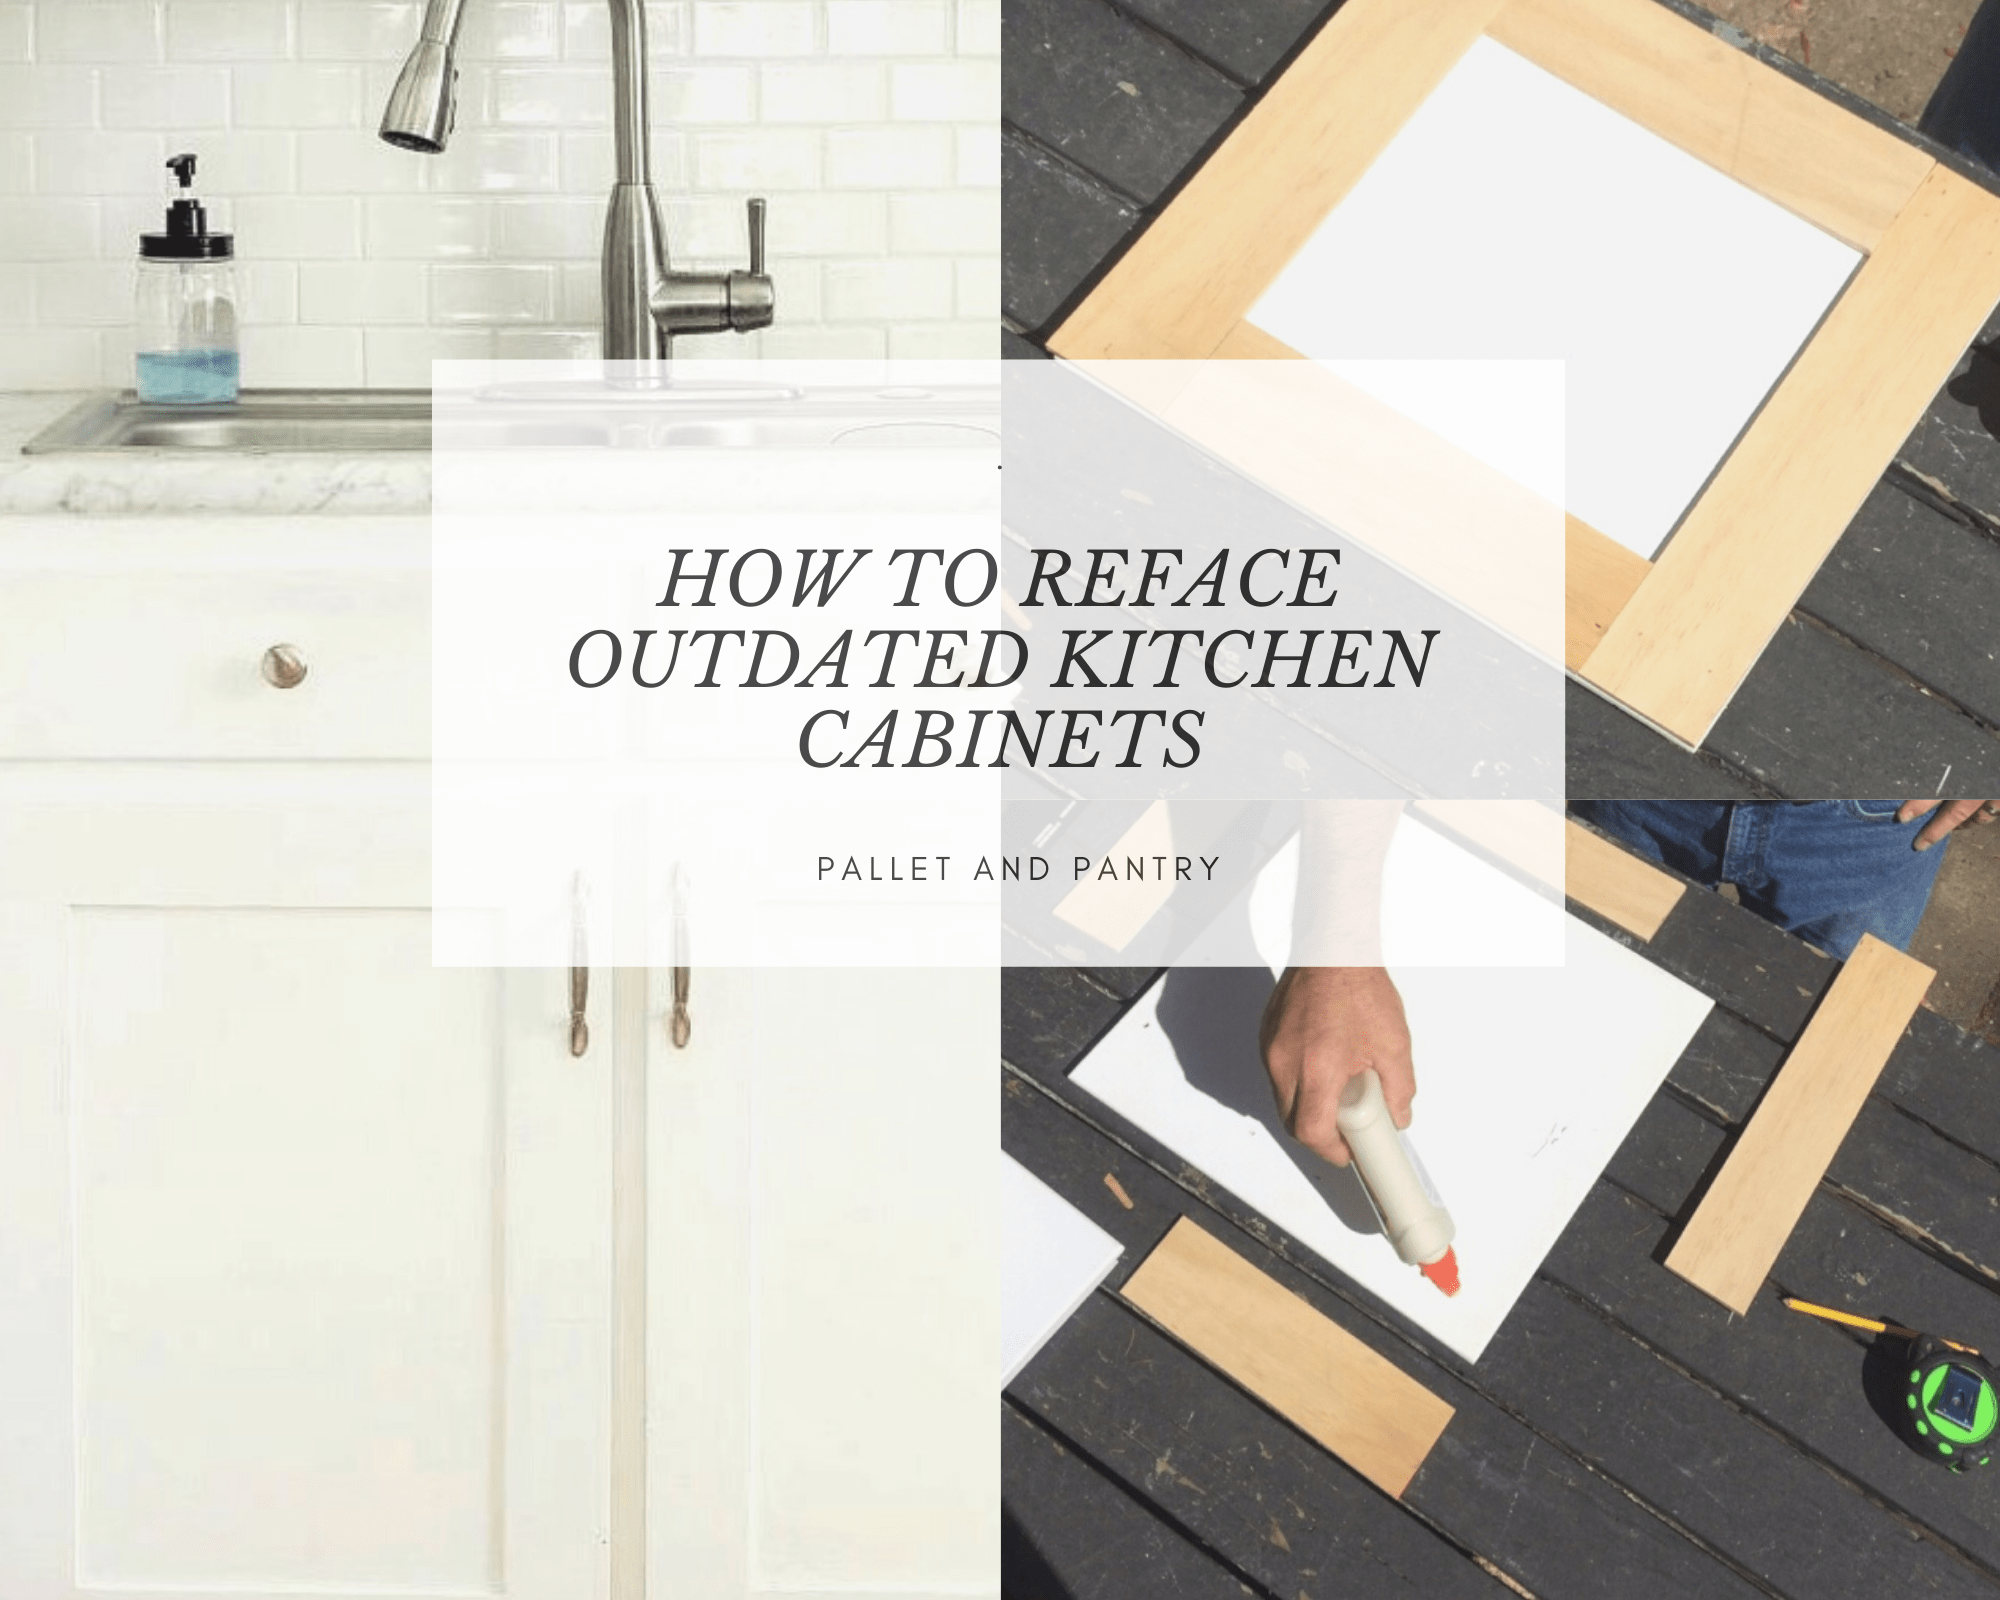
DIY Guide to Refacing Kitchen Cabinets
A step by step tutorial on how to reface kitchen cabinets!
When we first bought this old house there were so many projects to do and we definitely didn’t have the budget or the time to do them all at once.
In the end, we came up with two categories.
#1 MUST DO projects
#2 WANT to do projects
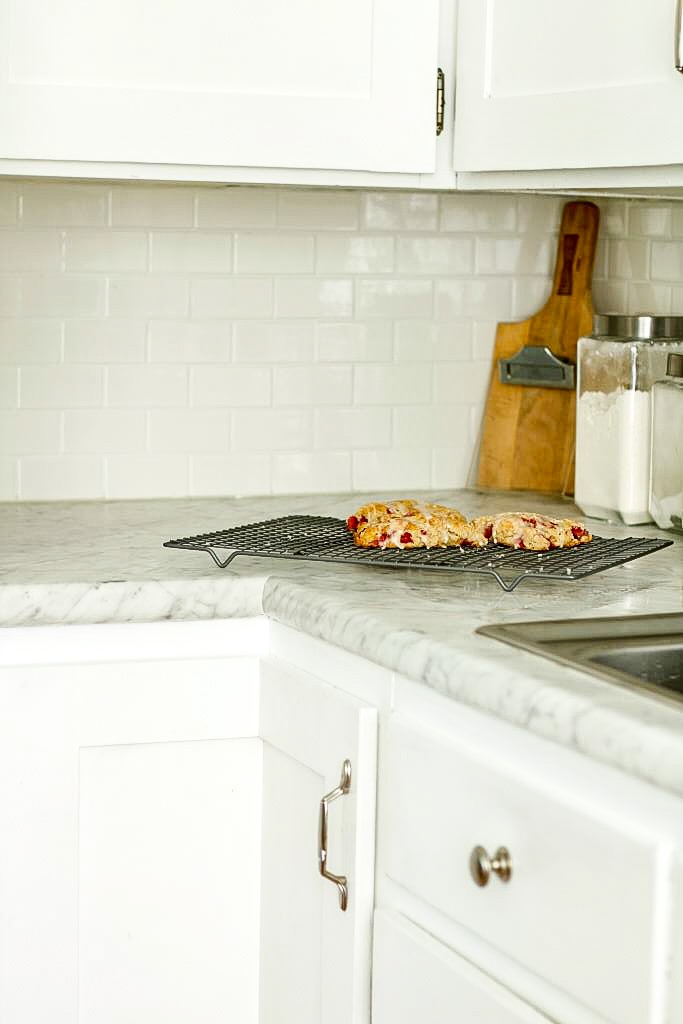
Because our kitchen was functional at the time, the only thing we did in that room was to install a new floor (covering the torn linoleum was a must for me) and painting the yellow walls a more neutral color. Later, after I couldn’t stand the dark, dingy cabinets any longer, we (and when I say ‘we’ I mean me) decided that maybe a fresh coat of paint would keep me happy until we had the budget to complete the rest of the kitchen.
You can read all about the trial and tribulations of that project in this post, but here is the end result.
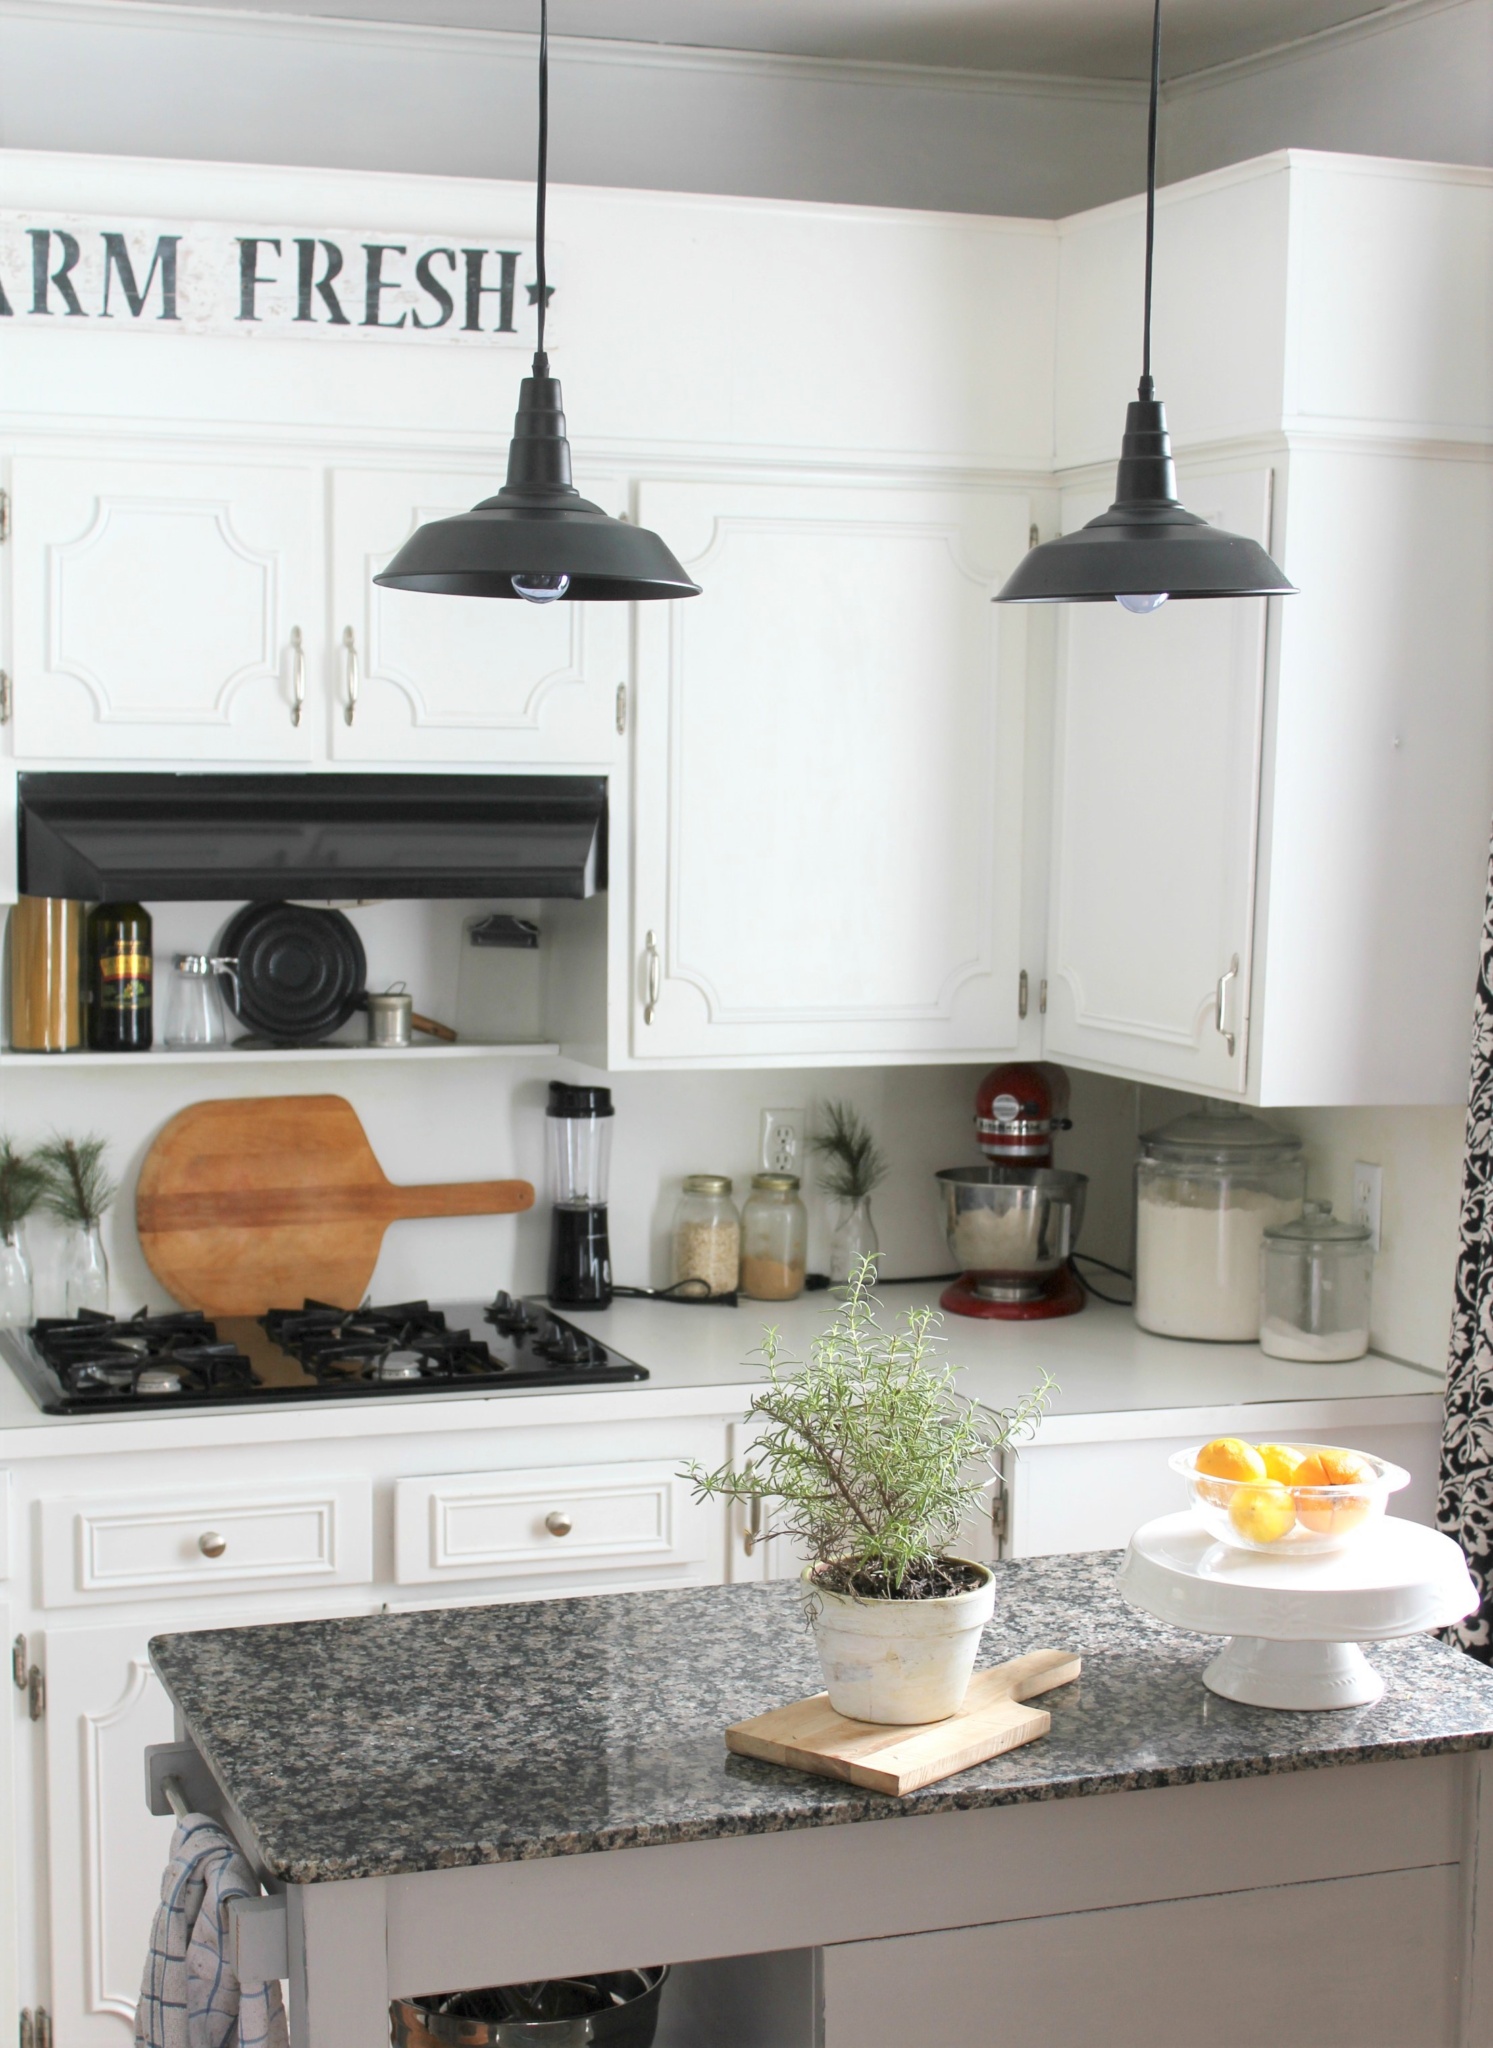
At the time the VERY dated panel trim didn’t bother me, but as the days, weeks, months, and yes years (it’s been four) passed by, I grew to really dislike that trim.
So one day I took down one of the cabinet doors and decided to do something about it.
I’ll start by saying that whoever built these cabinet doors did a VERY good job. They are super sturdy and that trim, well….it was put on to stay on, that is for sure!
Luckily, I don’t give up very easily!
It just took the right tools and a little patience. (Something I usually run short of).
Sorry, I didn’t take any photos for this part of the project.
Basically, I used a sharp blade and scored around the edge of the trim. I needed to break the seal of paint away from the panel. Then I placed the edge of a putty knife under the trim piece and tapped the end with a small mallet. Once the finishing nails were exposed I pulled them up with the putty knife.
The trim FINALLY came off slowly but surely.
The trim had been stuck to a few pieces really, really good, which unfortunately left divets or deep grooves. But after further inspection, we decided that unless the divets were super deep we really didn’t need to touch them up.
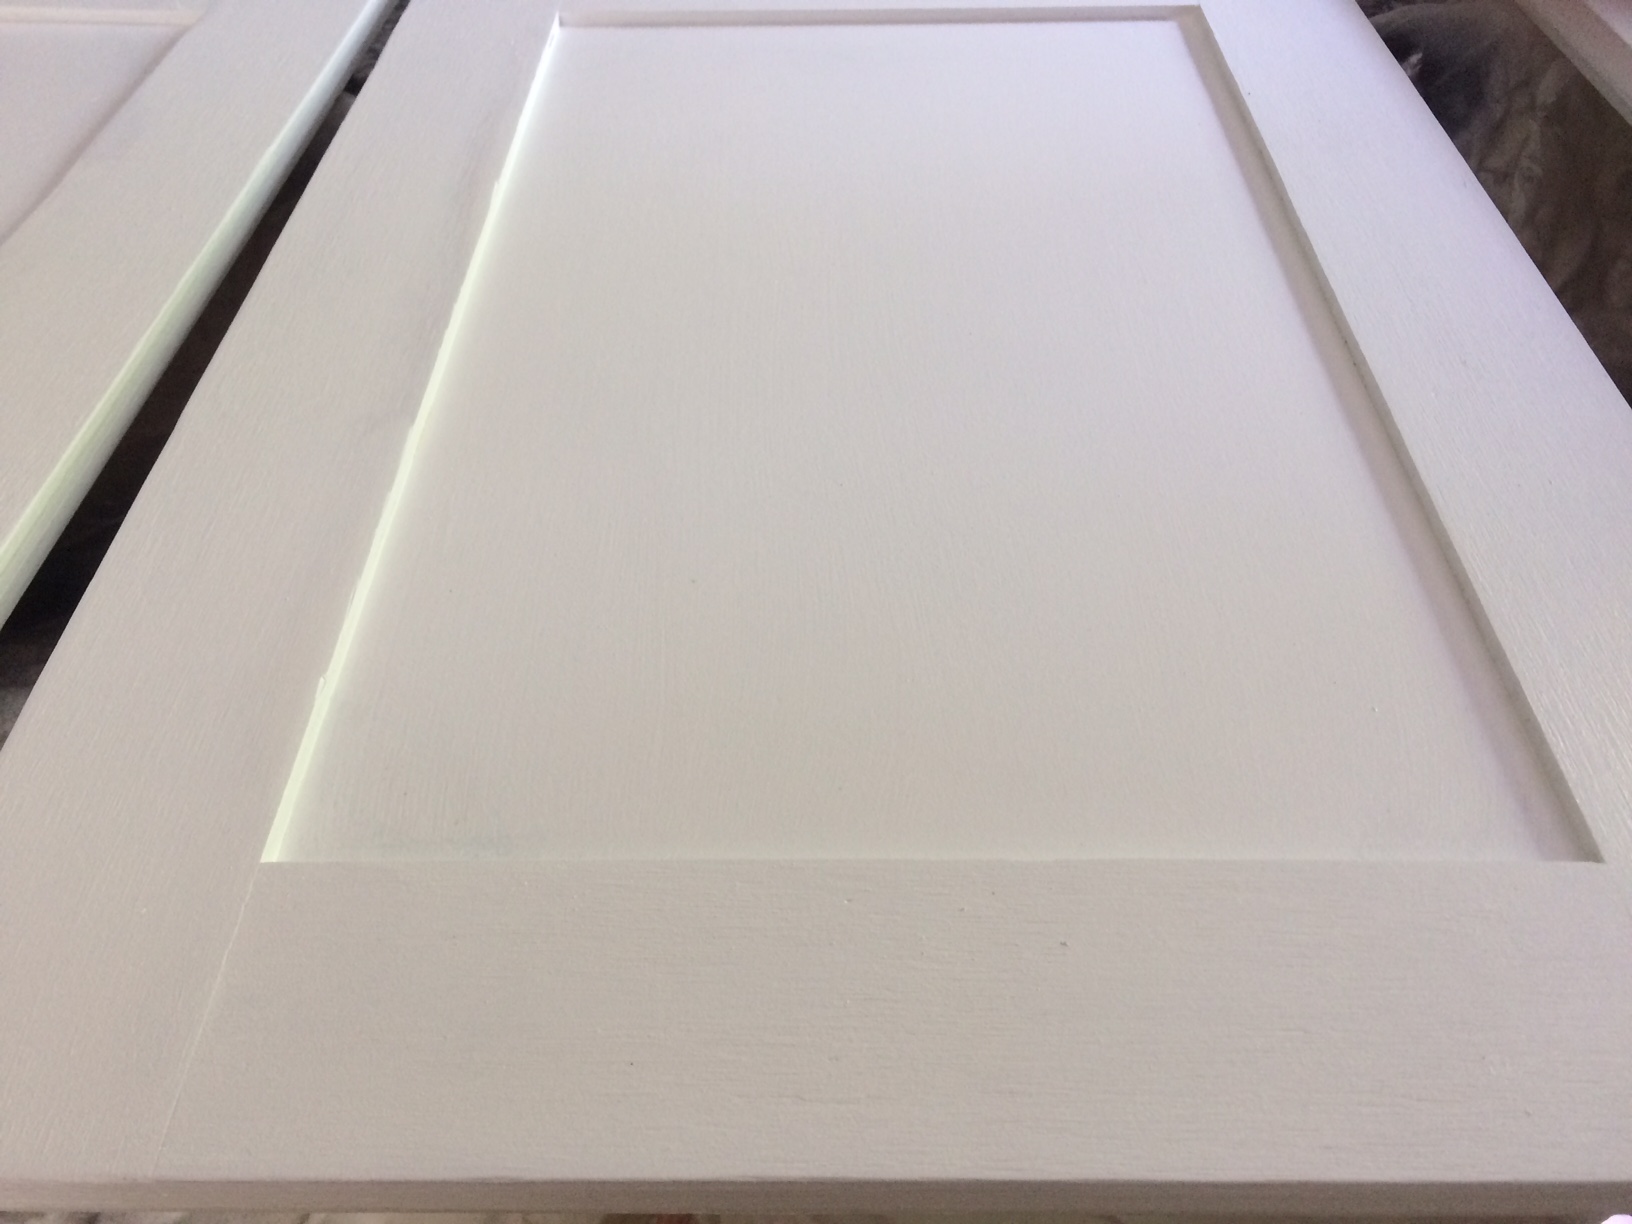
Because we had decided that we wanted shaker style cabinet fronts, the plywood we would use to create the new face of the cabinet would actually cover up any divets left by the trim.
So here’s our step by step DIY guide to refacing kitchen cabinets!
***This post contains affiliate links. These are also products that we use and recommend. If you click through and make a purchase, we will receive a small commission at no additional charge to you. Thank you for supporting our blog and family.
Here are the tools and materials we used.
Skill saw
Sandpaper (80 and 120 grit)
1/4″ x 4’x8′ plywood
Finish nails
Paint/Primer (We used Behr Ultra Pure White Enamel in Satin finish)
Paintbrush/roller
***************************************************************************************************
1. Wipe down each panel with vinegar and water just to get any film or grease off. Then sand each panel to remove any splinters from the trim work-and filled in any of the divets that were deep with wood filler. (For those, we let the filler dry for several hours before sanding and adding more filler if needed. We repeated if necessary. )
2. Once all of the panels were ready Michael measured the length of each panel and began cutting the plywood strips.

3. Each strip was 2 3/4″ wide. Once the strips were cut he sanded them down to remove any splinters or sharp edges. Next, he attached each strip with a generous amount of wood glue.
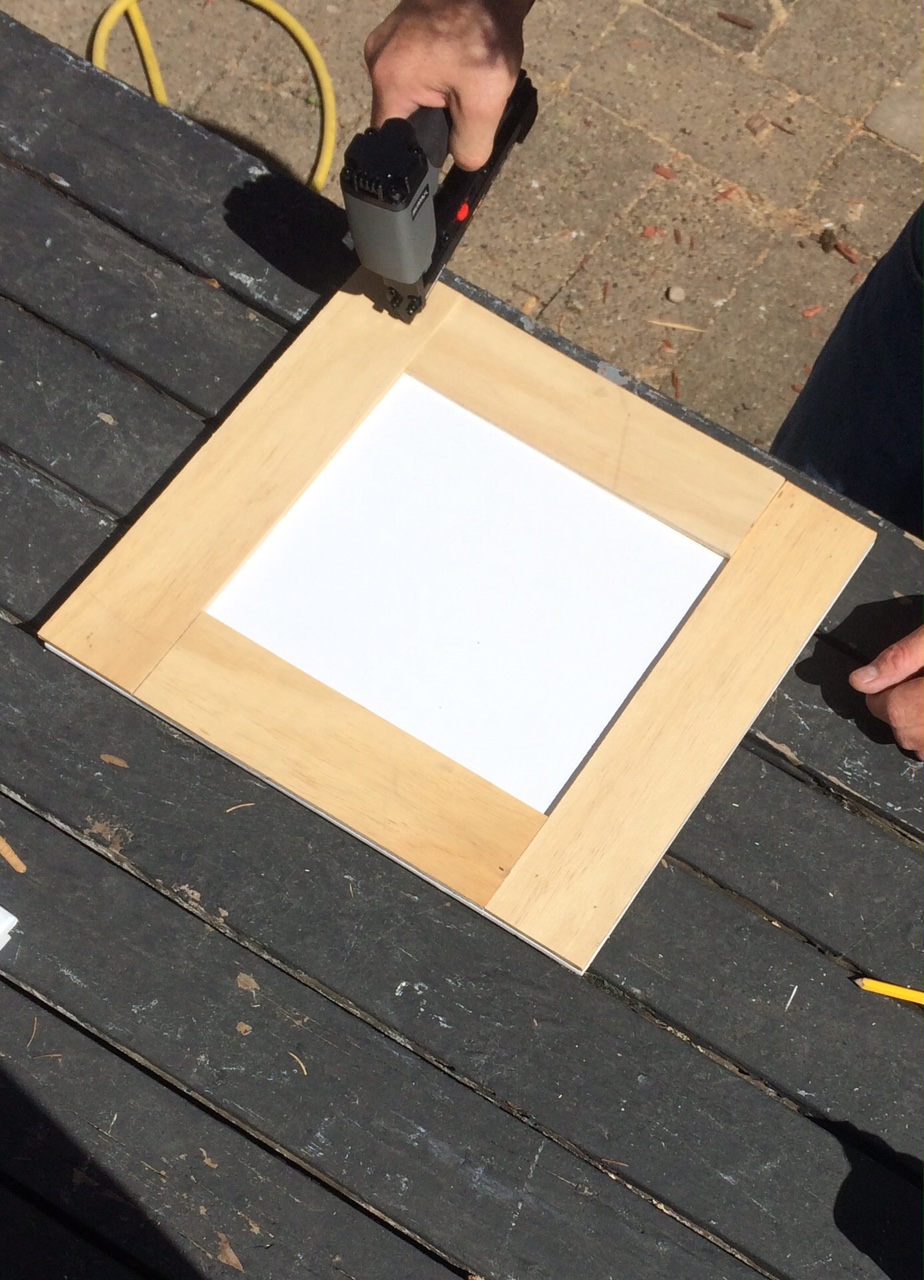
4. We let the panels dry for an hour or so. Then Michael used his nail gun to attach the plywood permanently with the finishing nails. We then let the panels set up overnight to allow the wood glue to dry completely.
4. The next day we filled in any seams, cracks, or gaps with the joint compound. Once that dried (2 hours) we sanded those areas with 120 grit paper. If any needed a further coat of compound we did that and allowed it to dry again. (We repeated as necessary).
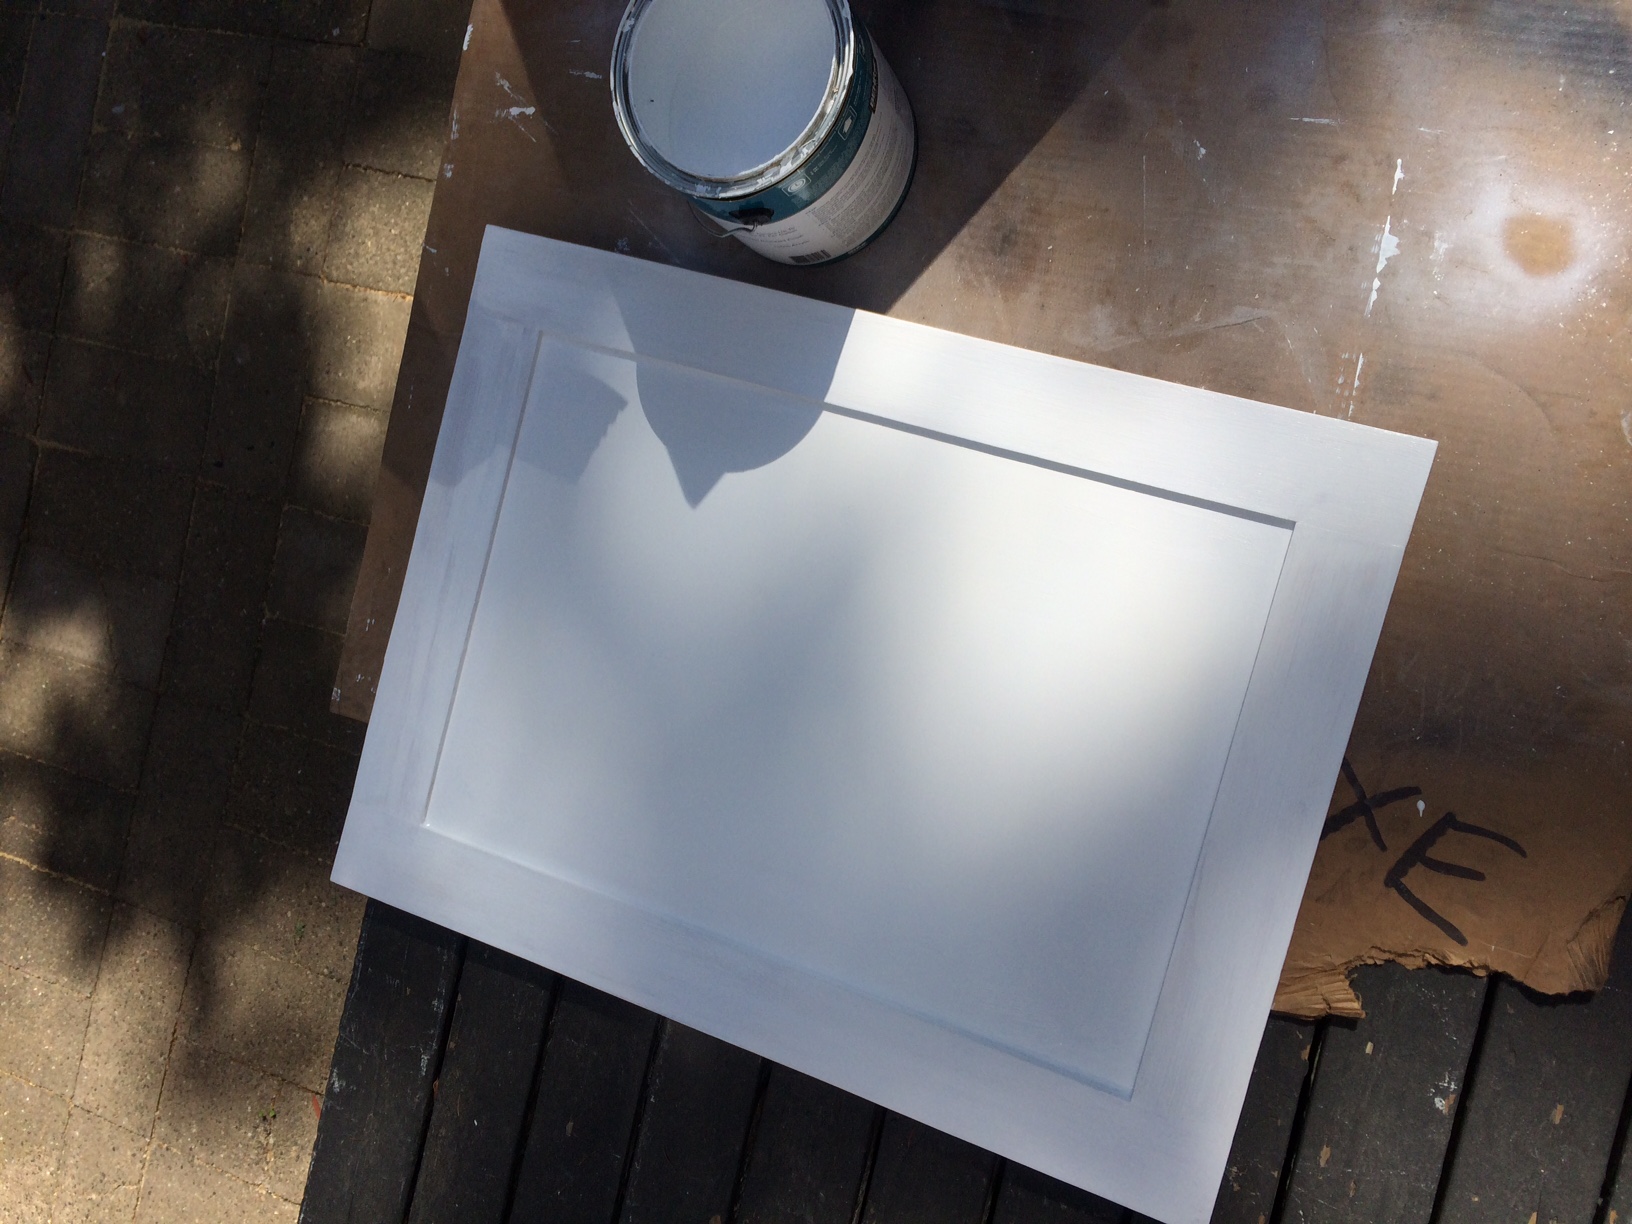
5. When all of the seams, crack and gaps had completely disappeared it was time for the first coat of paint/primer.
Initially, we used a good quality paintbrush but as you can see it was still leaving brush stroke marks. Not good. 🙁 Thankfully a quick sanding and re-coat with a roller did the trick!
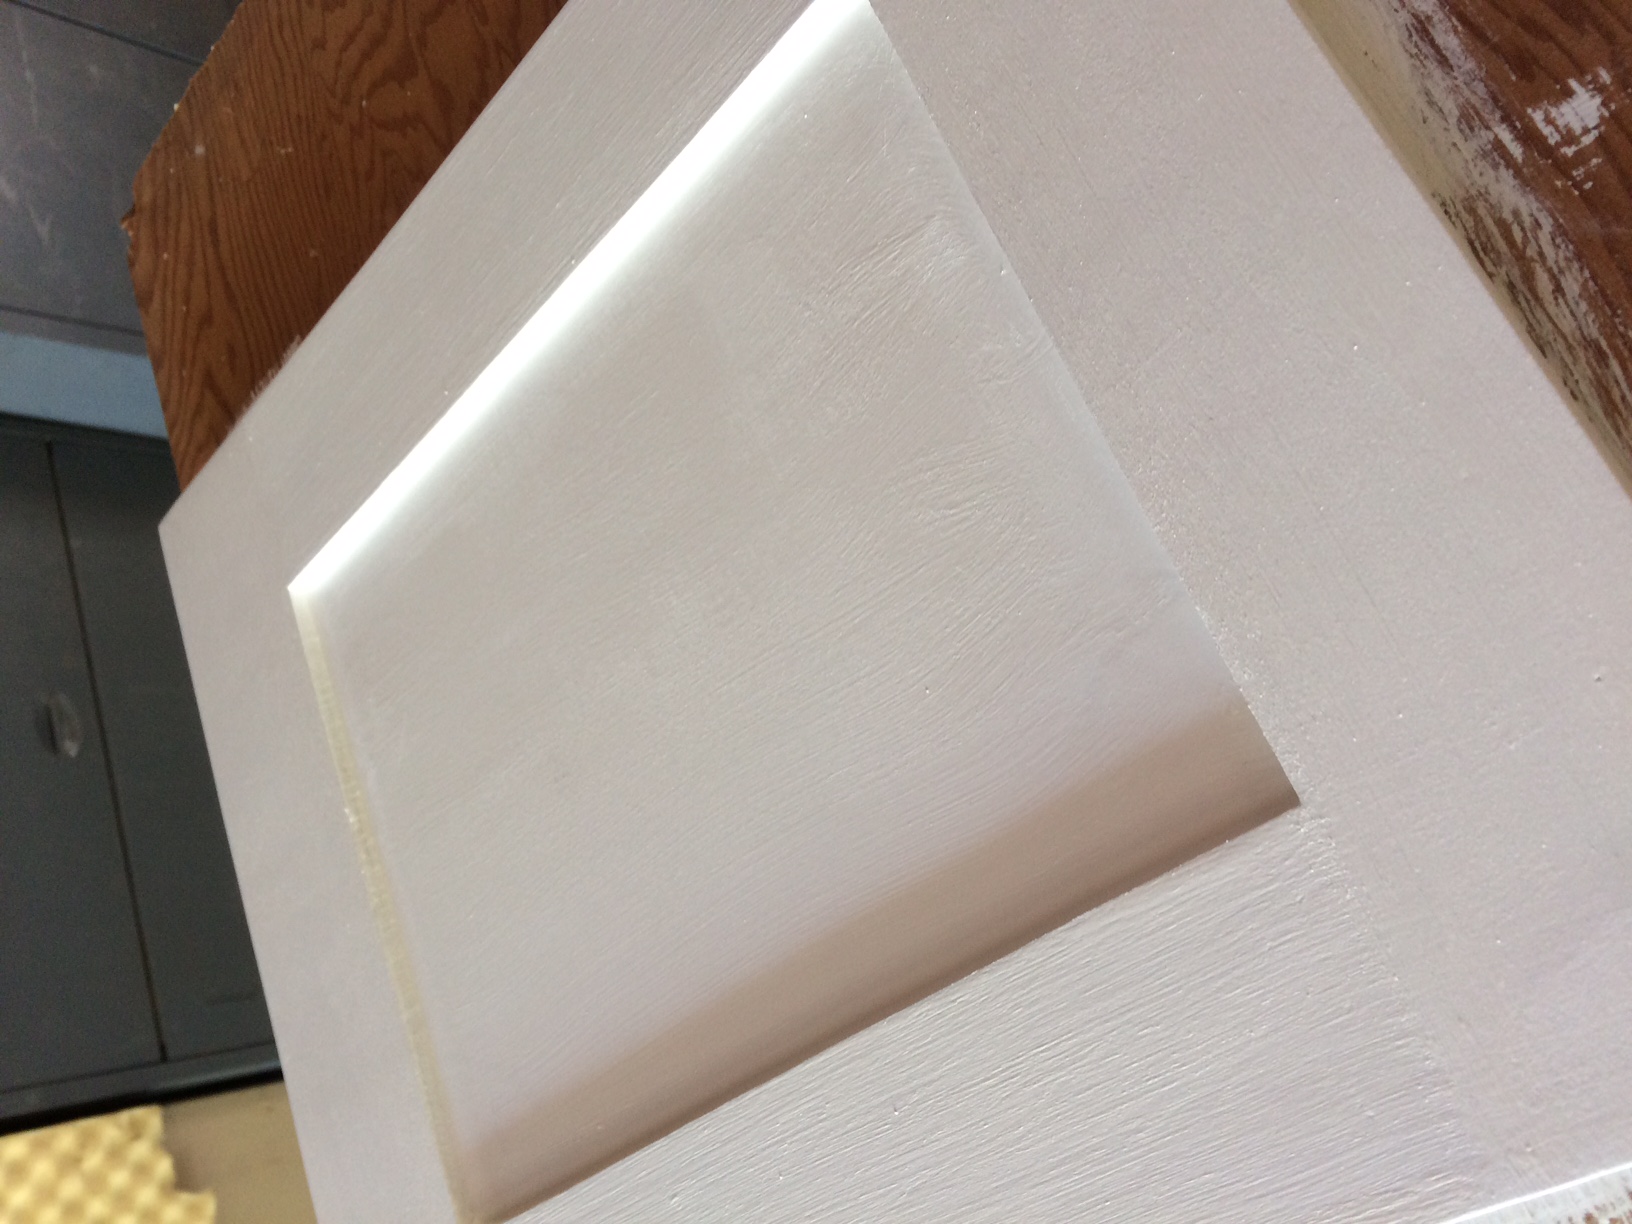
6. We allowed each of the coats of paint/primer to dry overnight. Before painting the next coat we sanded the panel with 120 grit paper. It took a total of 3 coats.
7. After we allowed the panels to dry another 24 hours we added back the hardware.
Now it was time to hang them back up!
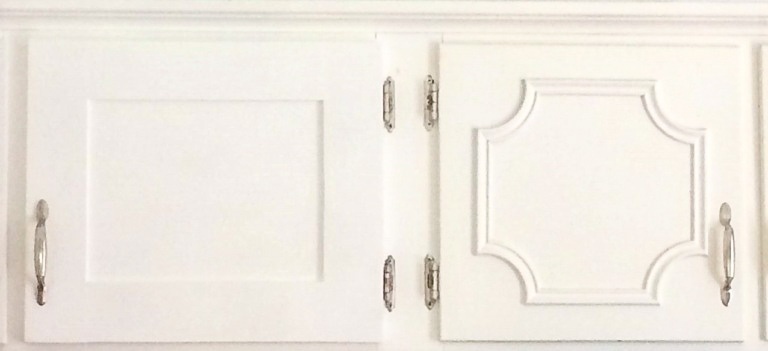
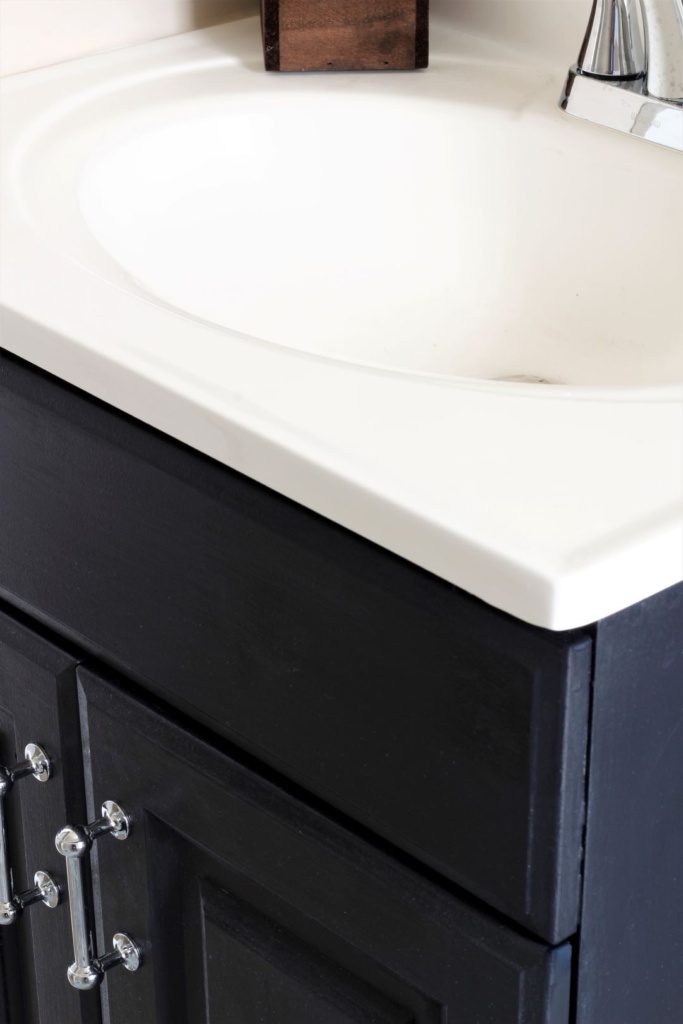
Here is a before and after side by side view.
We did four drawer fronts as well and I couldn’t be happier with the way they all turned out!!! I just love the classic, simple look of shaker cabinets!! But the best part is we were able to do this project for under $50! We had all of the material and tools except for the plywood and hardware!

We also decided to change out the dated range hood (see before pic) for a new microwave. Our old microwave died two days into the project!) To do this we did have to remove two of the small upper cabinets. I was okay with that because I couldn’t use them anyway. The wiring and vent for the old range hood took up most of the space.

Michael took care of that problem after installing the new microwave. He not only covered up the wiring but installed a panel that can be removed for access.
I hope this quick DIY Guide to Refacing Kitchen Cabinets inspires those of you who’d like to refresh your outdated cabinets without spending a lot of $!
This project was a bit time-consuming. But it was SO worth it in the end!
Looking for more room updates?

.
I love this and what a great solution to updating older cabinets. Simply brilliant. I remember fixing up our house and it seemed like the projects would never end. Fast forward now we’re turning a shed into a Tiny House while using it as a work space in the mean time. I starting to think it would just be less of a headache to just keep living in the RV. Great tutorial and I really like your kitchen, it’s bright and welcoming.
Thank you so much, Carole! I TOTALLY agree with you on those never-ending projects! I’m so excited for you and your tiny house adventure! Reading your posts I can tell you truly have found a peace that you never had before! As for our kitchen, the bright sunshine our big window provides is one thing I truly love about the space! Hugs!
Your cabinets turned out great! They way you added the trim to give them a shaker look is genius. Our cabinets are Kraftmaid, a very good well built line of cabinets. I know this because they are stamped inside. However, when we moved in the outside could not have been more ugly. They had a heavy oak wood grain in a medium to dark color. Worse yet was the pull. I was a large brass pull in the middle of the cabinet shaped something like a shoe horn. Anyway, all we did was remove the pulls, fill the holes with wood putty and paint them white. Then we used an antiquing glaze and added new hardware. That was over ten years ago and they still look pretty good, though I may change out the hardware again. Unfortunately we do not have the light that you do. Another reason to stick with white paint. The walls are yellow and we just updated the flooring with shades of gray laminate, so the yellow has to go. I’m thinking about a greige color. There’s always something to do, right?
Thank you, Patti! Wow, yes Kraftmaid is a very well built cabinet for sure! I had to laugh about the brass shoe horn pull. Good grief! What were they thinking! 🙂 Sounds like you gave them a HUGE upgrade! Love the antiquing glaze idea! And yes, there is ALWAYS something to do! Blessings.
Wow, it’s like you got brand new cabinets! I would never have even thought to try this, but I’m so glad you did. It looks amazing!
Thank you, Meredith! I’m so glad we did too! They look so much better!
Looks like a lot of work, but the end result was definitely worth it!
Thank you, Michelle! Yes, it was definitely a lot of work to update the cabinets but SO worth it!!! We are thrilled that they are still holding up so well!!
“Champions keep playing until they get it right. ” I am really impressed. you have done great work.
Thank you so much, Emily!