
DIY Chandelier Makeover
I still can’t believe it has been almost two years since we gave our dining room a makeover!
I’ve made quite a few changes since then.
The baker’s rack is gone. The wallpaper on the back of the built in’s is gone. The rustic DIY shutters are gone. The decor is no longer beachy.
Okay…so everything has pretty much changed since then.
So why haven’t I shared those changes?
Because there was one thing that hadn’t changed in the room.
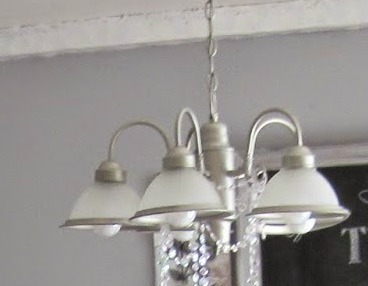
And no matter how hard I tried-(I even added pretty crystals) I just couldn’t make that light fixture look any less ugly!
Unfortunately, with all the room makeovers we have yet to do-there simply was NO budget for the chandelier of my dreams.
So I had no other choice but to live with that nasty light fixture. Until one day…..
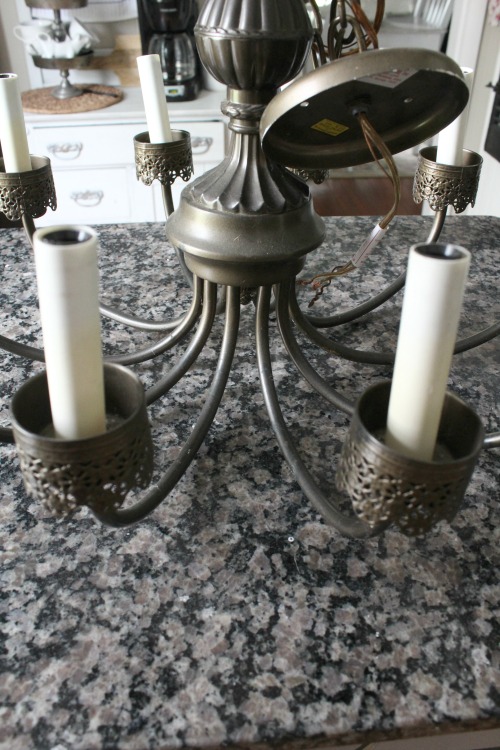
There she was….lying on a cold cement driveway…all by her lonesome.
At first I walked right by her. After all- she was just a dusty old bronze chandelier-put out to pasture-and since it was late in the day it was obvious no one wanted her.
Not even me.
It wasn’t until hubby and I made our way back to our truck after an hour or more of treasuring hunting-that I spotted that it again.
This time I decided to take a closer look.
Of course, hubby immediately started to panic!
But it was too late. I had already started to envision how I could transform it.
And when the owner accepted my $5 offer-I new it was meant to be!
A few day’s later-on a GORGEOUS sunny day-I hung the chandelier on a garden hook and made my vision a reality!
The only supplies I needed were:
Black Spray Paint- (Rust-Oleum Flat)
White Spray Paint (Rust-Oleum Flat)
Clear wax (American Decor)
Sandpaper (220 Fine Grit)
I already had these supplies on hand-so they only extra cost for the chandelier was:
Plastic socket covers (I needed 10-4 inch covers-total cost was $17.00)
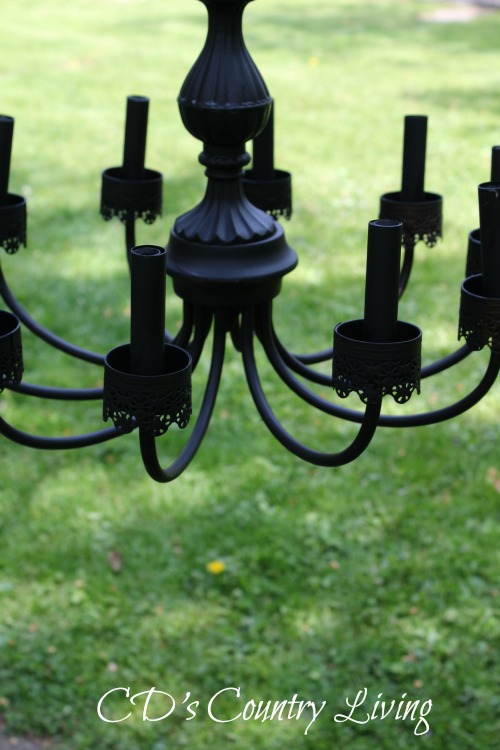
The first step was to give it a coat of black spray paint.
After the paint had dried (overnight), I gave everything a good sanding, wiped it down with a soft cloth (to remove dust) and it was time for the second coat of paint.
***I kept the old socket covers in place to avoid spraying the electrical inside.
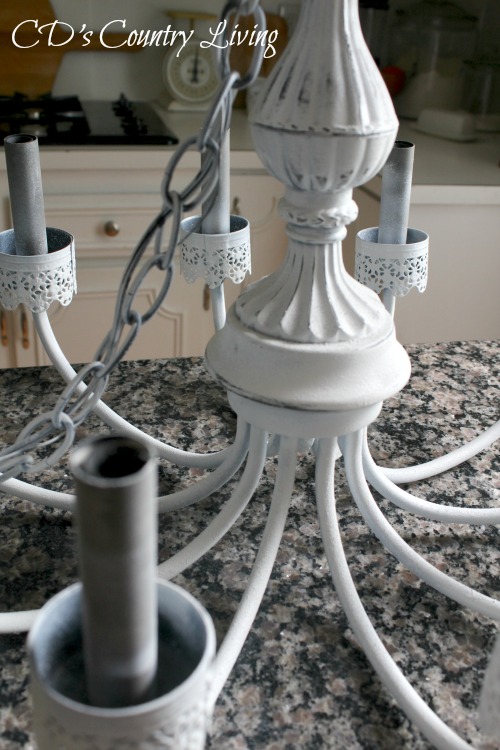
Once the white coat of paint had dried (again overnight), it was time for a little distressing!
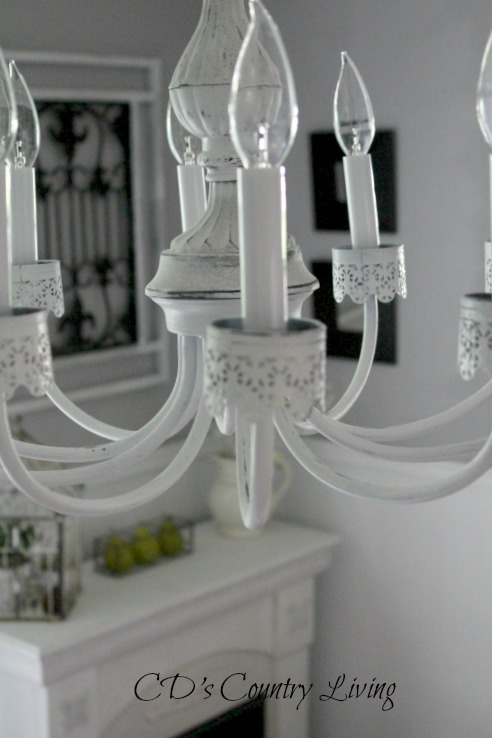
After a couple of coats of clear wax-that was it! My shabby chic-chandelier was ready to hang! SUPER EASY, right?
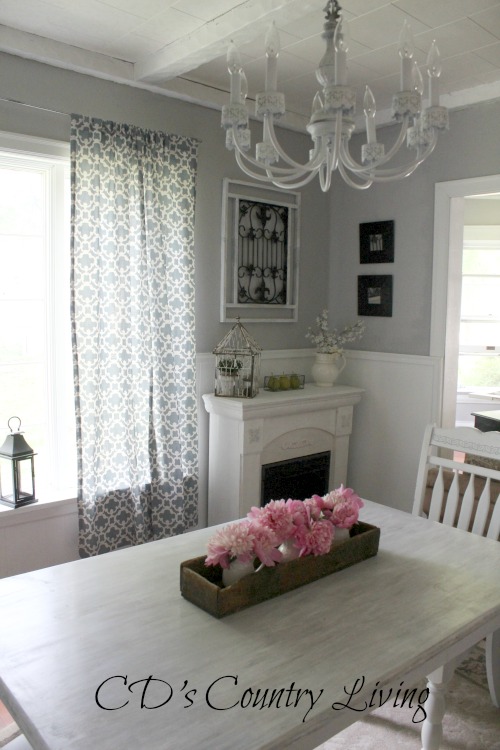
I’m SO happy I saw the potential and grabbed this beauty up!
I know I would have kicked myself if I’d walked on by a second time!
How about you? Have you ever walked by a treasure and kicked yourself later for not buying it?

I’ll be sharing this treasure at these AMAZING parties! Stop on by and be inspired!
Blessings and hugs,

Monday
I should be mopping the floor
The Dedicated House
Dwelling the Heart of your Home
Lou Lou Girls
My Uncommon Slice of Suburbia
Show and Tell
Inspire me Monday’s
Motivational Monday
Project Inspired
Between Naps on the Porch
Something to talk about
Tuesday
Coastal Charm
A Stroll Thru Life
Kammy’s Corner
Cozy Little House
Vintage Inspiration Party
Create and Share DIY
Live Randomly Simple
Be Inspired Link Party
Turn it up Tuesday
The Scoop
Wednesday
DIY by design
Ducks n’ Row
The Craftiest Allie
Wow us Wednesday
Happy Housie
The Dedicated House
Moonlight and Mason Jars
Cook it-Craft it-Share it
Thursday
From my Front porch to yours
Home and Garden Thursday
Inspiring Grace
Jann Olson
The Handmade Hangout
Katherine’s Corner
My Flagstaff Home
The Creative Exchange Link Party
Weekend RetreatThrowback Thursday
Friday
French Country Cottage
Friday Features
Rooted in Thyme
DIY-Vintage Chic
The Charm of Home
DIY Inspired
Pinworthy Projects Link up Party
Saturday
Funky Junk
Pierced Past Times
What to do Weekends
Love this what a fantastic transformation. Perfect addition too and I can see why you wanted to wait to revile this beautiful room . Great Project I even liked it in the black.
Thank you so much, Carole! I have to agree-I LOVED it in black too-but I thought it would be ‘TOO’ much-so I chose the ‘distressed’ look and I’m thrilled with how it turned out!!
Wow. A little bit of updateing can really make all the difference.
So beautiful! A bargain indeed. So glad that you looked at it again. I have a real thing for light fixtures.
🙂 gwingal
Thank you so much, Nikki! I am SUPER glad I looked at it again-and as for fixtures-I’m starting to have a ‘thing’ for them too! I just might be on the hunt for another one to makeover!! 🙂
It sure can, Lillith! Thank you for stopping by!!
Wow, just amazing! And perfectly suited to the space! I have a chandelier in my dining room that doesn’t quite suit my style (putting it nicely) and I’m on the lookout for just the perfect piece. Thanks for the inspiration!
Oh I hope you find it, Meredith! Nothing worse than walking by a light fixture every day and cringing! Thank you so much for the love! 🙂
Love love love this! Light fixtures really dress up a room. You’re two for two! (This time I’ll not try to copy you, hehe)
Thank you so much, Val! Lights really do add something special to a room! LOL on the copy! 🙂
Beautifully done!
Thanks so much for sharing at AMAZE ME MONDAY!
Blessings,
Cindy
Thank you so much, Cindy!
Wow, what a beauty! And to think it just sat there…unwanted.
I passed a couple of cast-off bird feeders on the curb during my walk yesterday morning. Each time I passed by I gave them a new evaluation. In the end, I decided to leave them.
I may go back now. 🙂 You’ve inspired me.
RUN…don’t walk, Karen and grab those bird feeders!! I’m thrilled with my lonely (and cheap) cast off-and I’m so happy I inspired you!
Thanks for sharing these guidelines. I love this article.