
Initially, I wasn’t going to do a separate post on this project-simply because it was
just too darn easy! I figured I’d just slip it into my final foyer reveal post. But every
time I walk through the foyer-I can’t help but smile, because I am SO in love with this
piece-that I just had to share it all with you now!!
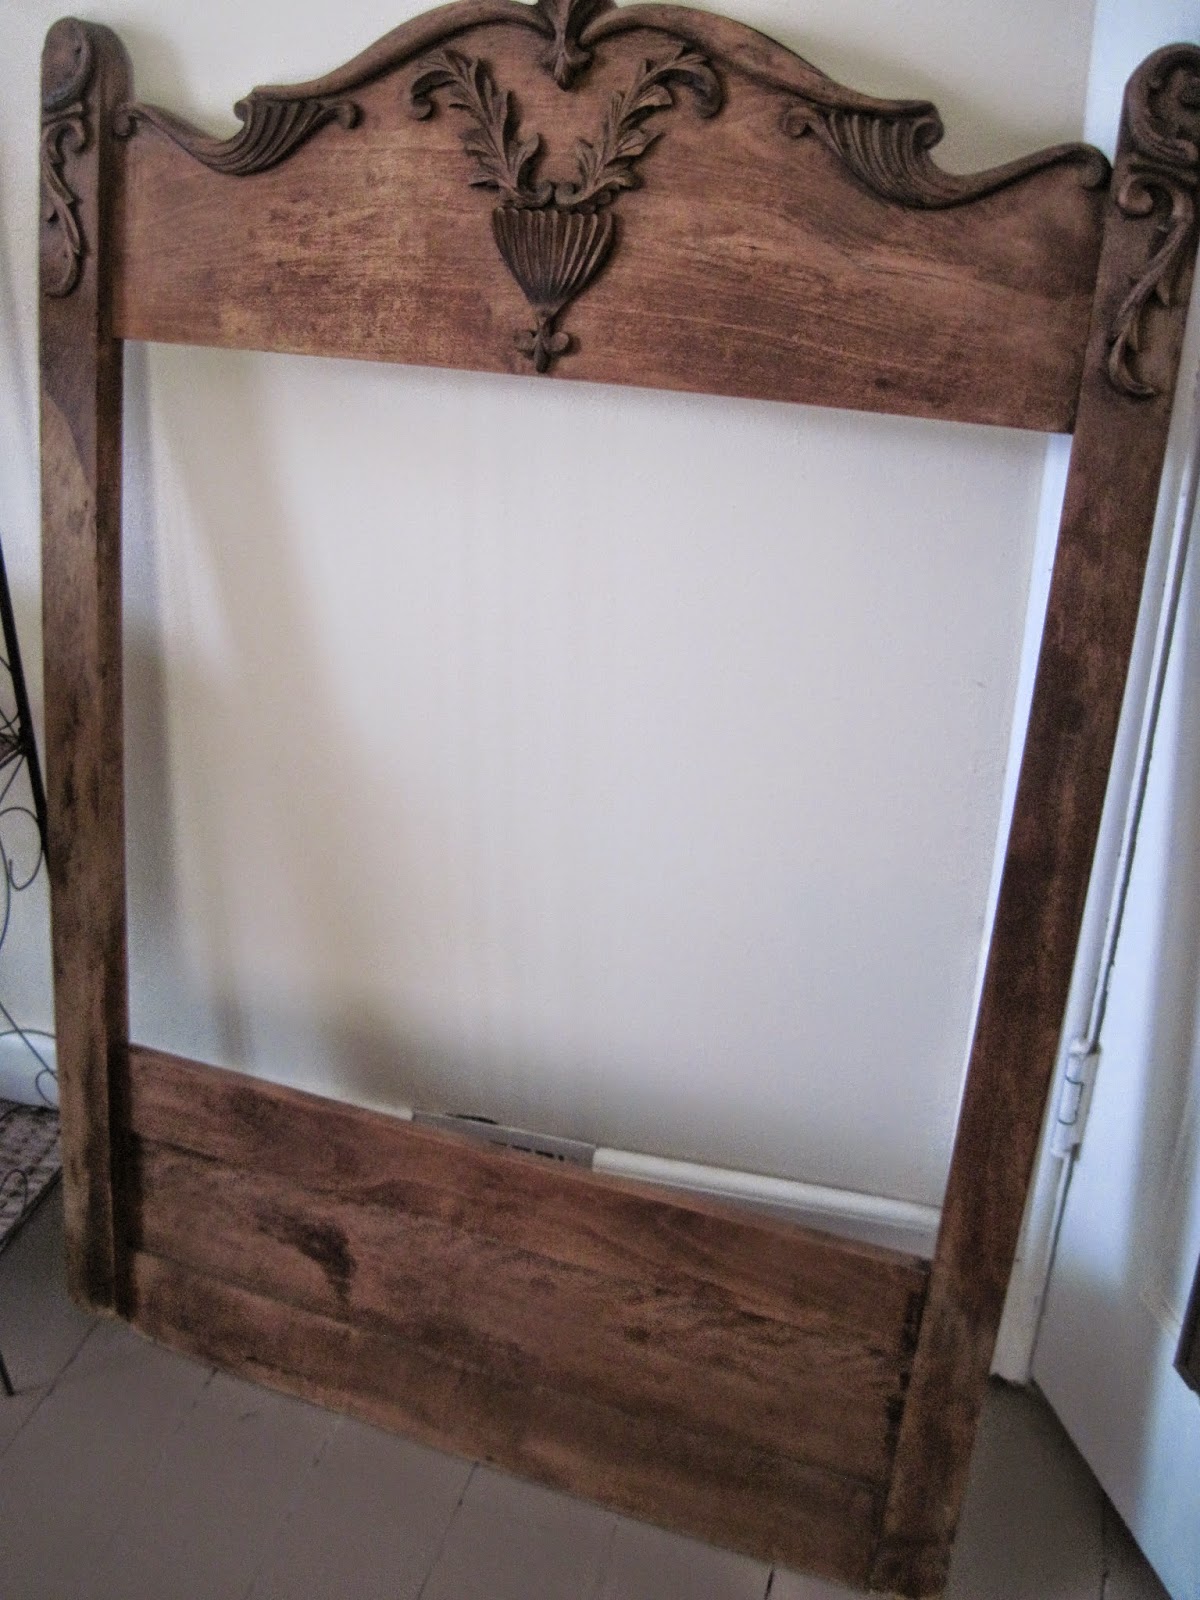
Remember when I posted about this old mirror frame a few months ago??? I told you that
I’d found it up in our attic shortly after I moved in. Back then I was just starting the
renovations on the house-and I really didn’t have any place to put it. So….I placed
it in the back of one of our guest room closets-and there it sat. Until…I re-discovered
it while doing some Spring cleaning.
The wheels in my head began to turn-and if you remember that post-you’ll
remember I thought I would turn it into a headboard!!! WHAT WAS I THINKING!!!
All I can say is-thank goodness I had too many other projects to work on-and once
again put the mirror frame aside.
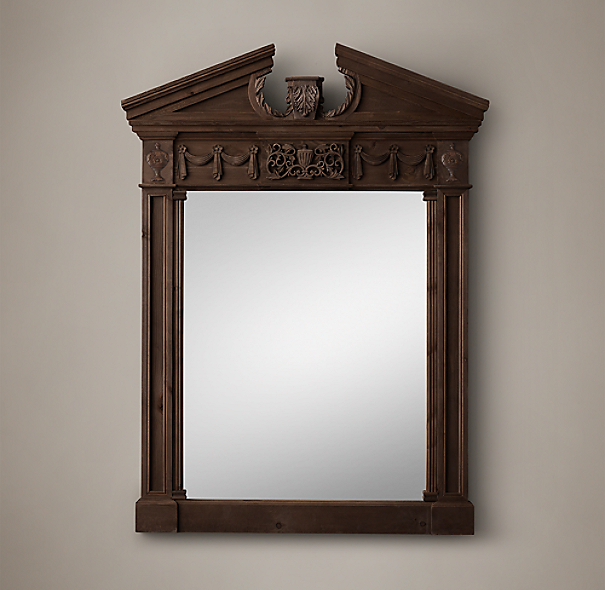 |
| Restoration Hardware |
Because one day-while I was searching for some inspiration for another project-I found
this GORGEOUS mirror at Restoration Hardware!!! I LOVED it-but the price tag literally
made my eyes bug out of my head!! $1200!!! No way!!!
And then another light bulb went off in my head!!! (Hubby hates when that happens
because it usually means work for him!)
**Sorry, the photo’s are a bit iffy-but the foyer gets very little natural light
(the only windows are stain glassed)!!
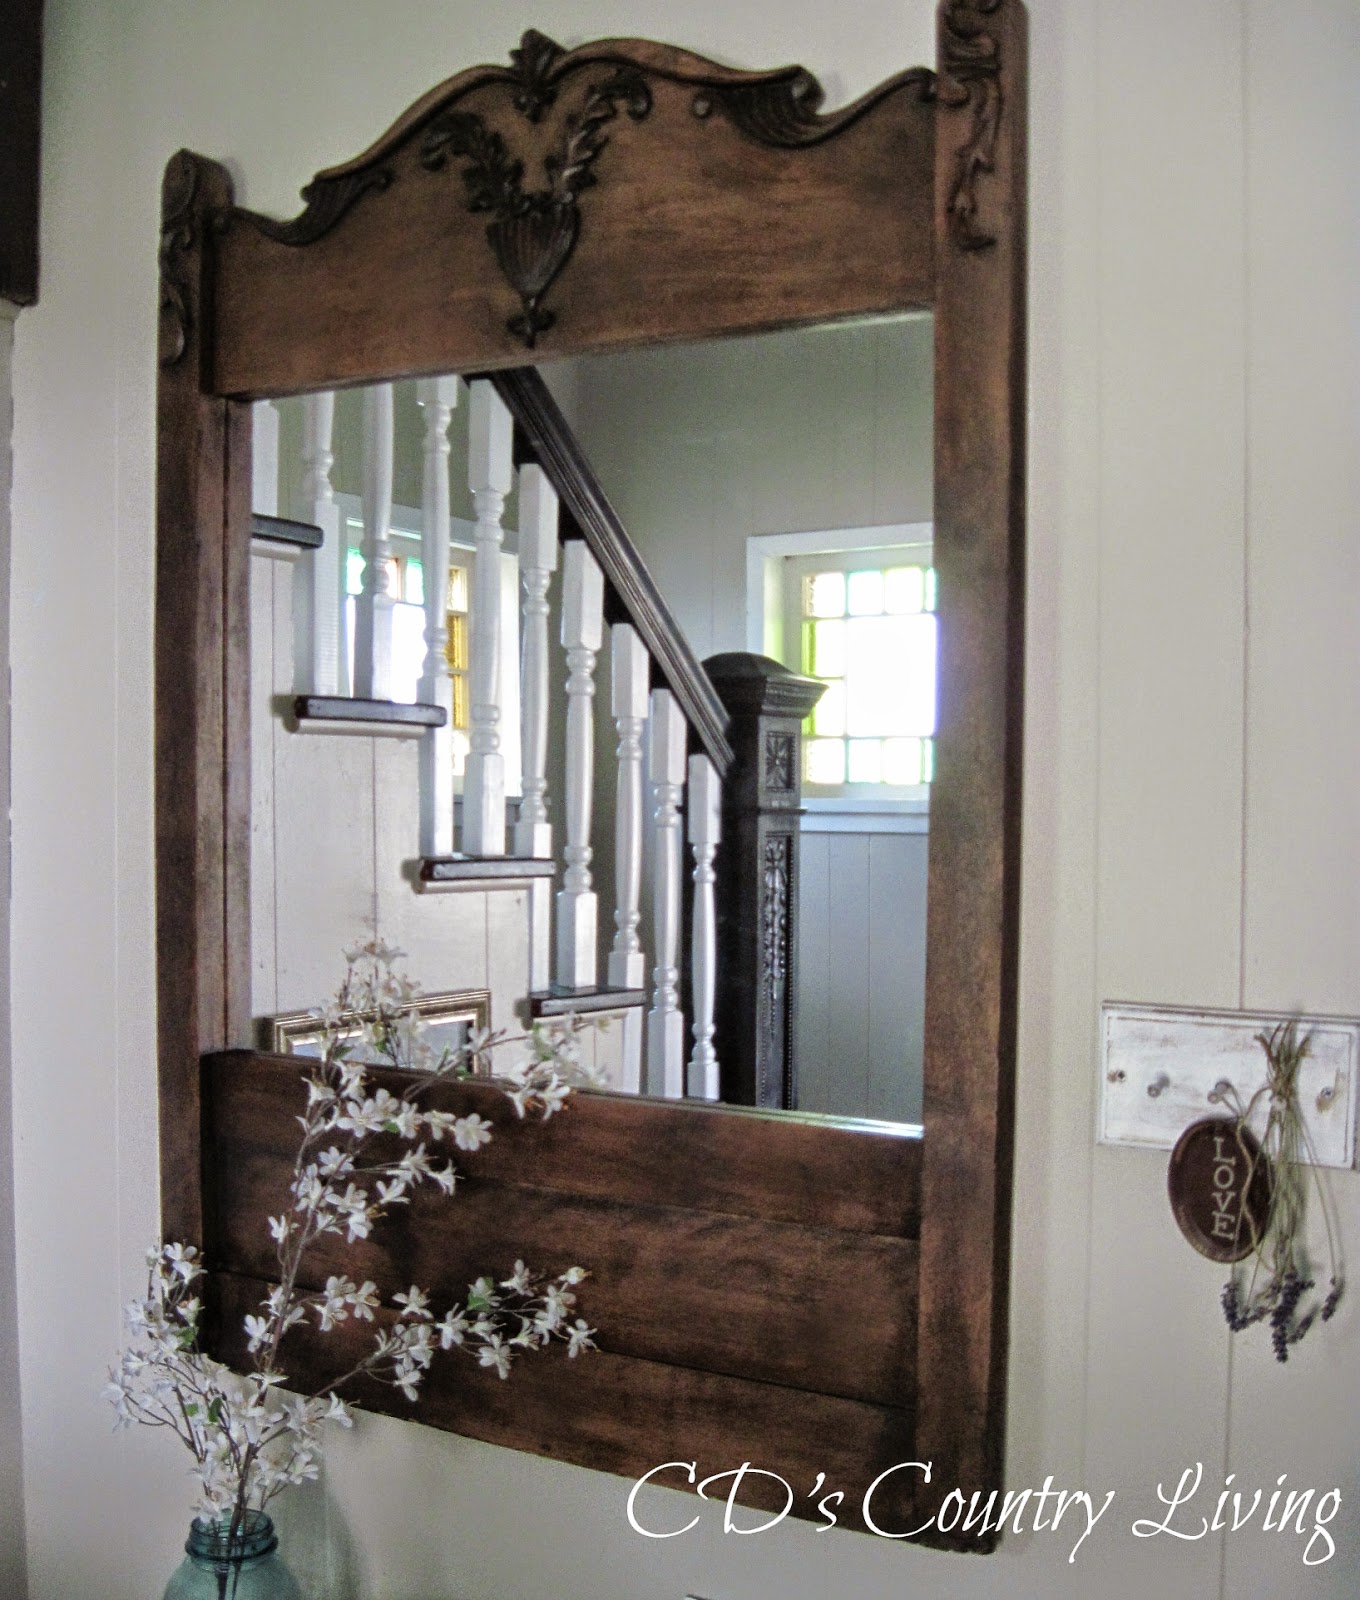
Well….it did mean a little work for both of us-but like I said-it was SO easy!!!

All this beautiful piece really needed was a little TLC-and of course… a mirror!
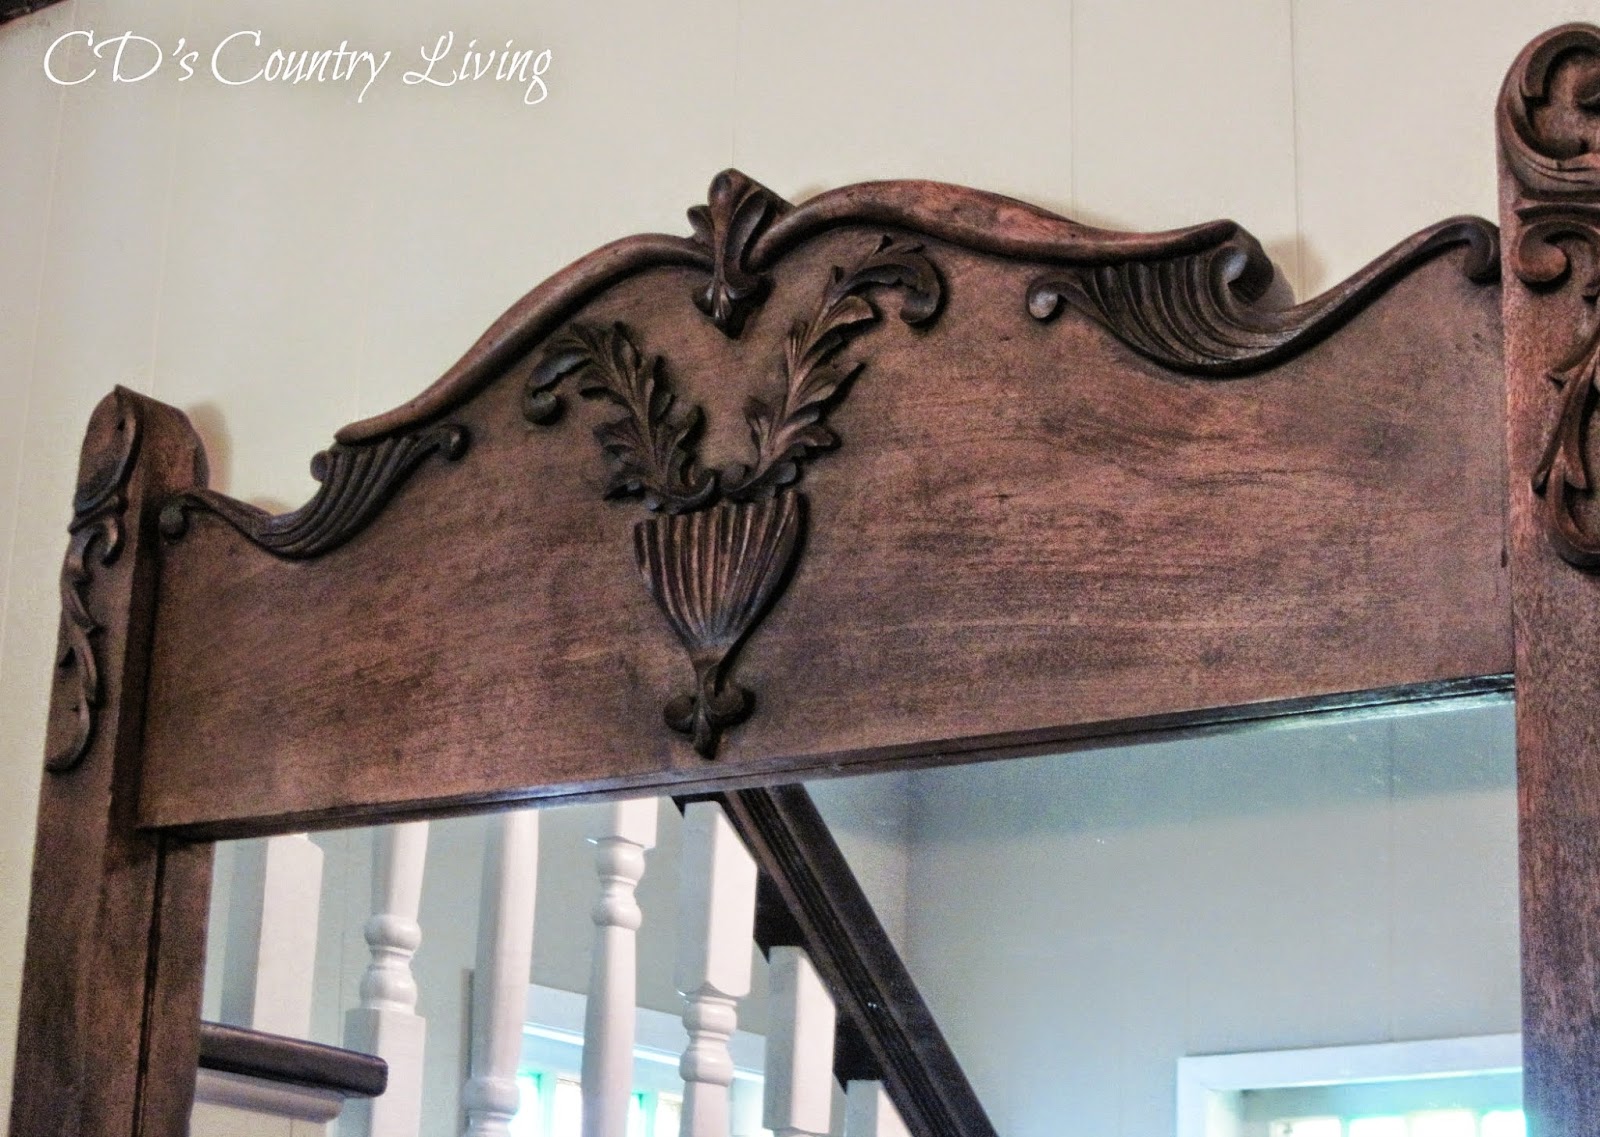
The first step was giving this old girl (yes, I assign genders to my projects-is that weird??)
a cook coating of moisturizer, as the wood had obviously seen better days before sitting
in the attic!! After I let that soak in-I wiped any excess off-and let it dry overnight.
The next step was adding just a teeny bit of color. I didn’t want it too dark-so I chose
Antique Brown by MINWAX. It took 2 coats total+ one coat of poly, and that was it!!

Oh-except we did have to get the mirror, which hubby installed, ($35.00 at our local
hardware store), as well two D ring’s (100 lb weight) and wire for hanging.
($3.49 at Walmart).
We are waiting on a light fixture for the foyer (we hope it arrives this week), and then
I’ll finally be able to reveal the foyer makeover!! In the meantime-I have one more
project ( this one requires a bit more of hubby’s help), which I’ll be sharing with
you on Monday!
Have an awesome Thursday!
Blessings and hugs,
CD
I’ll be linking up to these parties-so stop on over and be inspired!!!
I love this! Isn't it great to find a piece to inspire a project, and then find that you already have what you need???
The color you chose lends a perfect hue to your room (love how it compliments the staircase), and I look forward to seeing the entire reveal!
Glad you shared this – it deserved its own post.
Thank you, Karen!! I agree-it is so wonderful to find inspiration, and even better when you can make it happen for little or nothing!!
LOVE how it turned out! I am a sucker for vintage mirrors. Thank you fro sharing at THT.
Me too, Pamela!! Thank you so much for the visit and sweet comment!!
CD, that mirror is awesome! What an amazing find! Simply Stunning!
Thank you so much, Tara!! I still can't believe it was just left in the attic!!!
Great job on the mirror! Love it. Susan
Thank you, Susan! I LOVE it too!!
That mirror is to die for! What a find and great job fixing it up. 🙂
It sure was, Ann! Thank you for the sweet comment and visit!!!
Beautiful! I like yours better than the RH one!
WOW! Thank you Cindy!! You just made my day!!! 🙂 Have a great week!
Looks great!!
Thanks so much for stopping by!!
Hugs,
Debbie
I LOVE stopping by your blog, Debbie!! I hope you come back for the party tonight!!!
Oh my it is gorgeous! I like it better than the one from restoration hardware. It has a wonderful vintage feel!! Thanks for sharing it with SYC.
hugs,
Jann
I'm so glad you liked it, Jann! Thank you so much for the stopping by!! Have a great rest of your week!
I like yours way better than the Restoration Hardware mirror! I wish that my attic came with such treasures!
OMG – this is gorgeous !
I like it so much better the RH's – what a find ( and your staircase looks stunning in the view )
I have a pinterest page just for mirrors – guess where I'm headed to now?
Thanks so much for sharing !
Thank you, Suzan! You made my day!! I SO appreciate the sweet comment and the pin!!!
I'm so happy you like it Sharilee! It truly was an awesome find!!!
Gorgeous mirror! What luck that you already had it on hand.
It really was luck, Stephanie!! Thank you for the sweet comment and visit!!